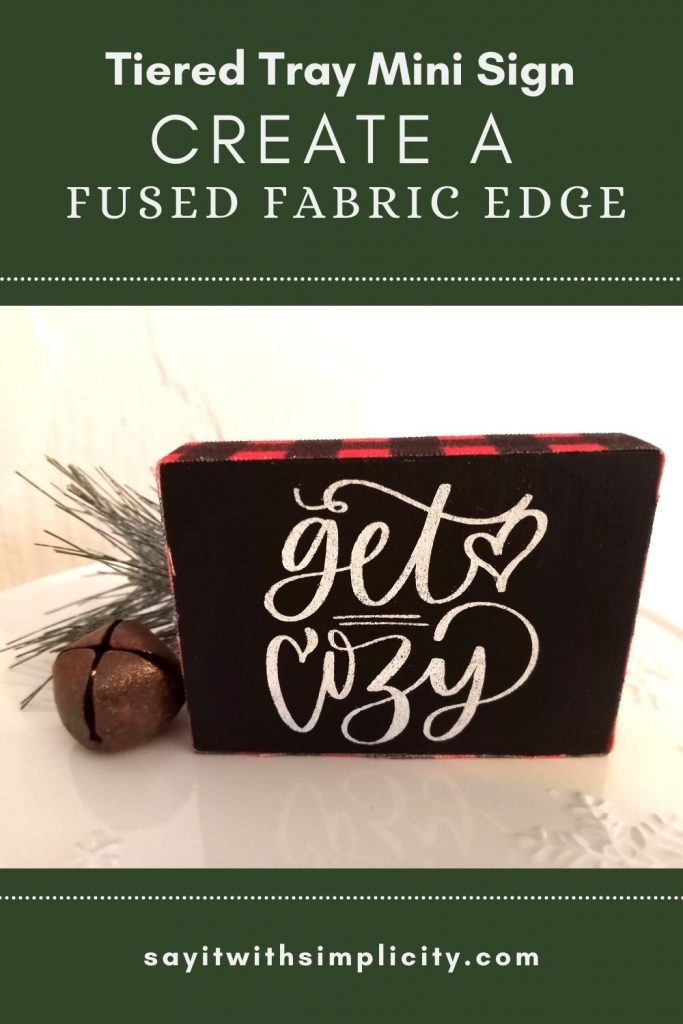
Applying Fabric to Wood with Wonder-Under®
Wonder-Under® is a paper-backed adhesive web that makes fabric fusible. When Mr. and I were walking through Hobby Lobby one night, I saw some cute signs that had buffalo check trim. Determined to make my own, I decided to try to apply fabric to my wood edge with Wonder-Under®. It worked beautifully!
I thought about using hot glue or Mod Podge, but I love how this worked out great and wasn’t near the mess.
Buffalo plaid vinyl may have been another choice, but I like how the warm and fuzzy really stands out. You wouldn’t get that with a piece of vinyl.
I’d purchased the buffalo check fabric at a local store, just because I liked it. Now it’s turning into a few warm and cozy crafts for the upcoming holidays. You can see the first of these projects in this post.
At the same time, I purchased the fusible adhesive web thinking I could cut some bonded fabric with my Cricut, and I may still do that. But it sure came in handy for this little project.
First Things First-Making a Tiny Sign
Links to the Products and Materials used are provided for your convenience. I may earn a small commission at no additional cost to you. Thank you for your support of Say It With Simplicity!
The first step in the process was to make the sign to which I was going to apply the trim.
I had a small scrap of wood in my scrap woodpile. It measured 3 1/2 inches x 2 1/2 inches. I love challenging myself with painting small signs (I cannot lie).
This wood had been a test piece for some Dixie Belle paint I was going to use on a project, so I sanded it smooth.
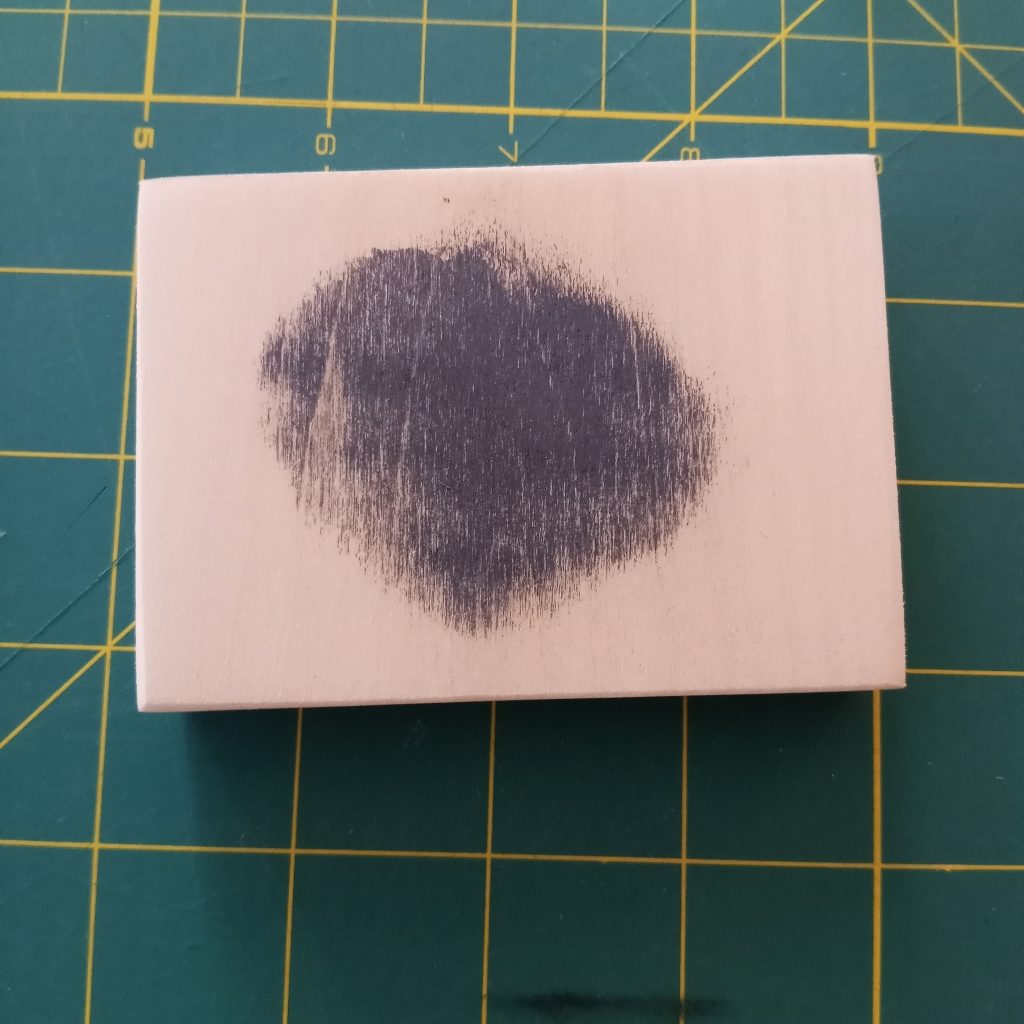
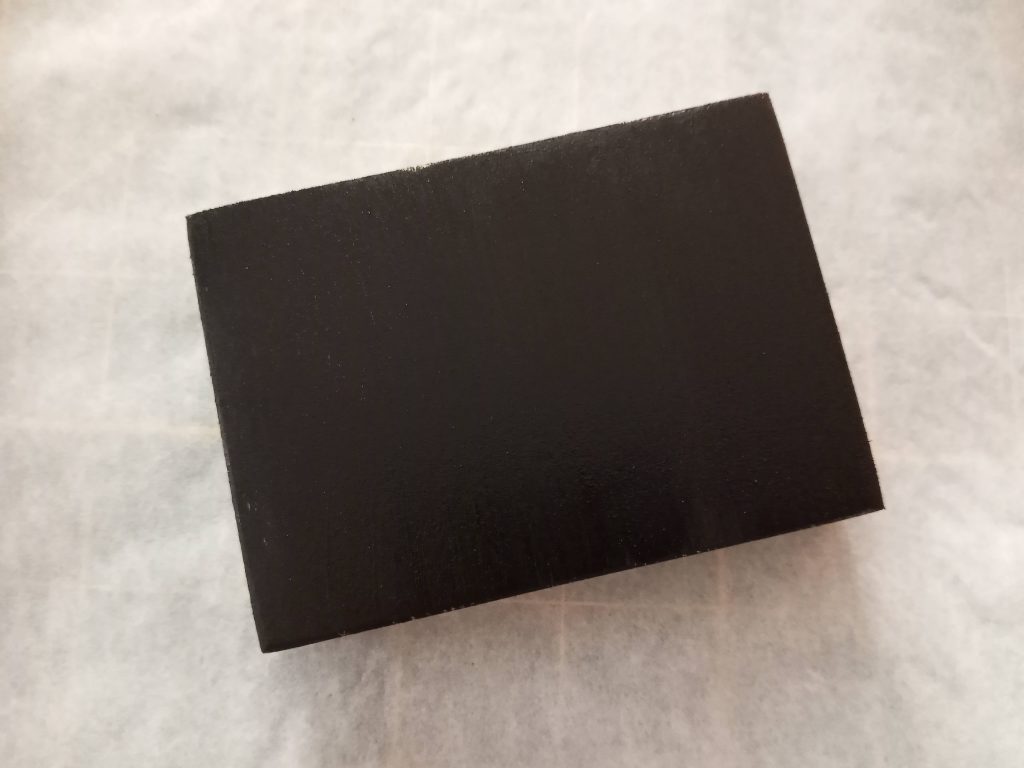
Then I painted it with Waverly Chalk Paint in the color Ink on both sides.
Be sure to let your paint dry thoroughly. Overnight is best, but if you can’t wait, a craft heat gun or hairdryer helps. There is a tendency to pull up paint with vinyl stencils when the paint isn’t completely dry.
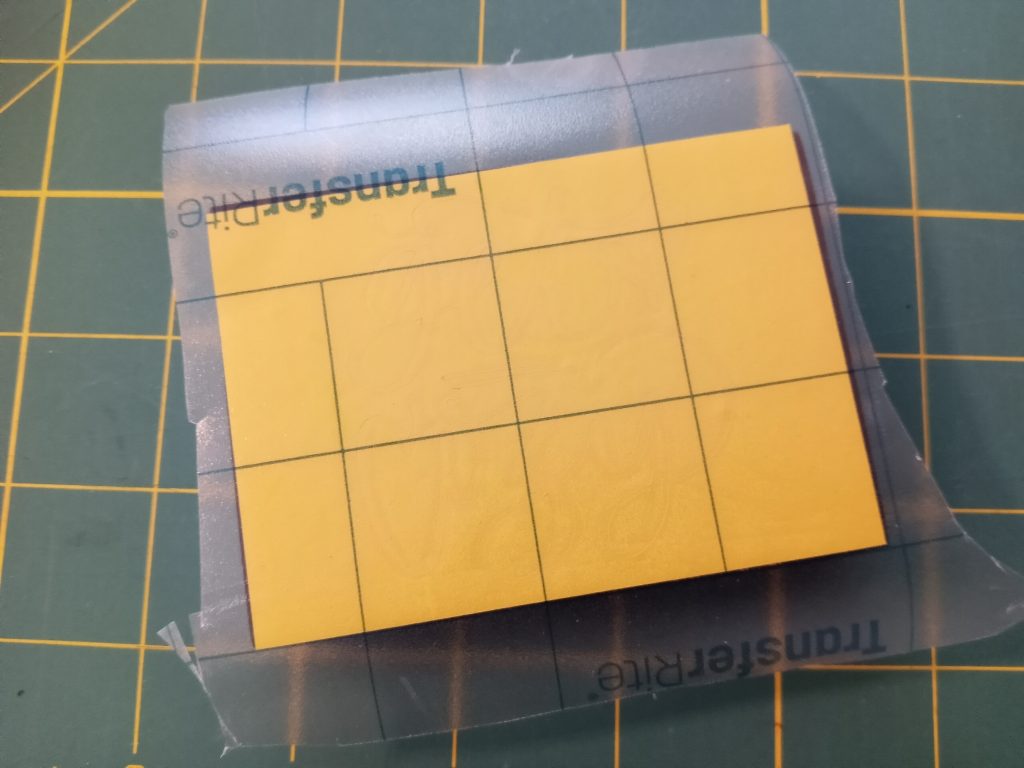
Cutting the Vinyl Stencil
Design Bundles had the perfect SVG for this little project. This is a PLUS member’s design. If you want to find out more about PLUS membership you can find out HERE. I love making my own files, but nothing beats downloading a design to make things quick and easy!
I cut my vinyl stencil with my Silhouette Cameo 4. Adding a weeding box around the image that is the same size as the wood helps with placement on the sign.
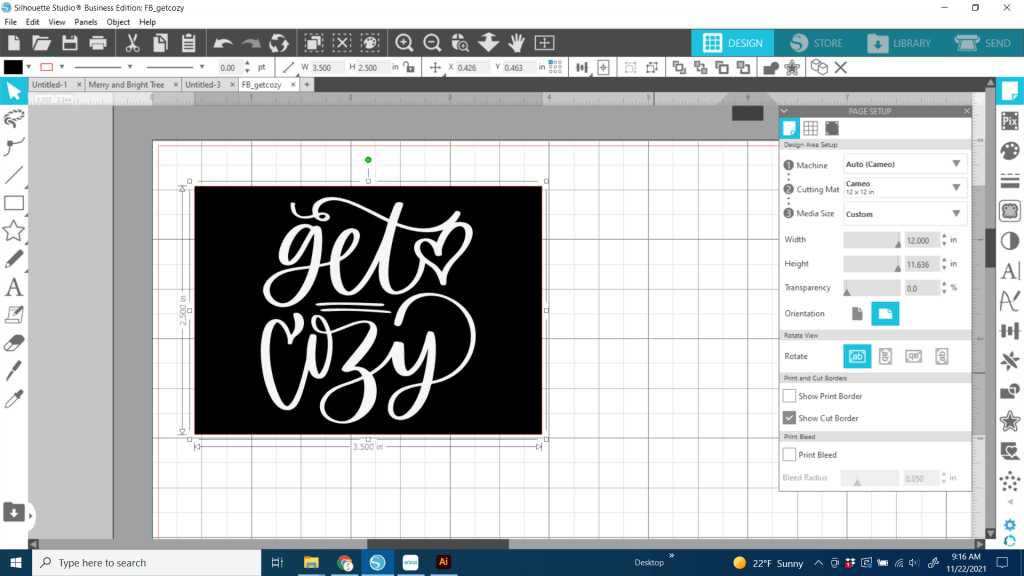
I cut my favorite stencil vinyl from MI Vinyl World on my Cameo using the Auto Blade Settings, Blade 2, Force 16, Speed 5.
If you are a new customer to MI Vinyl World, you may be able to earn a $10 Coupon. Disclosure: Your purchase through this referral link also earns me $10 in credit to MI Vinyl World.

Applying the Stencil to the Sign
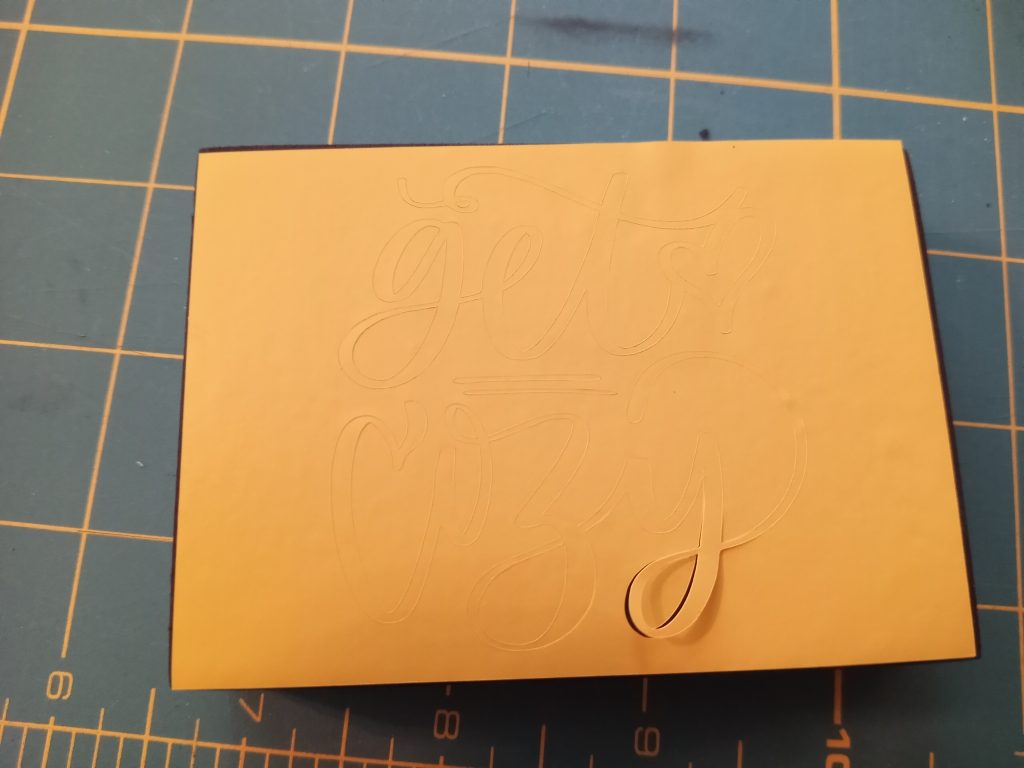
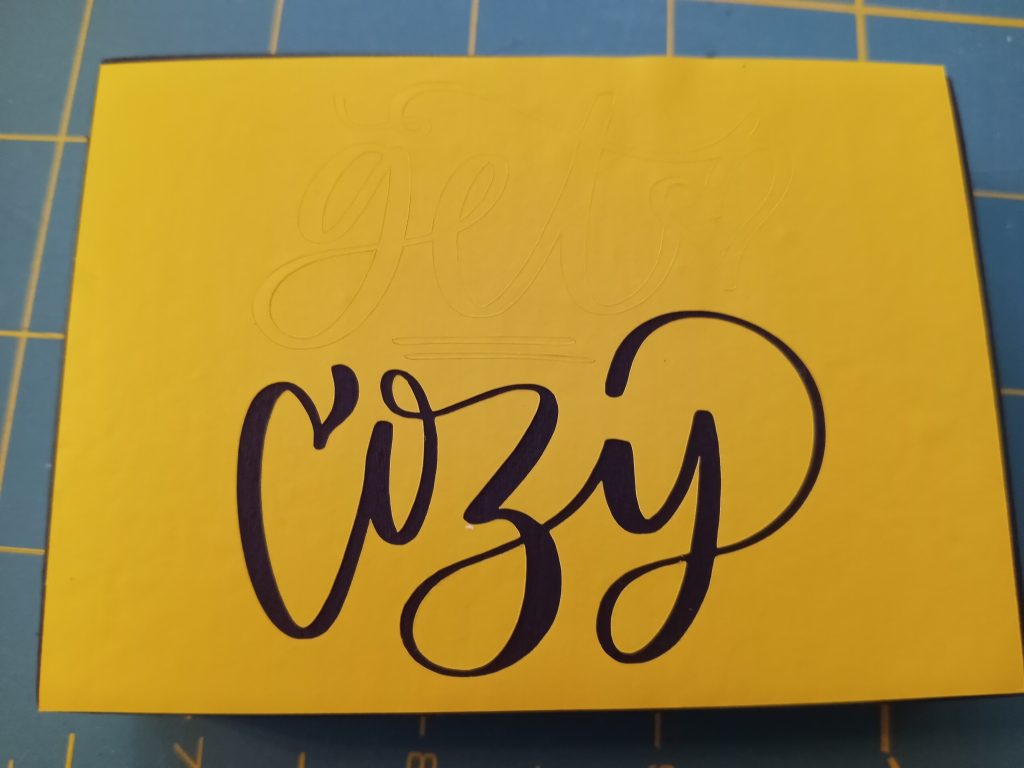
Intricate sign designs can be difficult, and so can small ones. I used my own method, similar to reverse weeding for transferring this design onto my tiny sign.
Pick up the entire design with the transfer tape and apply it to the wood.
Now you can start to lift the negative space where you want your paint to go. I use a pen-type weeding tool when weeding small designs like this.
See How to Use Heat Transfer Vinyl for more on weeding vinyl.
Stenciling the Design
Waverly White Chalk Paint was used to stencil the design on this tiny wood sign. I used a stencil brush. If you have trouble with bleeding under your stencil, check out these posts:
HOW TO PAINT WOOD SIGNS WITH VINYL STENCILS
GRAIN SACK PALLET WOOD ORANAMENT

Tapping off some of the paint from your stencil brush decreases the chance for bleeding. This way you can get nice crisp lines on your wood signs.
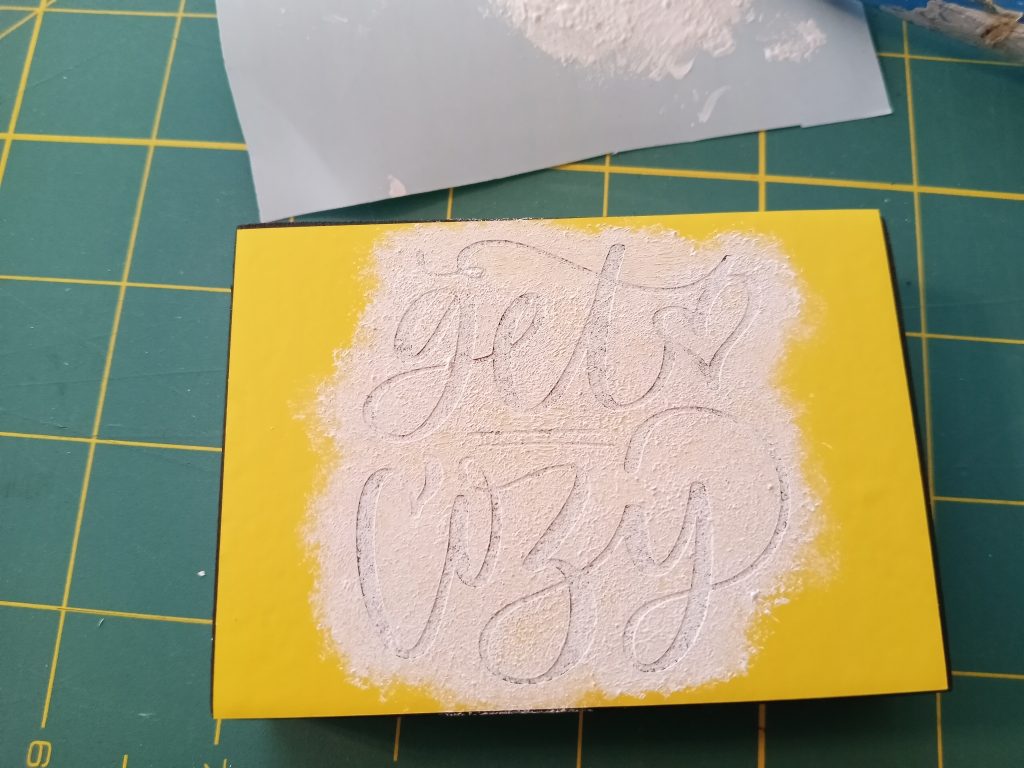
Once you have your paint filled in, you’re ready to remove the stencil. I have to admit, I’m getting to the bottom of this bottle of white chalk paint. The results may have been a little better if I had thinned my paint, but overall it still turned out okay.
QUICK TIP When the white paint is completely dry, use a lint roller to pick up the loose flakes and then spray with a matte clear coat. It keeps the white paint from flaking more onto the black paint.
Applying the Fabric Fused with Wonder-Under® to the Wood
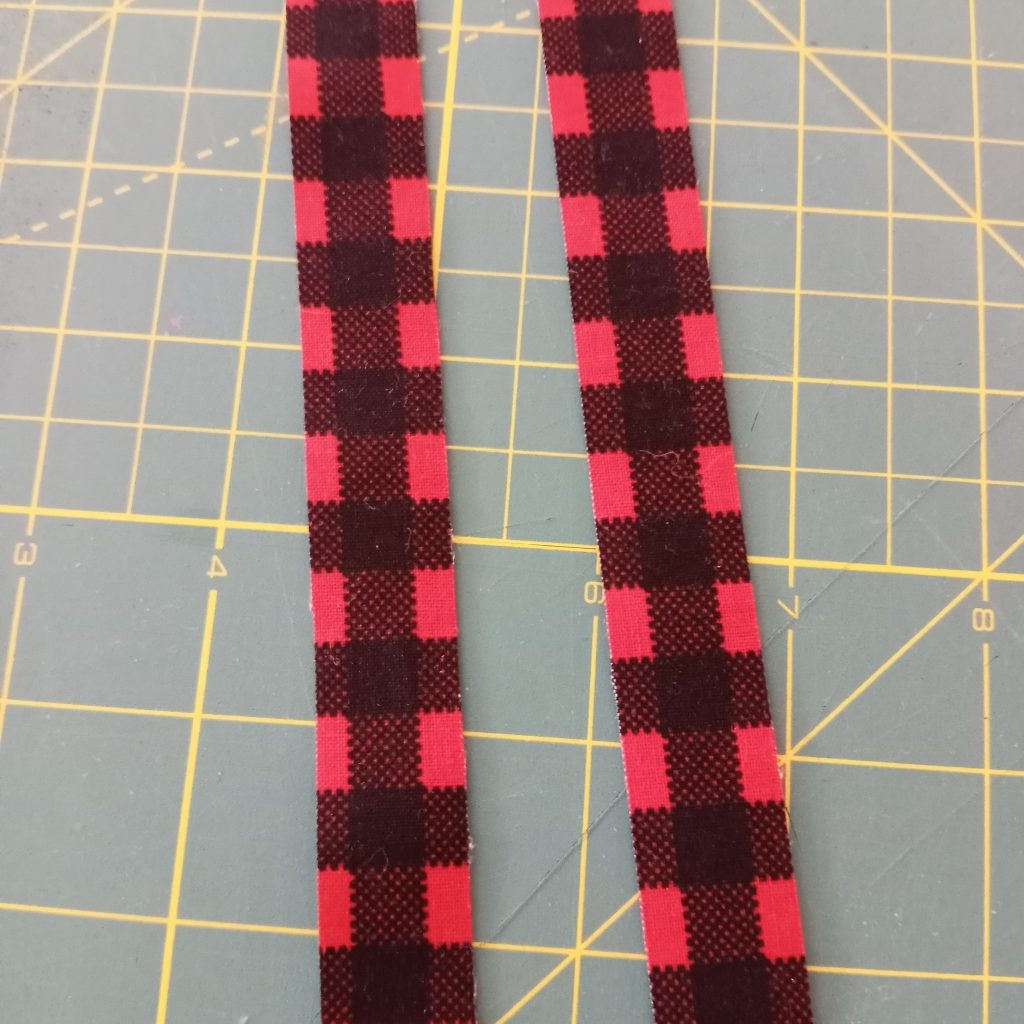
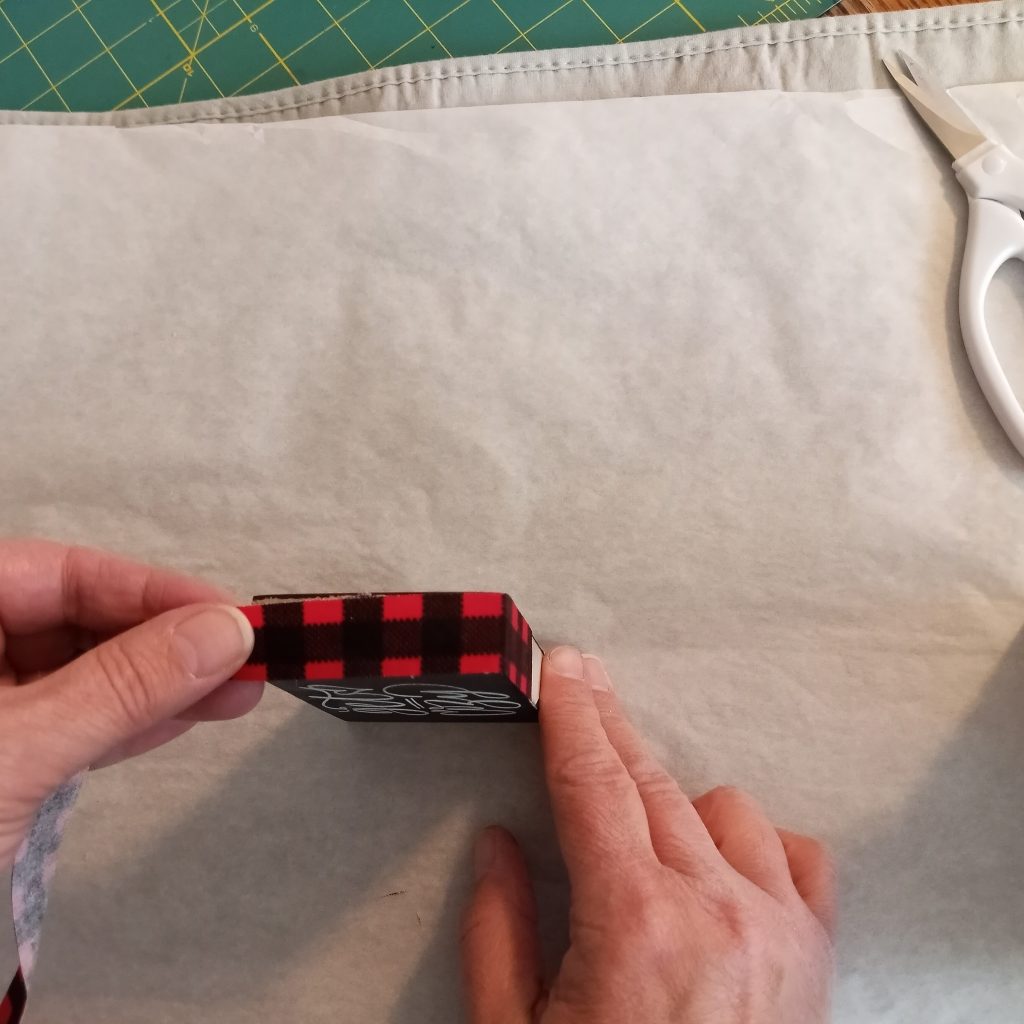
I cut strips of the fabric and the fusible adhesive both at 1 1/2 inches wide. Following the directions, fuse the rough side of the adhesive (Wonder-Under) to the back of the Fabric. Your paper side will be facing out.
Once I was done fusing the fabric and removing the paper I further cut this into two strips at 3/4 inches wide with a rotary cutter. The wood edge is 3/4 inches wide, so this was a perfect size. I only needed one of these strips and could use the other on another project.
Now, starting at the bottom with a hot iron fuse the fabric to the wood. Since this was flannel, I used the cotton setting on the iron.
Fuse by holding the iron on for about 10 seconds, then wrap and continue to fuse each side.
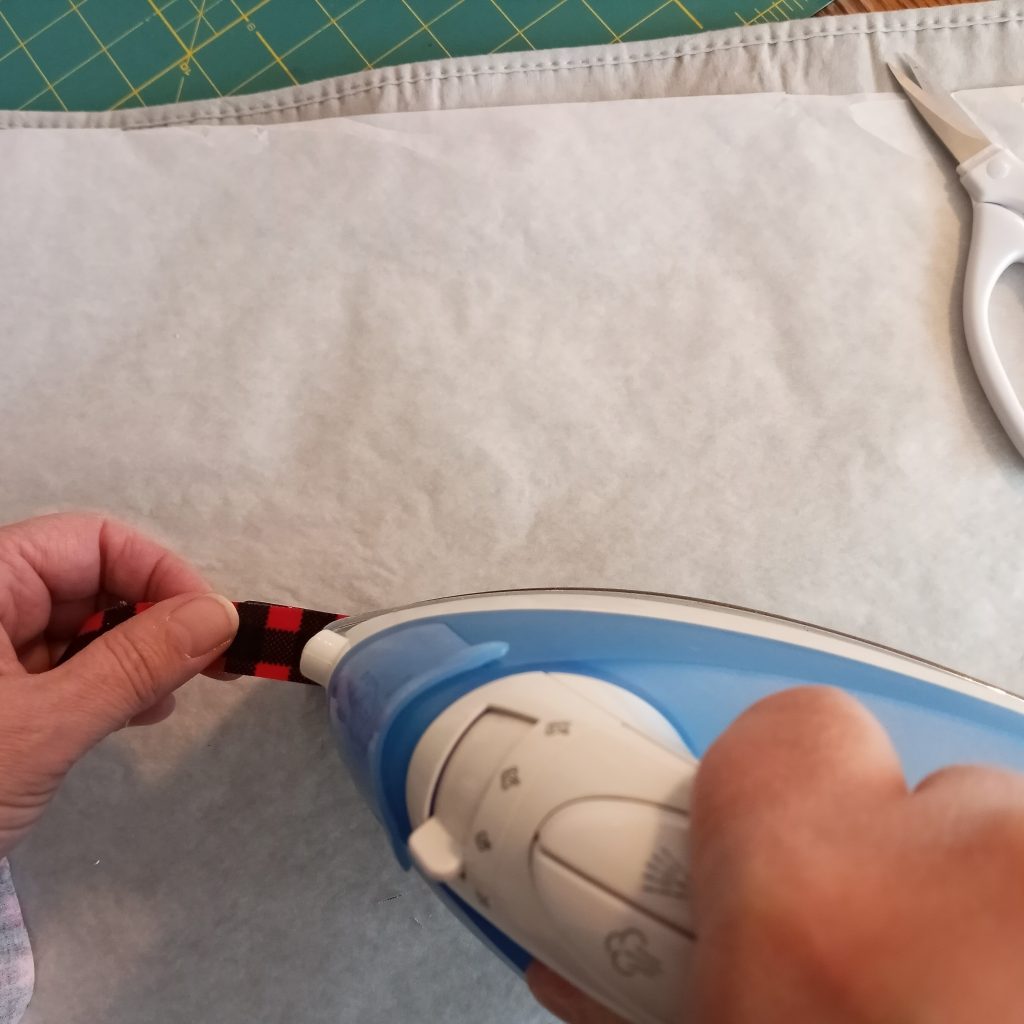
When you get to the bottom of the sign, overlap and cut off the excess fabric strip.

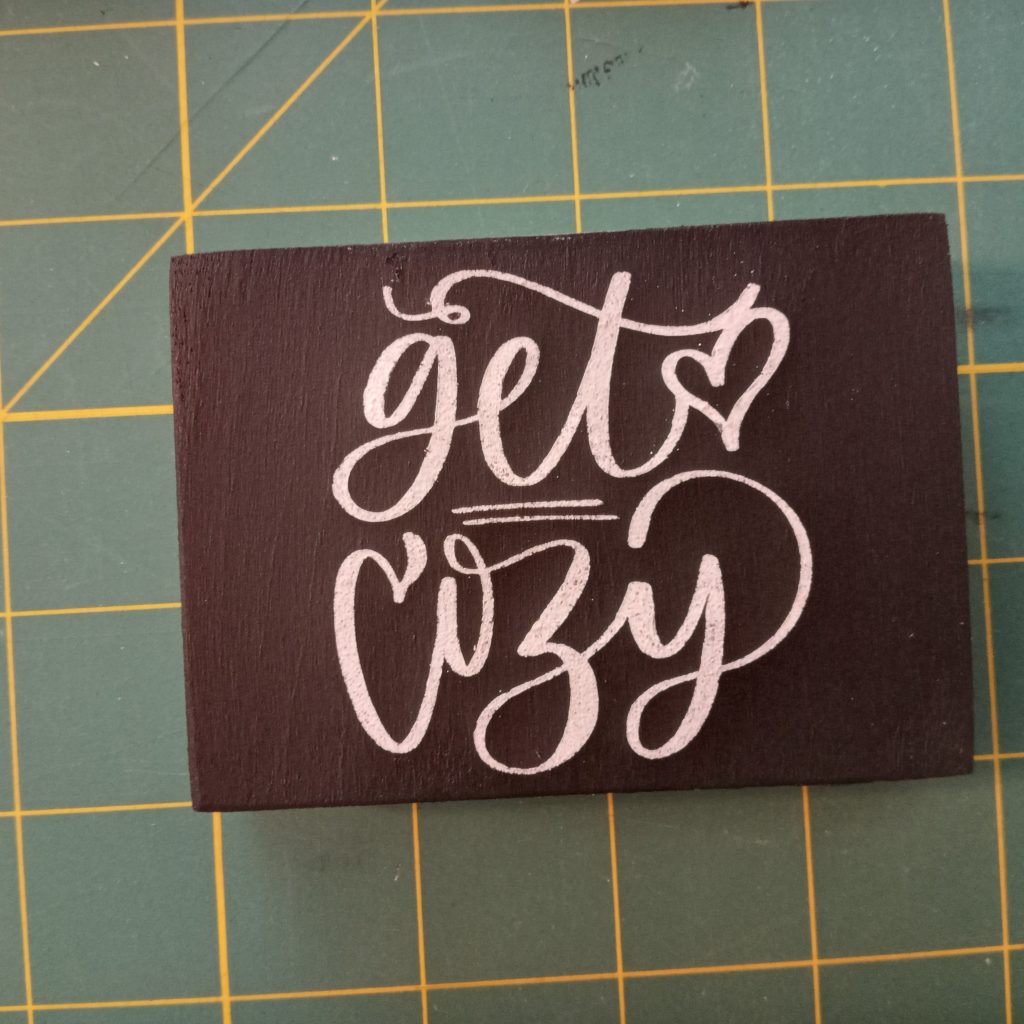
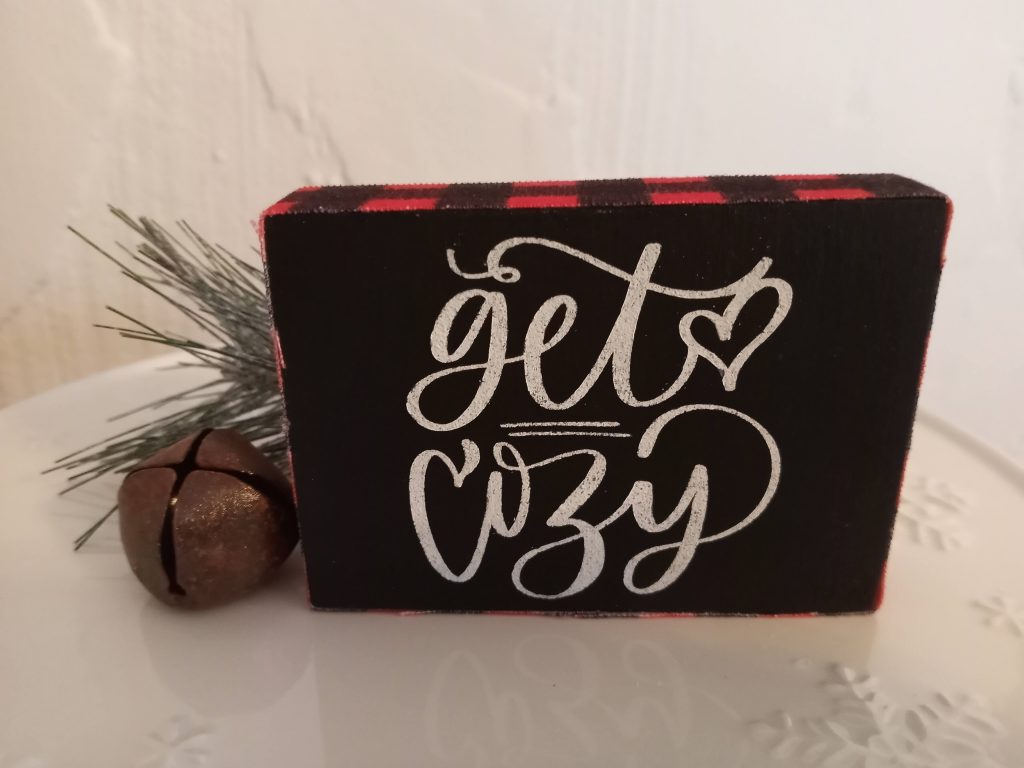
Finished Sign
Now, this little sign is finished and how cute is that? If you gave this to a friend, they might not even know that it wasn’t purchased in the home decor section of a big box store. And who doesn’t love these tiny little signs for a shelf sitter or tiered tray?
What do you think? Have you ever tried fusing fabric to wood? If not you may want to give this a try.
Thanks for stopping by today and have a warm and wonderful day!