How to Use Heat Transfer Vinyl
Vinyl is an easy medium to work with and heat transfer vinyl projects make great beginning cutting machine projects. Today I want to introduce you to cutting heat transfer vinyl with your Cricut and applying it to a simple surface. Hopefully, this tutorial will help you gain some confidence to start using your machine for some heat transfer vinyl projects.
This post contains some affiliate links for your convenience. I may earn a small commission but it won’t cost you anything extra. I only link to sites and products that I personally use and highly recommend. Thank you for your support!
Heat transfer vinyl (or HTV) can be used on a variety of surfaces. I’ve used heat transfer vinyl on various fabrics, wood, cardstock, faux leather, and canvas. Because it is so versatile, you can find lots of inexpensive surfaces to experiment with.
Are you ready to start making crafts with heat transfer vinyl? There are a few basic steps and we’ll be ready in no time to add them all together for a successful application.
Materials and Tools Used for This Project
- Muslin Bag
- Heat Transfer Vinyl (This is a large variety pack of vinyl that I’ve used with great success)
- Your Cricut, Cutting Mat, Weeding Tools, Scissors
- Heat Press and Teflon Sheet
Planning Your Project In Cricut Design Space
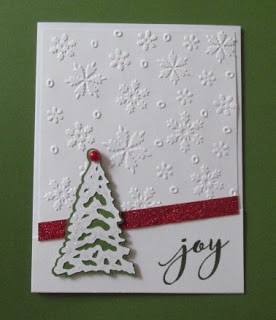
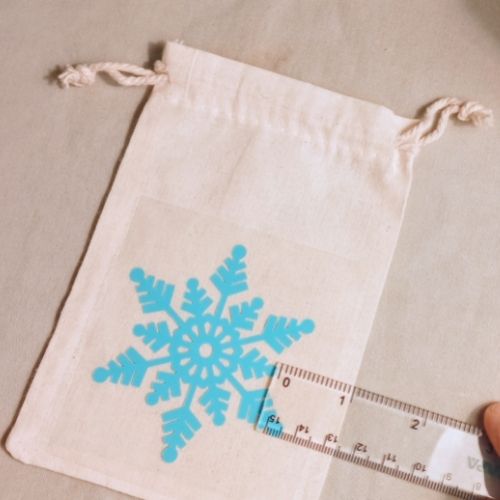
The first step is to plan out your desired design. For this project, I’ll be going to Cricut Design Space and choosing a simple image. For my project, I’ll be pressing a snowflake design on a simple muslin bag. I’m using an image from Cricut Access, but you could also upload a design.
You’ll want to measure the area you’re going to place your design and size the design accordingly.
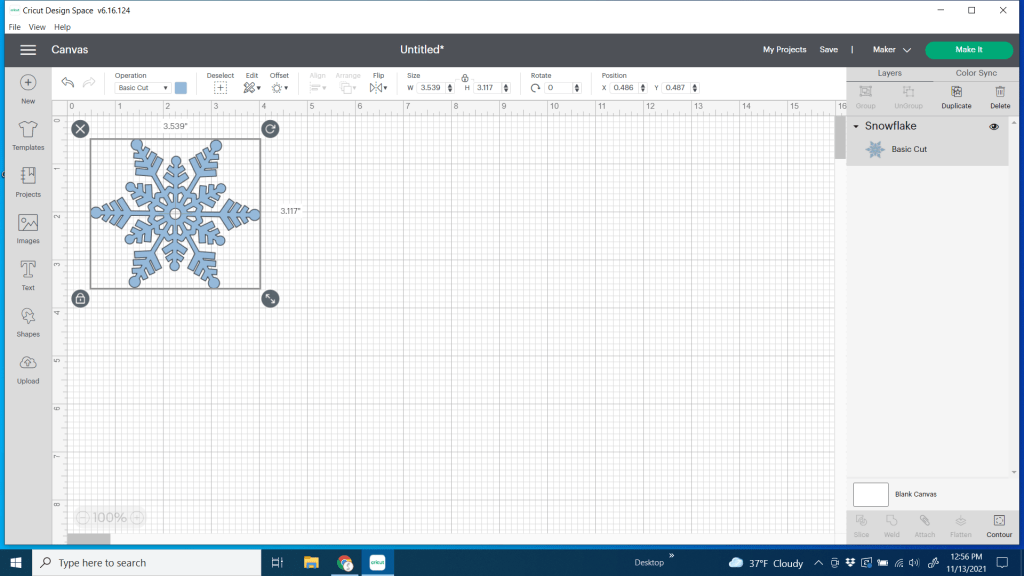
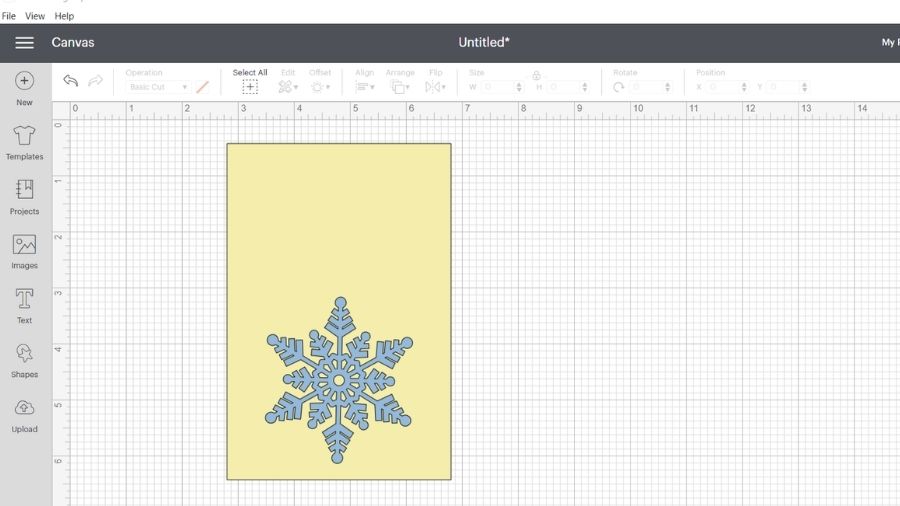
I like to visualize my image on my product whenever possible. Here I created a rectangle the same size as my little muslin bag to help me resize my image. You can delete the rectangle template before you cut your project.
Placing your Vinyl on the Mat
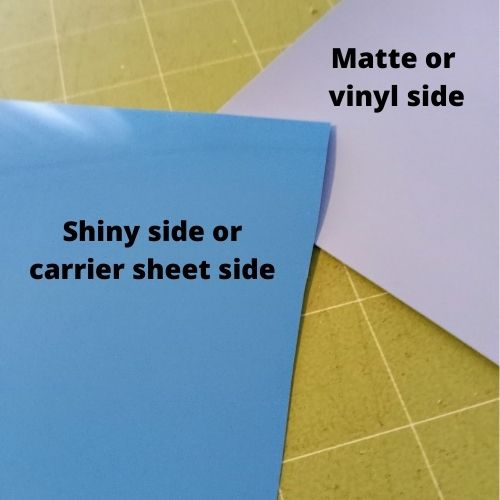
How do I know which side goes against the mat?
Heat transfer vinyl has two layers. One layer is a transparent carrier sheet that holds the vinyl until it is ready to be pressed on the product or blank. The other side is the actual vinyl.
The carrier sheet side is shiny. You may notice that the vinyl side is more matte-looking and may not look at all like the actual color of your vinyl. That’s because you are looking at the back of it.
When I was first starting out with vinyl projects I felt confused about what side to place down on the mat. What you want to remember is that you don’t want to cut your carrier sheet. You want to cut the vinyl. So place the carrier sheet DOWN and the vinyl side UP or toward your cutting blade.
You’ll actually be cutting on the back side of the vinyl. One important thing you’ll want to remember in regard to this is that your image will need to be mirrored in order to come out correctly when you press it on your product or blank. We’ll talk about that more in the next sections.
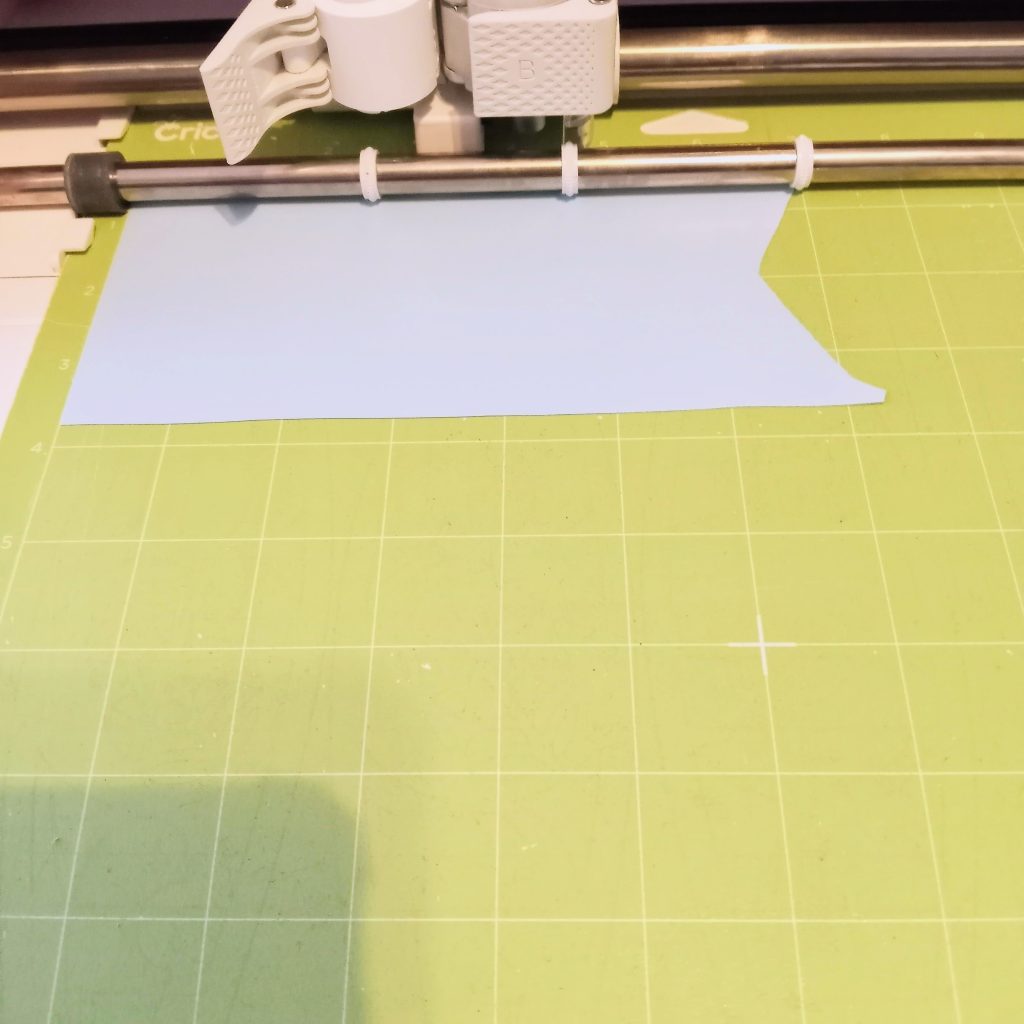
Now you can place your vinyl on your mat and load it into your machine.
One of the things that vinyl cutting with Cricut so easily is that you hit the “Make It” button in Cricut Design Space and follow the prompts.
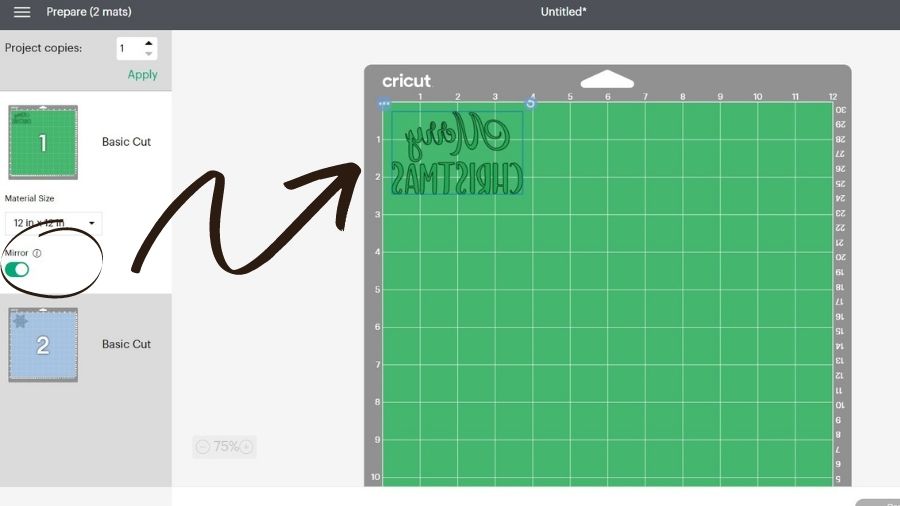
Mirroring your Image with Heat Transfer Vinyl
Important: As mentioned above, remember to mirror your image for heat transfer vinyl. My snowflake image doesn’t really need to be mirrored because it is symmetrical. But if you have text or a directional image, you will certainly want to mirror your image. If you didn’t flip your image in Design Space, you can mirror it before you send the cutting job to the machine.
Here I’ve created some text. When you slide the “mirror” button to the right in the send panel, your image will be mirrored on the mat. If it looks backward, that’s perfect!
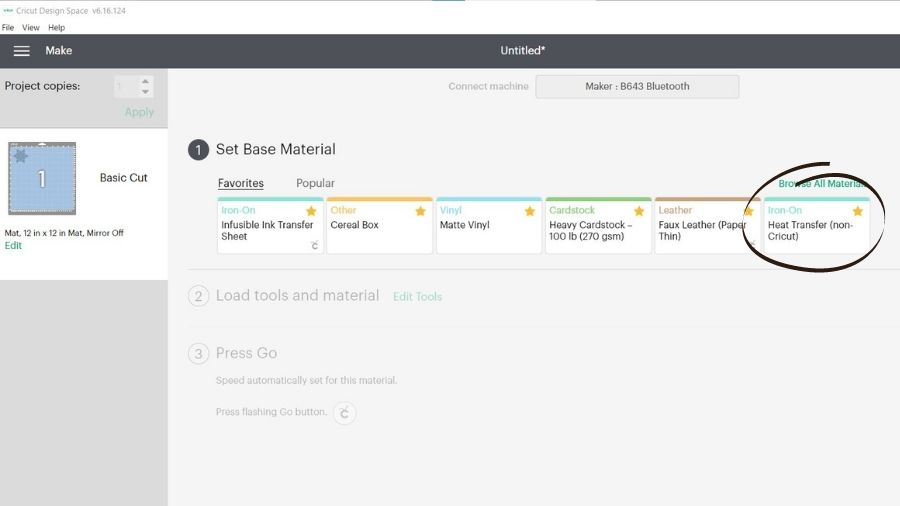
When you get to the base material screen, I usually choose heat transfer vinyl (non-Cricut) as I buy most of my HTV from other vendors.
Keep in mind that glitter and other types of vinyl may have other settings. Be sure to check your vendor recommendations.
Continue to follow the prompts for your machine, and your vinyl will be cut in no time!
How to Weed Heat Transfer Vinyl
Once you have your image cut out, the next step is “weeding” your design. Weeding is removing all the excess material to reveal the final design that you’ll be pressing on your project.
You’ll want to remove all the material around the outside of your image as well as any little spaces that you want “open’ in your design. In my case, it’s the small pieces inside the snowflake.
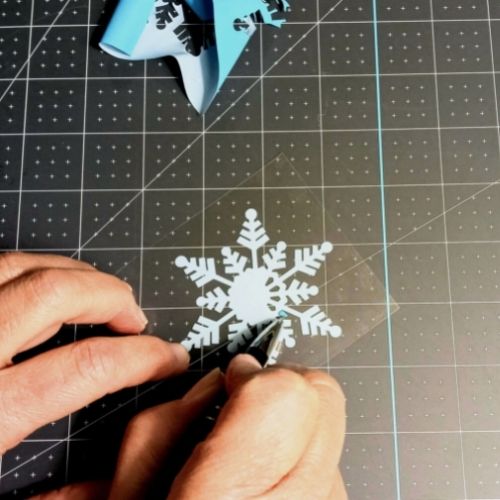
There are a couple of different tools that you may find handy for weeding vinyl. One is a pen-type tool and another is a hook-type weeding tool. I like the pen tool for getting into more intricate areas. I also have a set of Nicapa Basic Tools set that I use all the time. It has a hook tool and tweezers that are very useful for the weeding process.
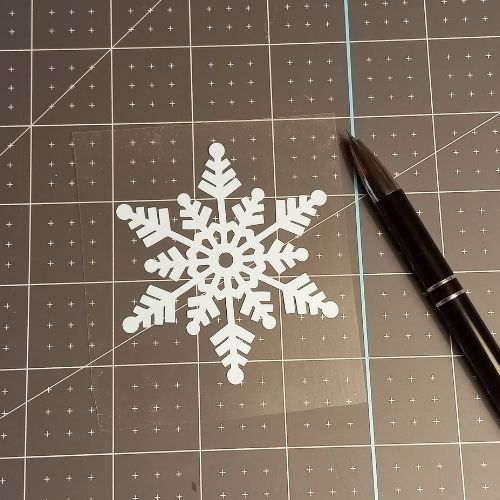
Now that I have all the excess vinyl removed, my snowflake is still on the carrier sheet and it’s ready to place on my bag to press.
Place Vinyl on Your Blank and Press
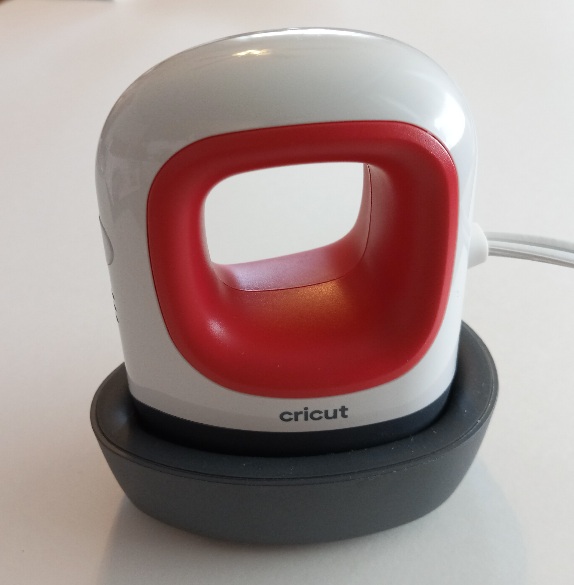
I used the Cricut EasyPress Mini to Iron the Snowflake on this bag. The heat setting was medium and I used about 25 seconds of light pressure. If you want to find out the appropriate EasyPress heat settings for your materials, you can check out the Cricut Heat guide HERE.
You’ll want to use a Teflon sheet when heat pressing your items. You can also use parchment paper. Both of these are heat resistant and will protect your heat press and design.
If I was using my large heat-press, I would generally follow the settings suggested by the vinyl vendor. Most of the time these can be found on the vendor website, or you can do a web search for them. (Ex. “Siser Easy Weed Heat Settings”)
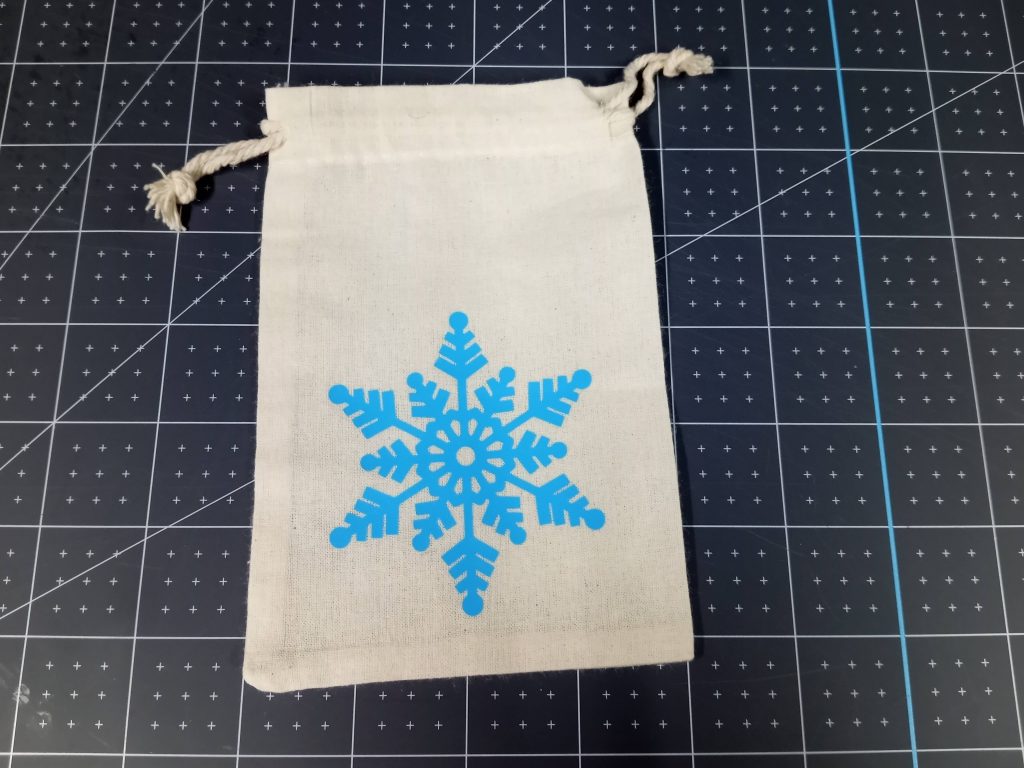
Finished Product
Here is the finished muslin bag with the heat transfer vinyl. You could use this for a small gift or gift card. Personalize them and hang them on the tree. These would also make great table favors. With all the great vinyl choices out there you can customize these bags quickly and easily.
Do I Need a Heat Press for Heat Transfer Vinyl?
You can use HTV even if you don’t own a press.
I find a heat press easier and faster, but don’t feel like you need to sink a bunch of money into a heat press to get started. While I love my heat-press, I didn’t have one when I started using Heat Transfer vinyl. I used a plain household iron. Here is a photo of a design I pressed on a shirt for my husband.

You may consider checking out this post by Heather over at “Fields of Heather”. She uses an iron for all her heat transfer projects.
While I highly recommend a heat press, do your research before buying. Your goals and the amount of use it will get are huge factors in what type of press you purchase.
I hope this post helps you as you get started in Heat Transfer Vinyl. Be sure to check out my last post for a fun heat transfer vinyl ornament project.
Easy Mini Hoop Ornament with Heat Transfer Vinyl