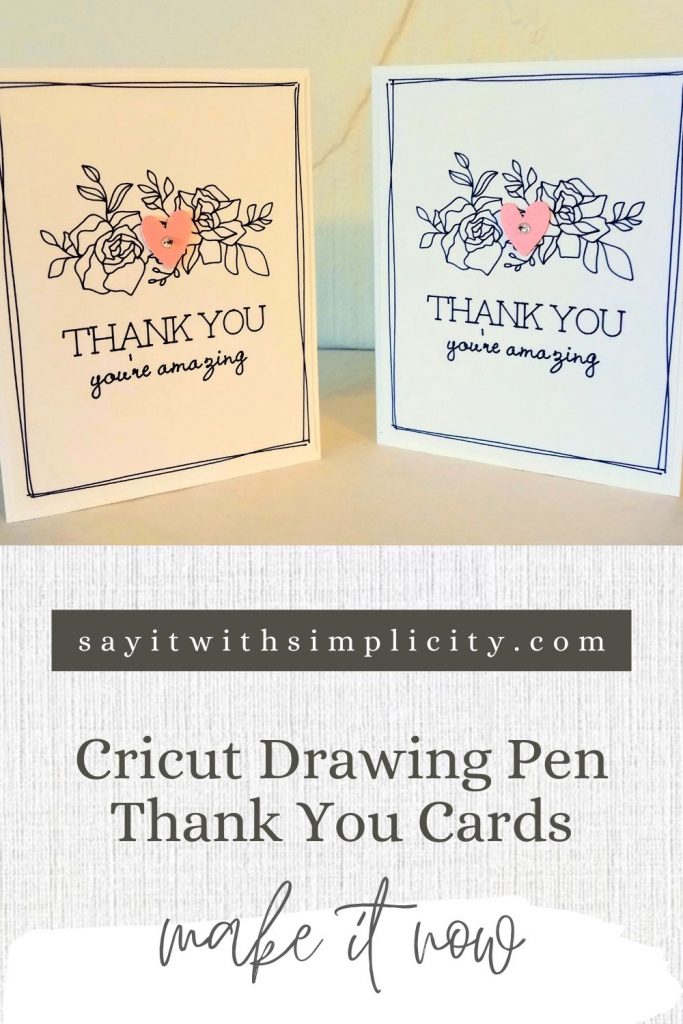
Easy Cricut Thank You Cards
Making Thank You Cards with Cricut Maker
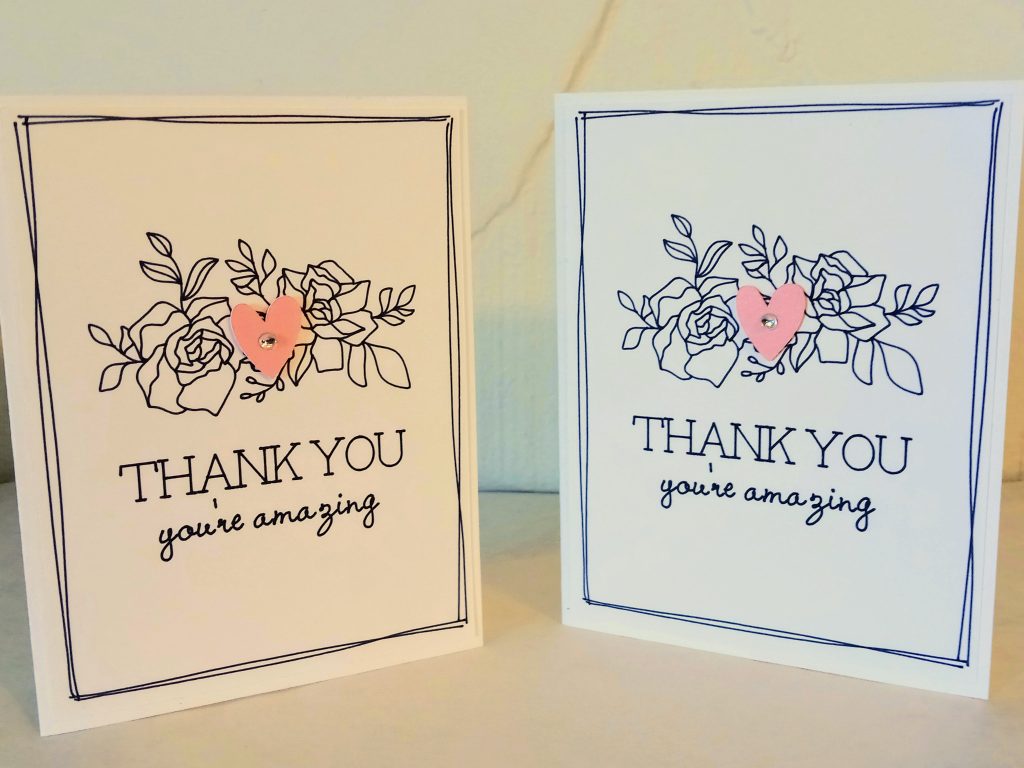
If you have a Cricut Maker or Explore and the black drawing pen that came with your machine, then you’re ready to make this easy and elegant “Thank you” card.
Say It With Simplicity is part of the Cricut Partner Program. This post contains affiliate links, and I will be compensated if you make a purchase after clicking on my links.
I’m sharing the link to this project in Cricut Design Space, but you can totally use any images you wish to create gorgeous cards with your drawing pens.
I have a heart of gratitude for the wonderful Christmas gifts I received and started to create Thank you cards to send to my loved ones.
Now the real truth is, that I had my Maker for nearly a year before I started using the drawing pen that came with my machine. Now I can’t quit using it!
I even did a Trash to Treasure Pen Project for my YouTube Channel using the Drawing Pens. I used nearly all the bags I share in this video for small gifts under our tree!
Materials and Tools for Easy Cricut Thank You Cards
- Your Cricut-I have the original Cricut Maker
- 12″x12″ Standard Grip Mat
- Cricut Black Pen-If you don’t have your Cricut Black Pen, you can order A Multi Pen set in Black from Cricut, but the Everyday Collection is amazing and includes Gold and Silver Medium Pens.
- White Cardstock-I love the 110-Pound Cardstock from Neenah and use it for many of my card projects.
- A small piece of pink or other favorite color cardstock for the heart.
- Sequin or Rhinestone for the center of the heart
- An adhesive-My personal favorite is Art Glitter Glue.
- Foam tape or a similar product (optional to pop up heart)
- Scissors, Paper Trimmer, and tools you would use during card assembly.
- Your Cricut-I have the original Cricut Maker
As an Amazon Associate, I earn from qualifying purchases.
Instructions for These Cricut Thank You Cards
Create a blank card base from 110-Pound Cardstock. This is a link to my previous post on how to make two A2 card bases from one piece of cardstock.
Draw and cut the “Thank you” card front in Cricut Design Space. This will be slightly smaller than your card base but looks great layered.
** You may have to push your “GO” button twice during the drawing process.
Load your second mat with your heart-colored cardstock and cut the heart.
Assemble your card with the heart in the center of the flowers. Add a sequin, rhinestone, button, or another embellishment as desired.
Quick Tip!
To avoid damaging your cardstock, always roll and pull your mat away from your cardstock rather than pulling up your cut cardstock from the mat.
This is such a simple card to make. If you decide to use other drawing images from Cricut Access, simply make a 5.25″x 4.00″ rectangle in Cricut Design Space for your card front. Align your images and writing text to your card. Select all and “Attach” before you “Make It” and you’ll have a totally custom card.
What do you think of the Easy Cricut Thank You cards?
If you make this card, I’d love to have you share it in our small but growing Facebook Group.