Let’s Wrap It: Cardboard Gift Tag With Cricut Maker
I love to shop my stash and craft from common household items. This is a great eco-friendly craft and may inspire you to look at cardboard in new ways. Learn how I made this gift tag with corrugated cardboard and my Cricut Maker.
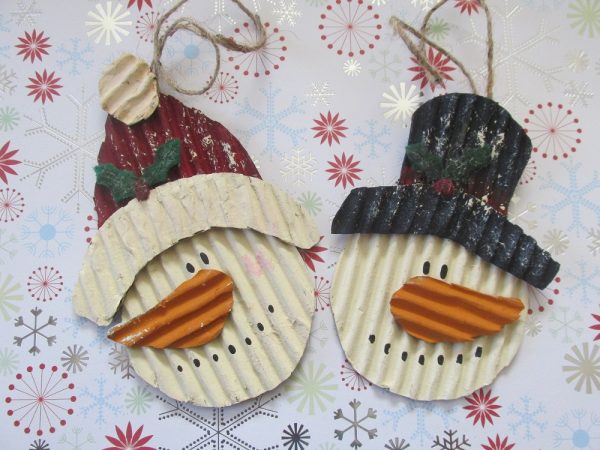
A couple of years ago I made some adorable cardboard snowman ornaments that I saw on Pinterest, and I was excited to make something with corrugated cardboard again. These Trash to Treasure projects are a great way to challenge your creativity and use what you already have on hand.
The files that I used were ones that I created myself, but you could use any tag and tree files in Cricut Access.
Preparing the Cardboard
First, you’ll want to remove one paper face from the corrugated part. Sandwiched in the middle is the cool-looking stuff that you’re after for your cardboard gift tag.
I find that it’s easiest to remove if you work your way along each ridge. Pull the paper face carefully as you go. You can even mist this with a tiny bit of water and let it dry.
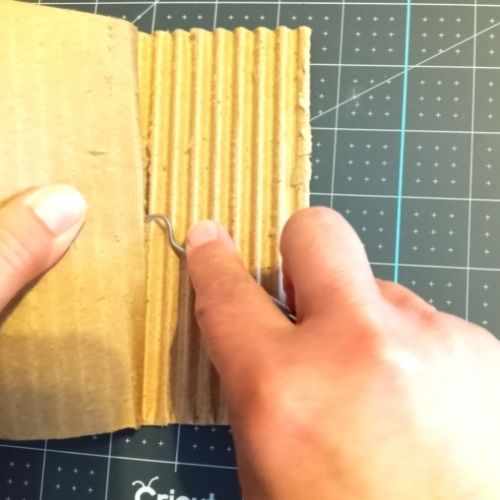
Here I am with a weeding tool just working my way across. An X-Acto knife or similar tool also works well. Patience is key, but it really doesn’t take that long.
The face on the opposite side should be left intact.
Cutting Your Corrugated Cardboard
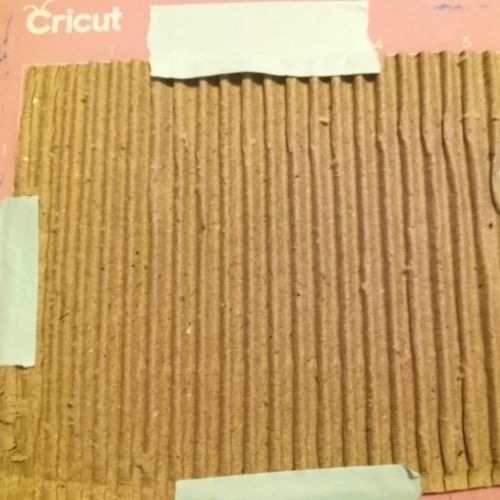
I used the pink Fabric Grip mat for cutting my cardboard. You could use your regular cutting mat as well. I did add a little of the Mint Tape from Scrapbook.com. This is low-tack and repositionable. I was confident it wouldn’t tear up the corrugated cardboard, but would still hold it on the mat during cutting.
My first cut was a test cut with the fine point blade. That didn’t do well, so I decided to try the rotary blade, and it went much better.
Uploading Your Images to Design Space
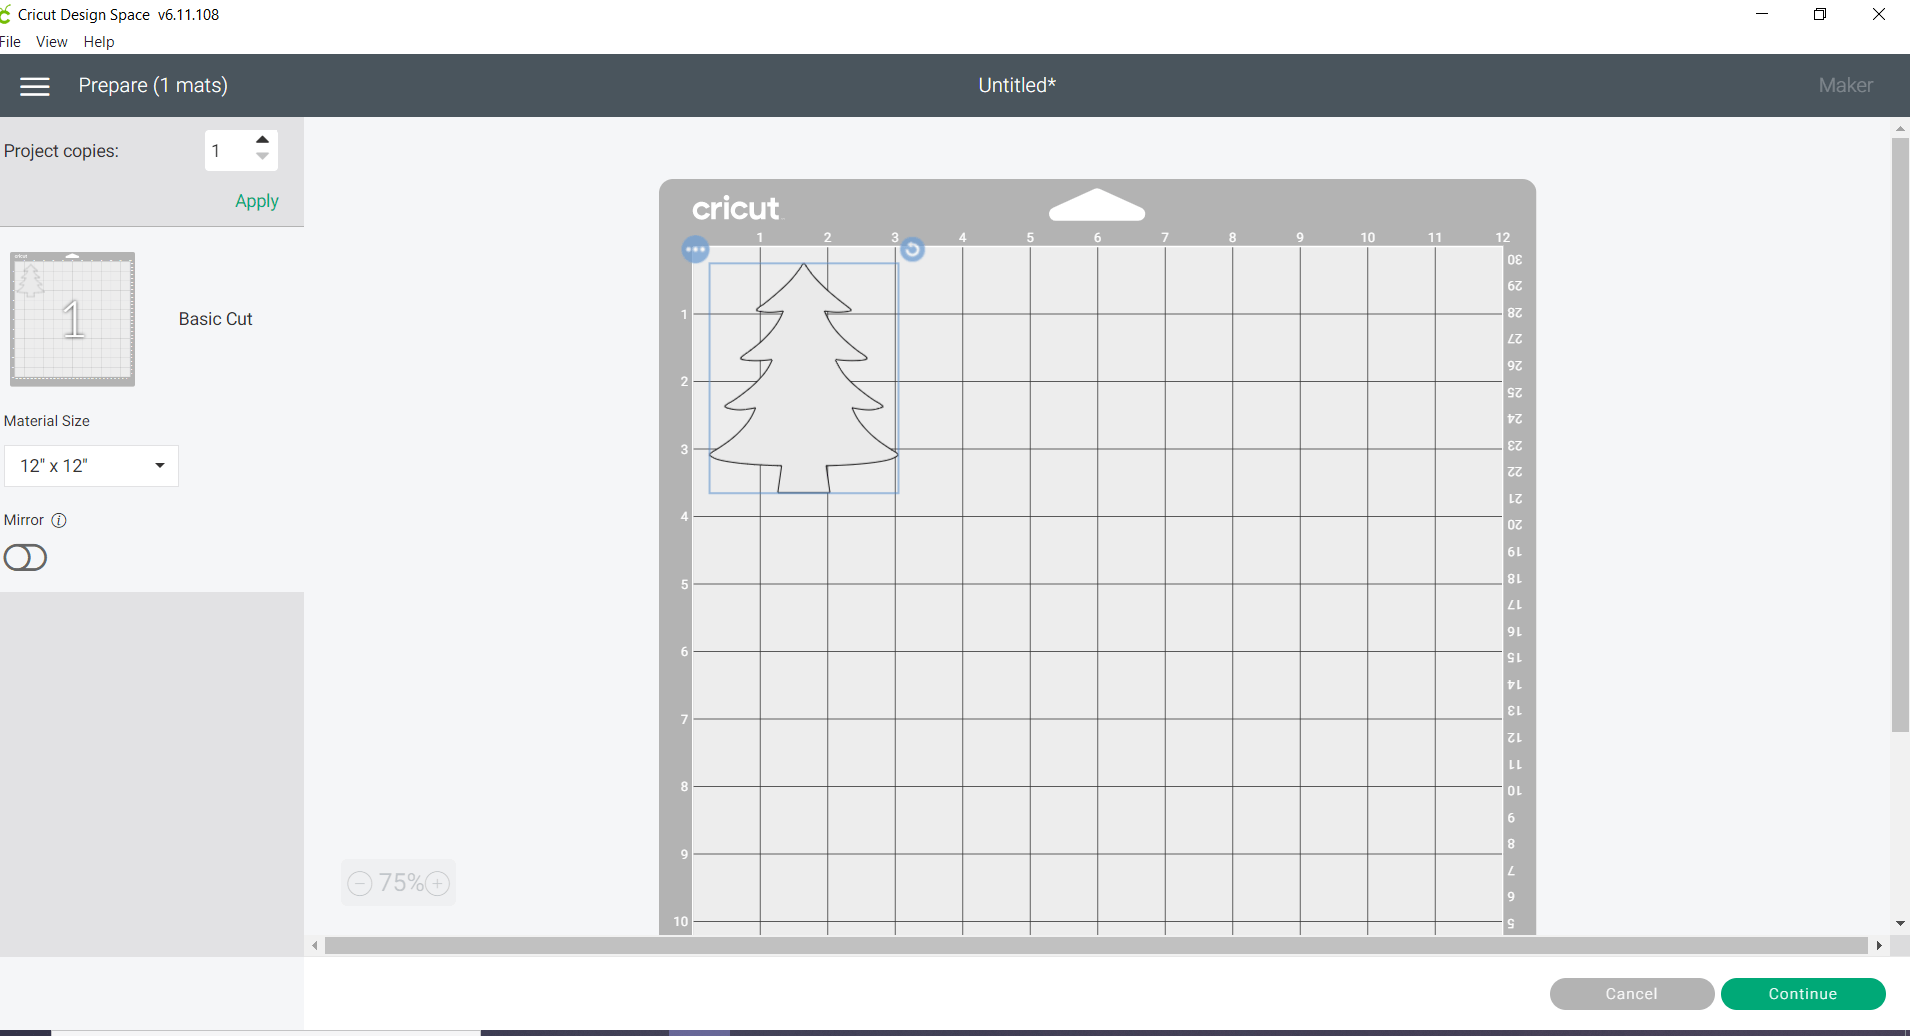
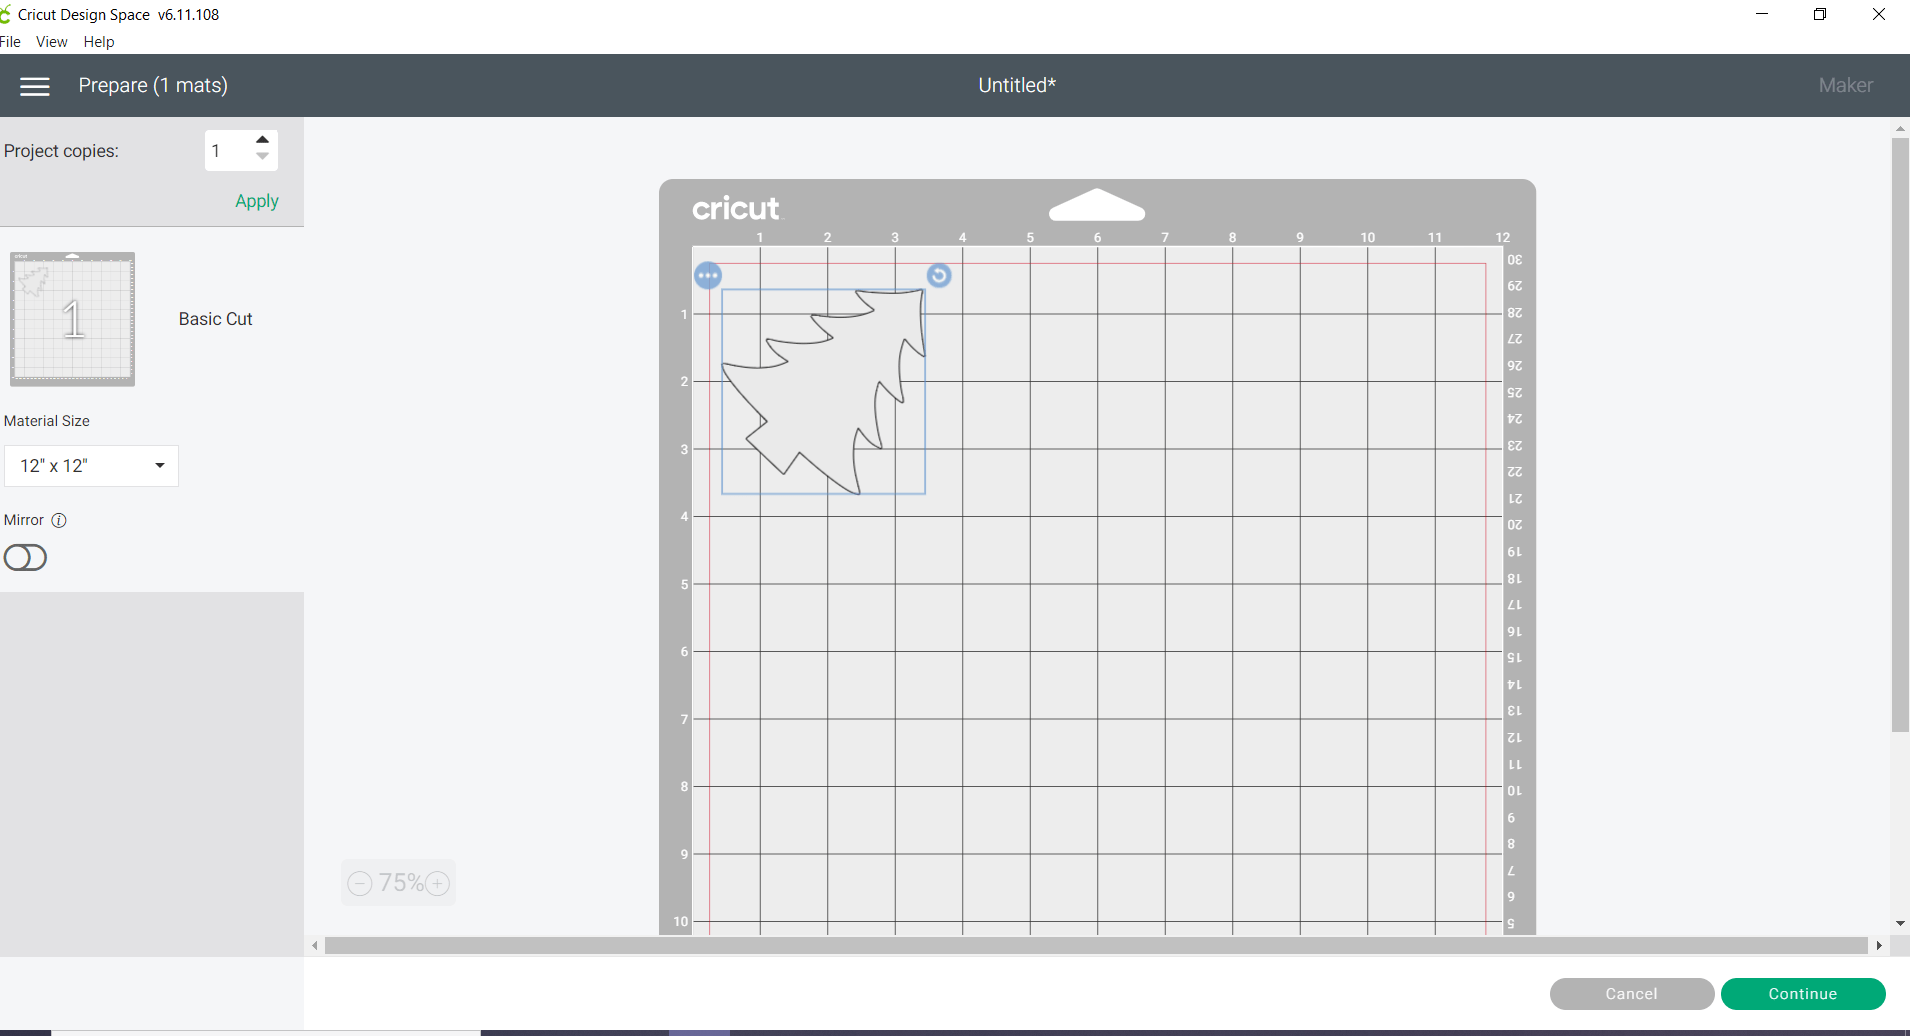
Upload your images to Design Space and place them on your canvas. The first thing I did was to create an offset of the tree image. You can see the tree in white and the offset in green. The offset was 0.085. If you haven’t used the offset function, you’ll want to be sure to check it out. It’s a great way to add dimension and layers to your designs.

Now I’m ready to cut the tree from the cardboard. I’ve hidden my tag and my offset while I do this. While this isn’t entirely necessary, I wanted to focus on getting the cardboard cut. You can hide part of your design by clicking on the eye icons on the way right in your layers panel.
Let’s Make It
So I hit the make it button, but I wanted to tweak some things first. I decided to rotate my image so that the lines of the cardboard would be diagonal.
This is the original orientation.
There is a little rotate handle if you look at the upper right-hand corner of the image. It’s a small blue circle. Use your mouse to turn your image and now when you cut, the orientation of the lines on your cardboard will be diagonal.
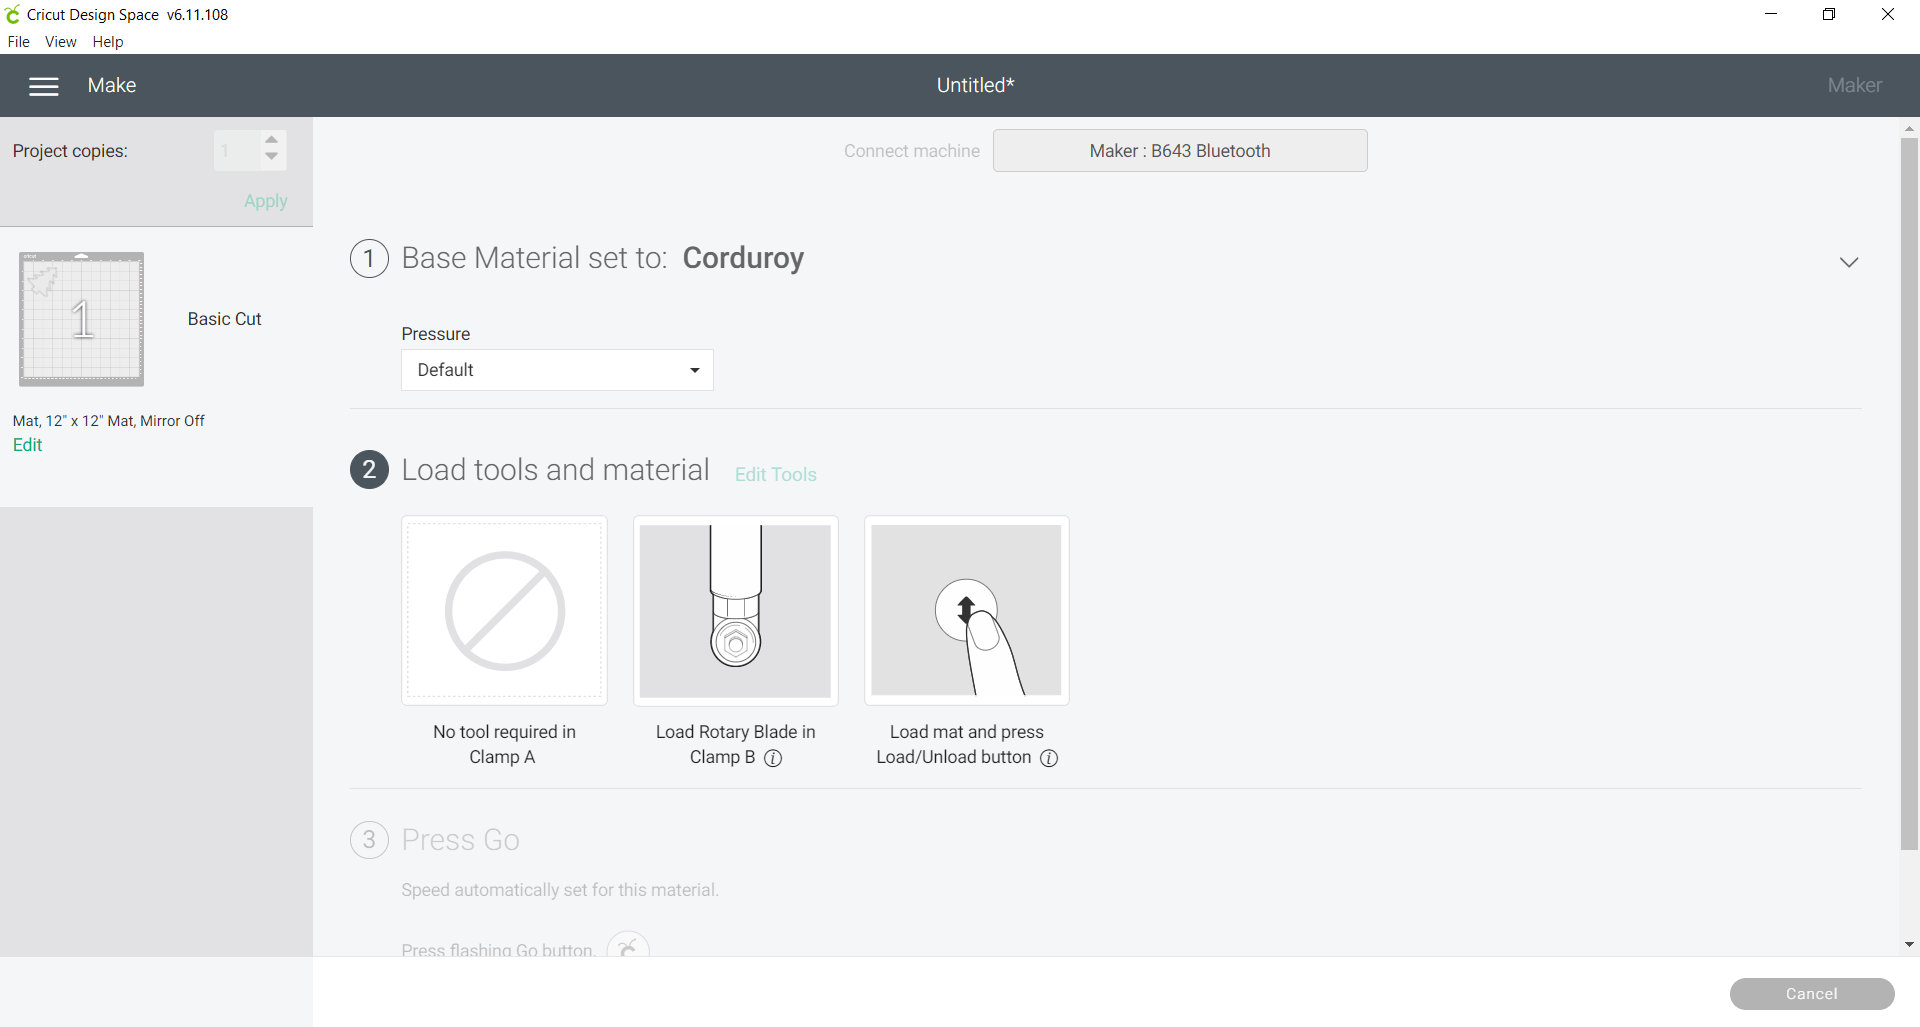
The next setting that I wanted to take a look at was the materials setting.
Because I was using the rotary blade, I chose a material that used the rotary blade. I chose Fabric>Corduroy. This worked out fine, and cut through without any problems.
Finishing the Tag
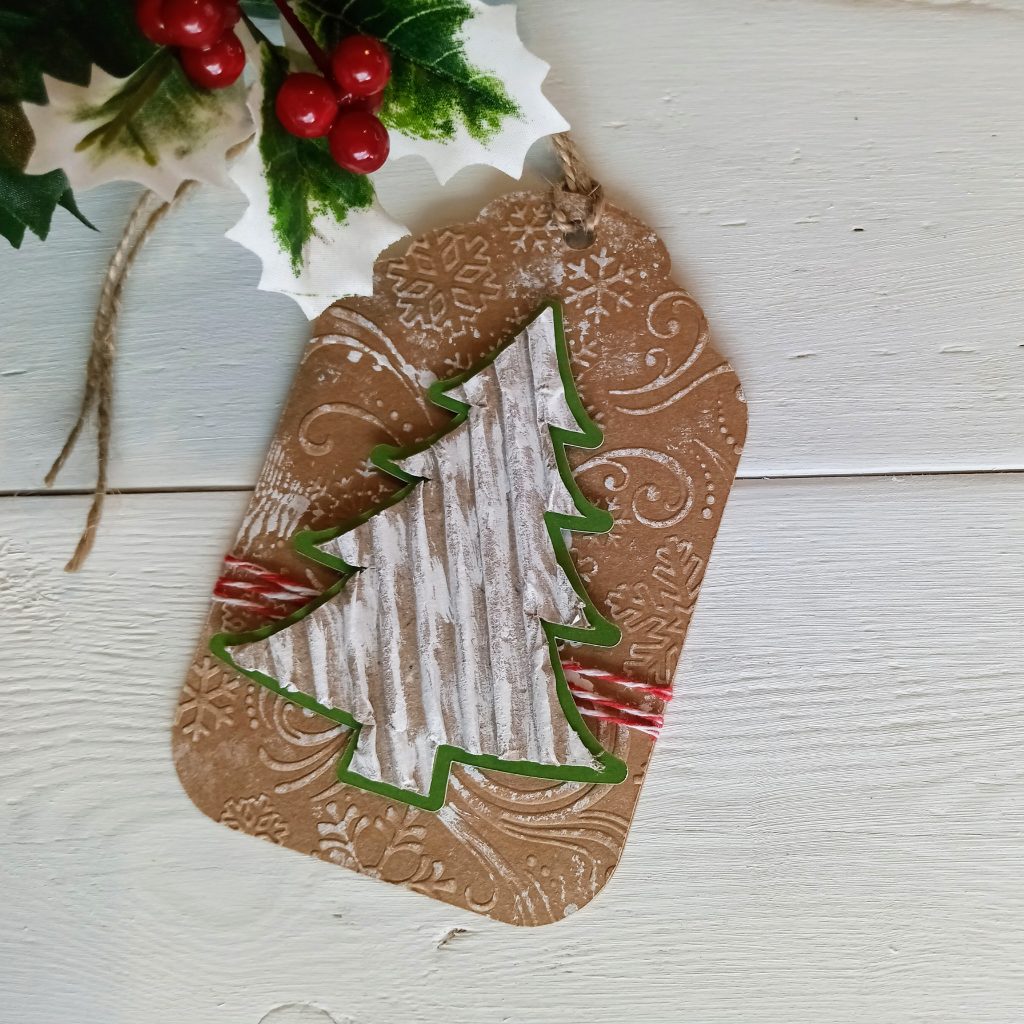
Now I went back and finished cutting the offset tree image from green cardstock. I also cut two copies of the tag from some heavy kraft cardstock.
Next, I used white acrylic paint and dry-brushed my cardboard image.
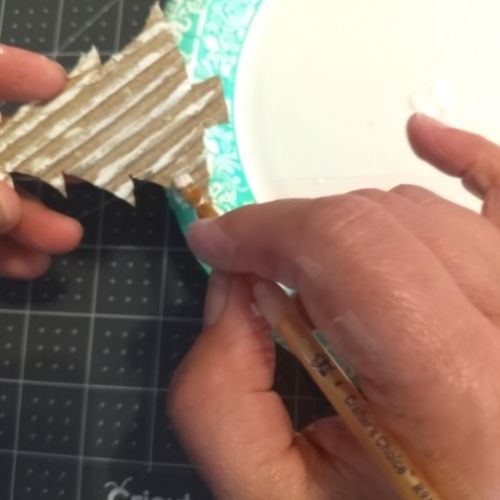
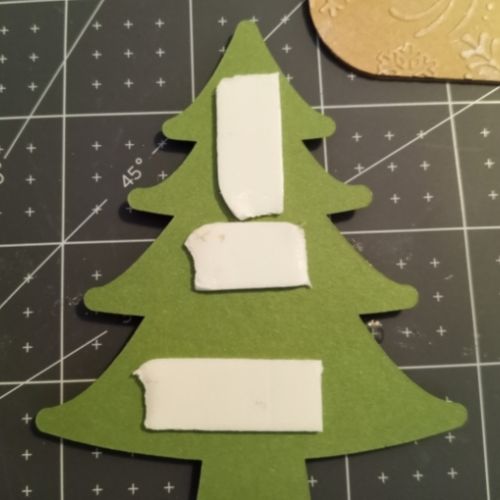
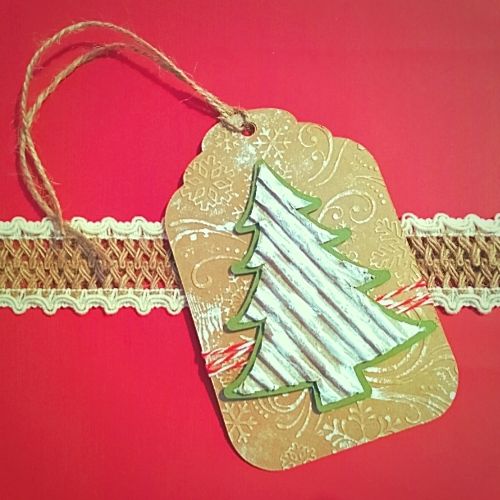
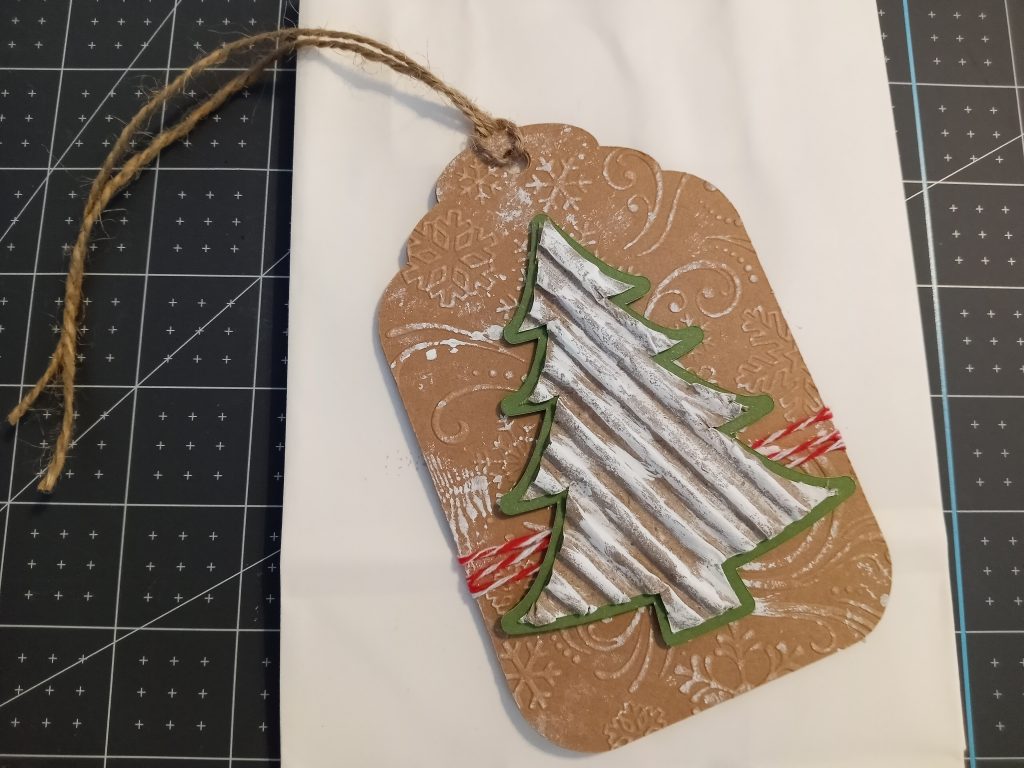
Then I adhered that to my green tree offset with Art Glitter Glue. I added foam tape to the back of these images to add some dimension to my tag.
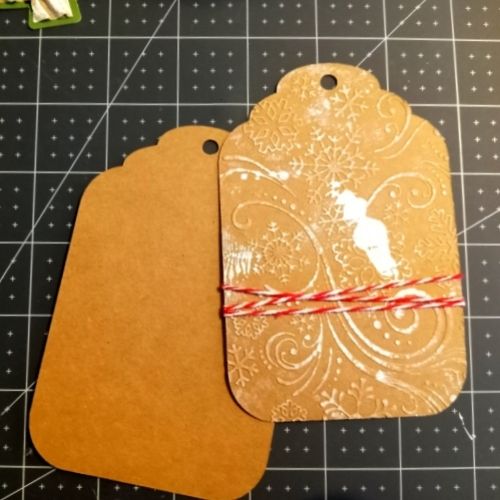
I cut two copies of the kraft cardstock and embossed one with a Darice embossing folder and my Cuttlebug. A brayer and acrylic paint were used to add some additional dimension. There was a bit of an oops, but that’s okay. The tree covers it up, as you’ll see in the end product.
I also added some red baker’s twine and fastened it with scotch tape in the back. I glued these two layers with the Art Glitter Glue.
Finished Cardboard Gift Tag with Cricut Maker
Once the tag is finished, you’re ready to wrap. I purchased a bag of leftover trims from a thrift store that would make a neat addition to plain wrapping paper. I picked them up for $1.25 and have lots of fun options for wrapping packages.
This also looks great on a white gift bag. Personally, I love white! What do you think?

Want to Get This SVG?
You can download the SVG for this project with the button below. Please be sure to share the link to this project on Pinterest. If you make this project, I’d love for you to share it in my Facebook Group!