DIY Layered Christmas Tags: A Festive Cricut Design Space Creation
The holiday season is the perfect time for crafting, and what better way to personalize your gifts than with handmade Christmas tags? Inspired by designs found online, I’ve created a set of layered Christmas tags that you can easily make for your own gifts this holiday season. These tags are not only simple to make but also versatile, giving you multiple ways to use them and add that special touch to your presents.
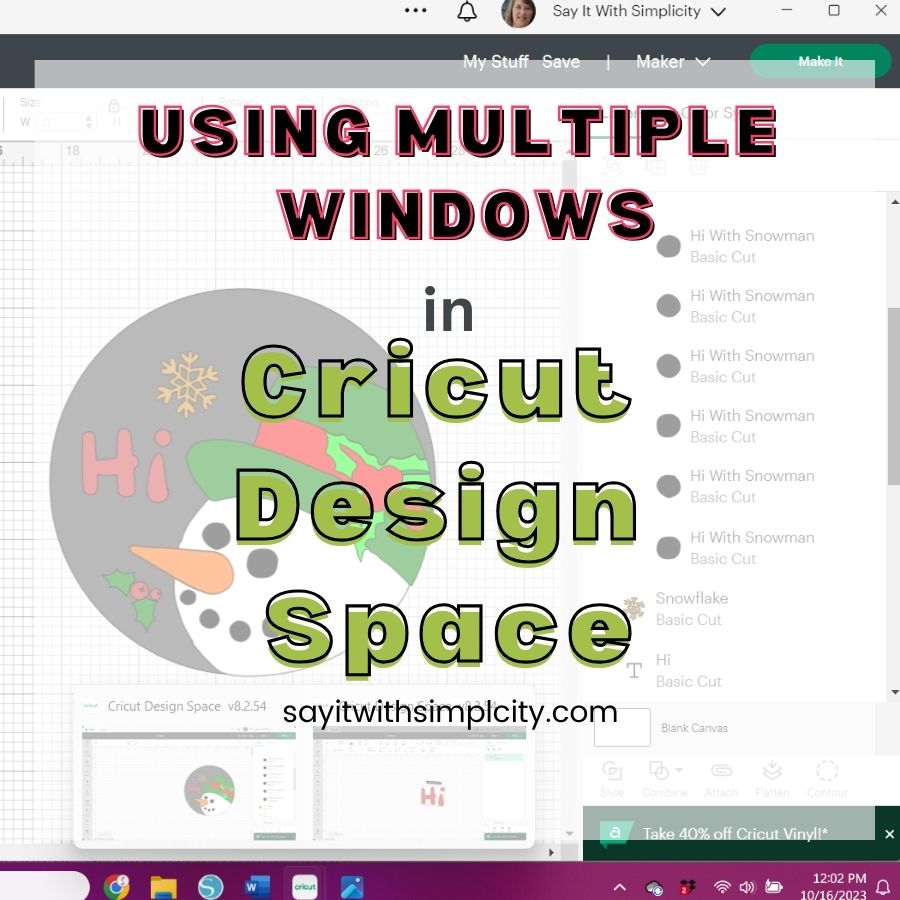
I’ve created this project in Cricut Design Space and make this project public. You can find the link to my shared project HERE.
Versatile Ways to Use This Layered Gift Tag Project
1. Single Layer Tag: If you’re looking for a simple yet colorful tag, you can choose to cut out only the top colored layer of each tag. This option is perfect for a classic tag that stands out on your gifts. Attach a writing font with a personalized message for a custom look.
You can see the single layer tag to the right of this photo.
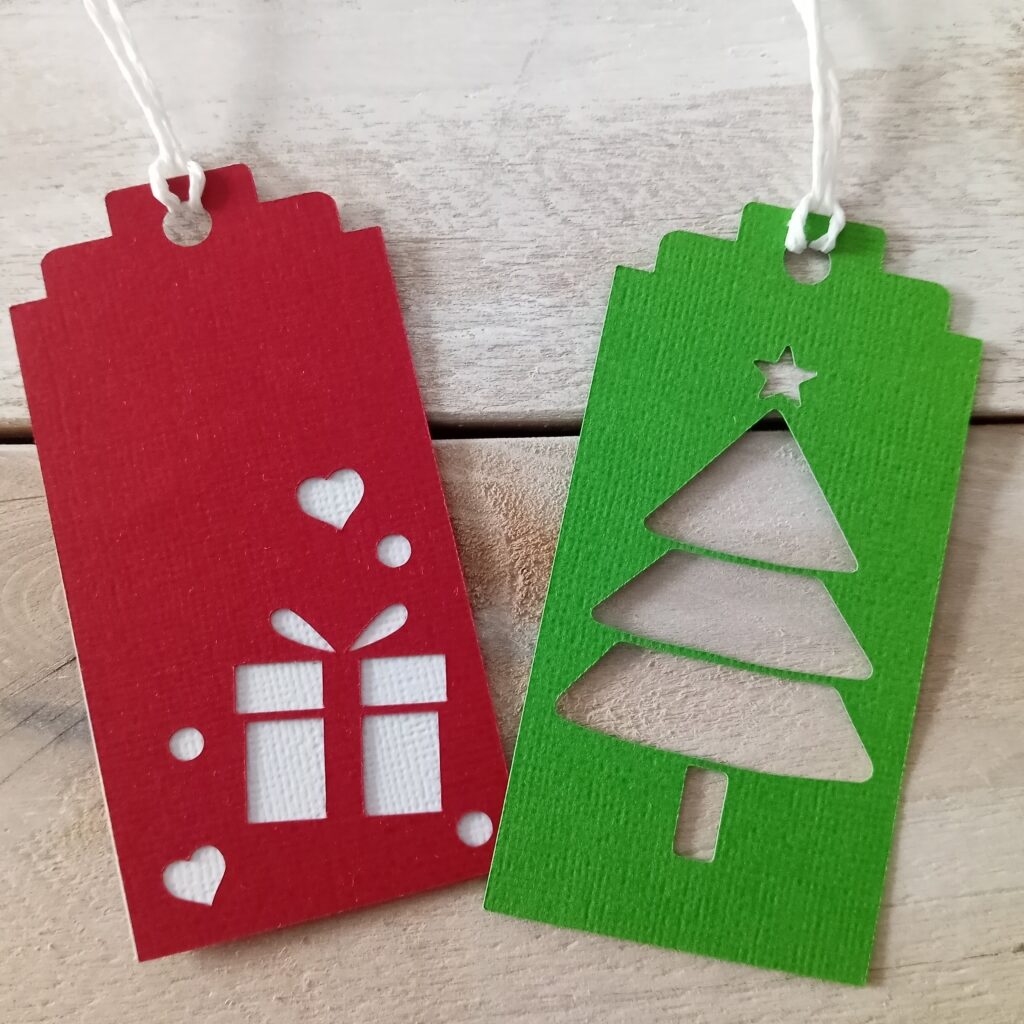
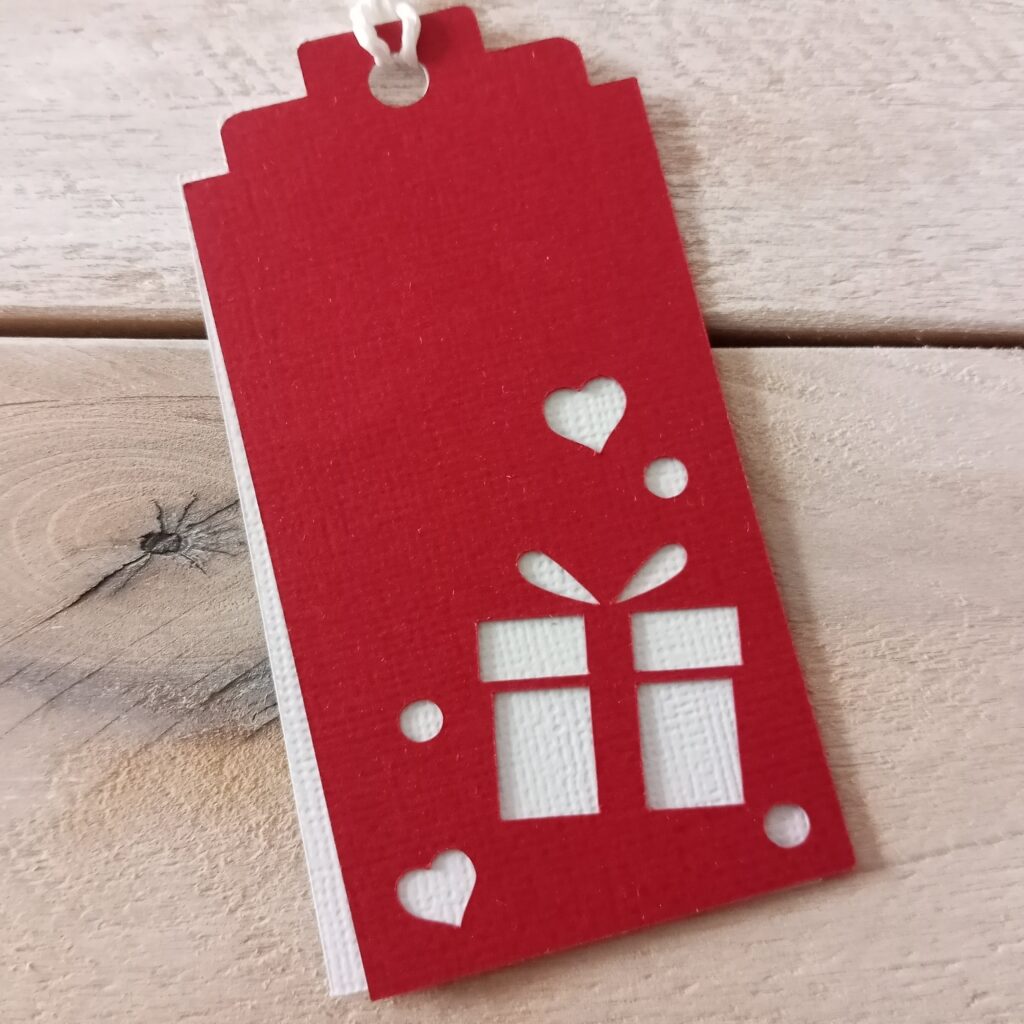
2. Layered Look: To create a more intricate and personalized appearance, you can cut out both the colored and white layers and assemble them. This layered look adds depth and sophistication to your tags. You can even hide the recipient’s name on the white layer for an element of surprise.
You can see the layered tag to the left of the photo above and below.
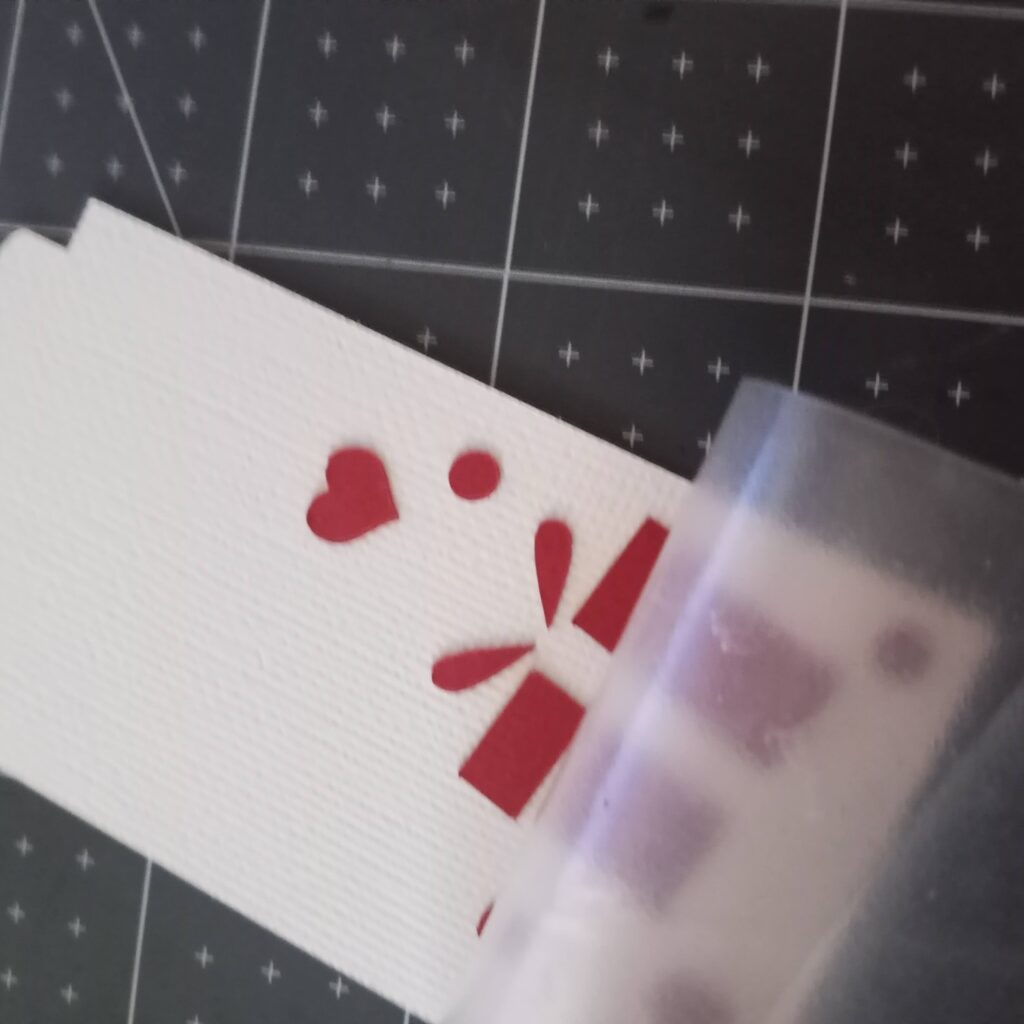
3. Negative Space Magic: For a truly unique twist, consider preserving the negative space elements from the design and transferring them to a white tag, just as shown in the photo.
You’ll have to be careful removing your tags from the mat so that you leave the negative space image on the mat.
This method involves using a low-tack transfer tape to carefully pick up the elements, then add the glue to the back. Now transfer the elements to the tag, let the glue set for a minute, and then gently remove the transfer tape. The result is a beautifully intricate tag design. I added jingle bells for a little pop of color at the top.
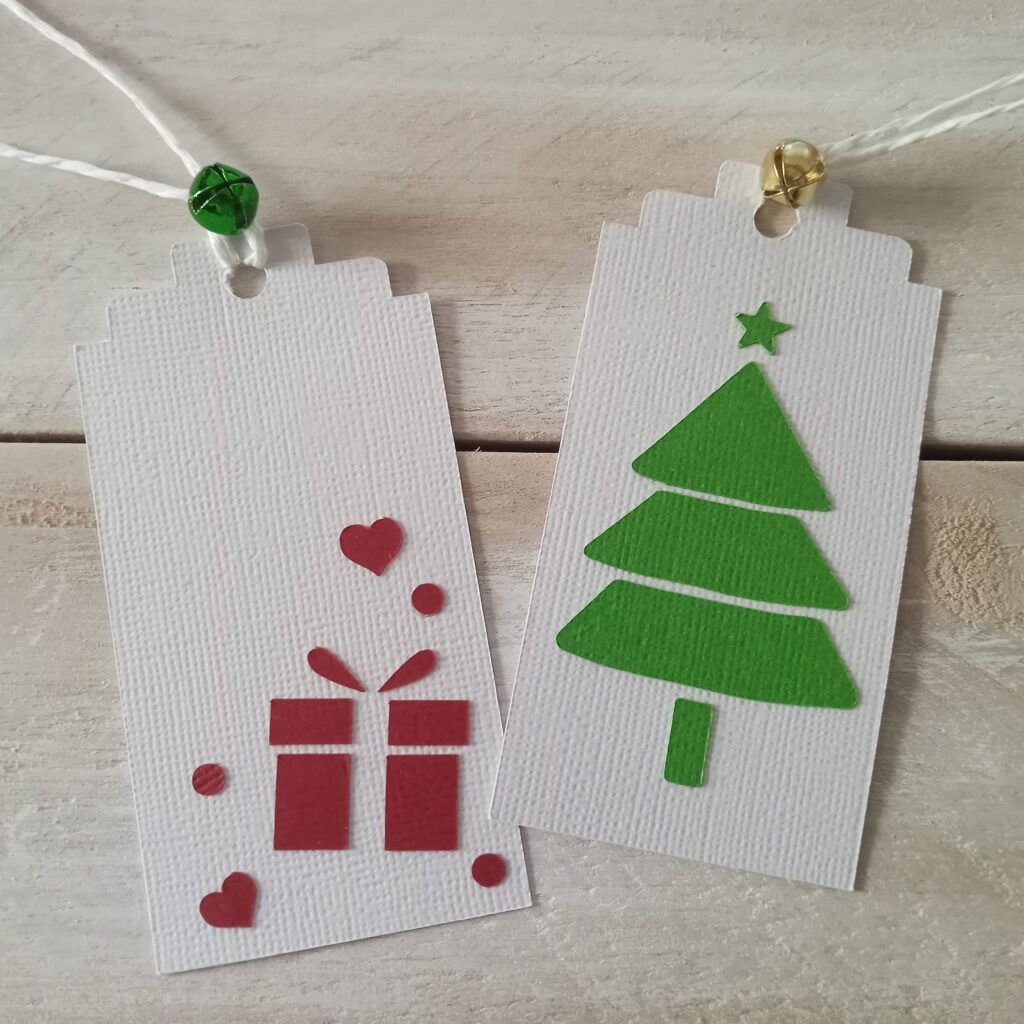
But the creativity doesn’t stop there! You can take these tags to the next level by using patterned paper for the bottom layer or adding sequins, pearls, or other embellishments. I even added some jingle bells to the tops of two of my tags for a touch of holiday cheer. These tags are a canvas for your imagination, so have fun with this file and let your creativity run wild.
This Cricut Design Space creation is more than just a craft; it’s a way to infuse your gifts with a personal touch and make your holiday season even more special. Whether you choose a single layer, a layered look, or get crafty with the negative space, these Christmas tags are sure to bring a smile to your loved ones’ faces as they unwrap their presents. So, grab your Cricut machine, get into the holiday spirit, and let the creative fun begin!
Christmas Gift Tags Cricut Explore