Gift Tags with Free Elements in Design Space
Hello! Today I’m sharing how I made these Christmas Gift Tags using Free Elements in Cricut Design Space. Using various patterned papers, supplies, and techniques, you can make beautiful tags for any season of the year.
This post contains affiliate links. I may earn a commission when you purchase through these links. You never pay a penny more.
I enjoy using Cricut Access, and I also love creating my own cut files. But for today, let’s keep it simple.
Let’s harness to power of Cricut Design Space and use our imaginations to create some projects with a few basic elements.
I used my Cricut Maker to cut out the tags I created with the free images in Cricut Design Space.
There is a video to accompany this post on my YouTube channel, so I hope you’ll follow along and create some of your own tags using the free shapes and images.
Suppplies and Tools Christmas Gift Tags
- Cardstock
- Patterned Paper
- Adhesive or Tape Runner
- Sequins, pearls, buttons, glitter, and other embellishments
- Cord, string, jute
- Scissors
- Cricut Explore Air 2, Explore 3, Maker, or Maker 3
- Cricut Black Writing Pen

More Cricut Projects You Might Like
Writing with Pen Cricut Design Space
Trash to Treasure Cricut Drawing Pens Christmas Gift Bags
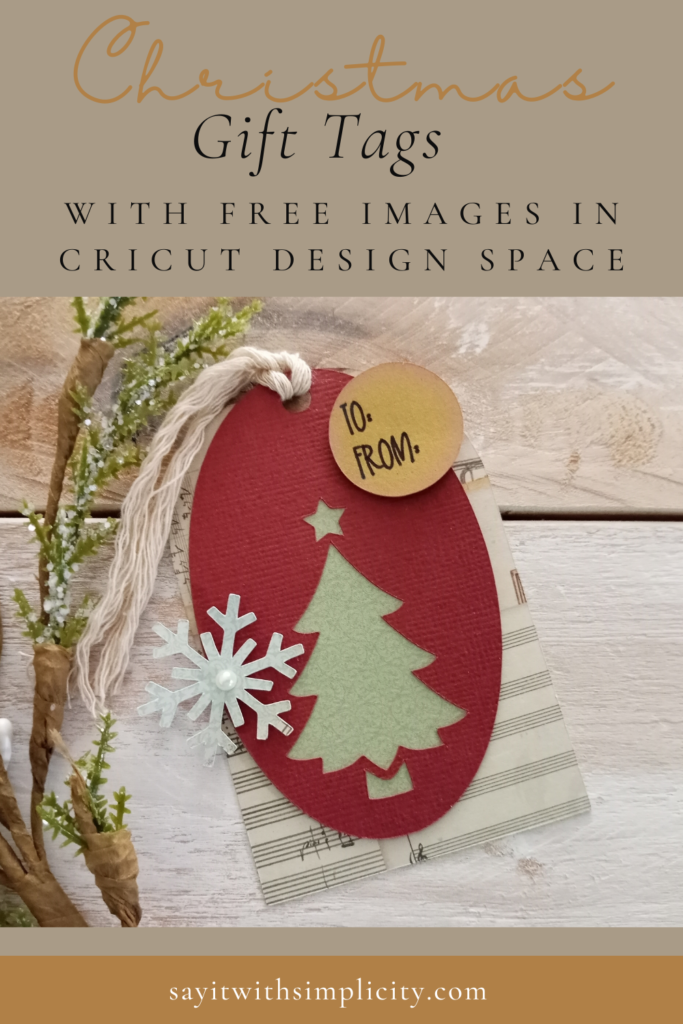
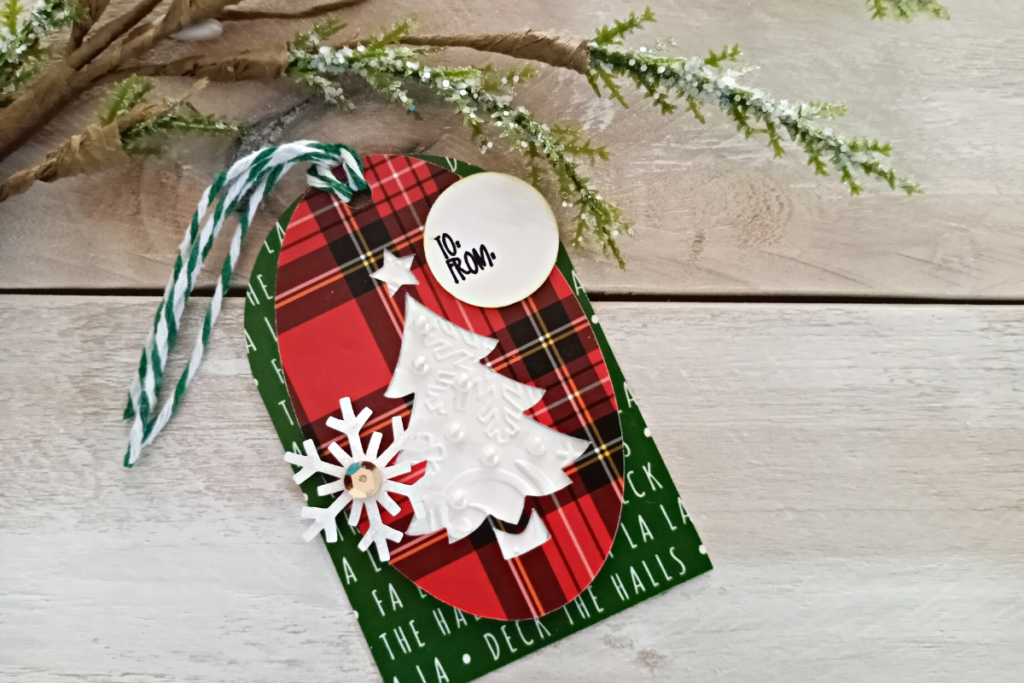
Making the First Gift Tag
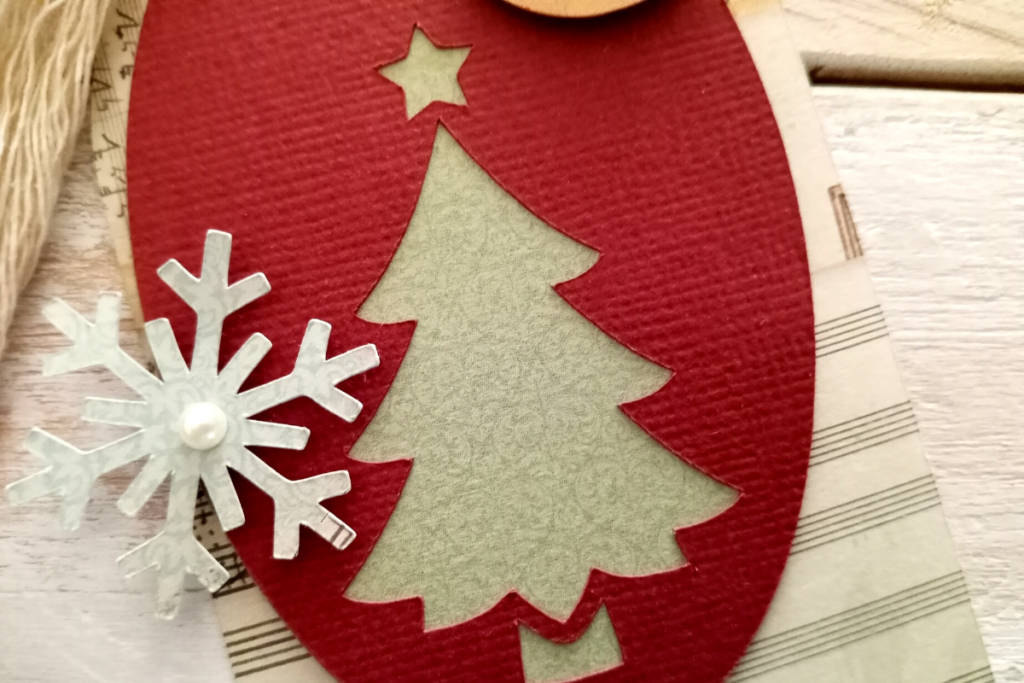
All of the elements were cut with my Cricut Maker. The one inch “To: and From:” circle was drawn with the black Cricut Pen, and then cut out by machine.
The patterned papers that I used for my gift tags were from a couple of different collections. Plaids found in the Scrapbook Customs collection from scrapbook.com are some of my favorites. I had leftovers from a 6″x6″ pack (12″x12 currently available)
White cardstock makes up the lower layer on the oval part of the tag. I used embossing with the Snowflake Swirl Embossing folder to create some texture and dimension for this tag.
The twine used for this tag was a green baker’s twine from Dollar Tree. I added a sequin and some Stickles Glitter Glue by Ranger to the snowflake to give it a little shine.
Pearls from the thrift store were added to the tree.
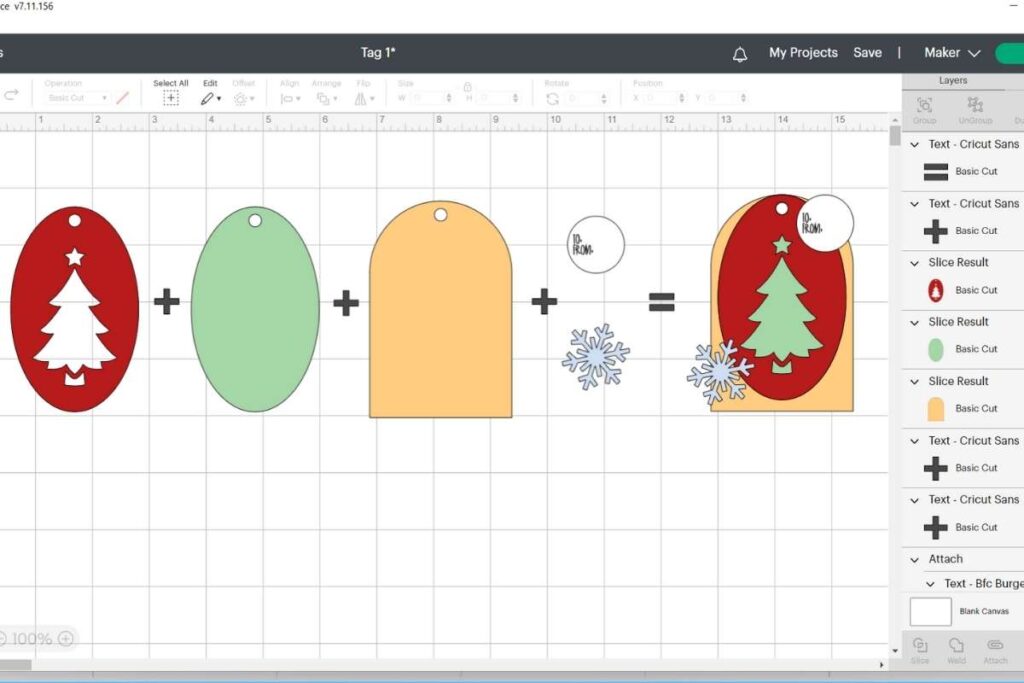
Christmas Tags in Design Space-Assembly
Below is a diagram or mock-up of sorts, to show what the various cuts look like in Cricut Design Space. Be sure to go to the video if you want more information about how I created the pieces.
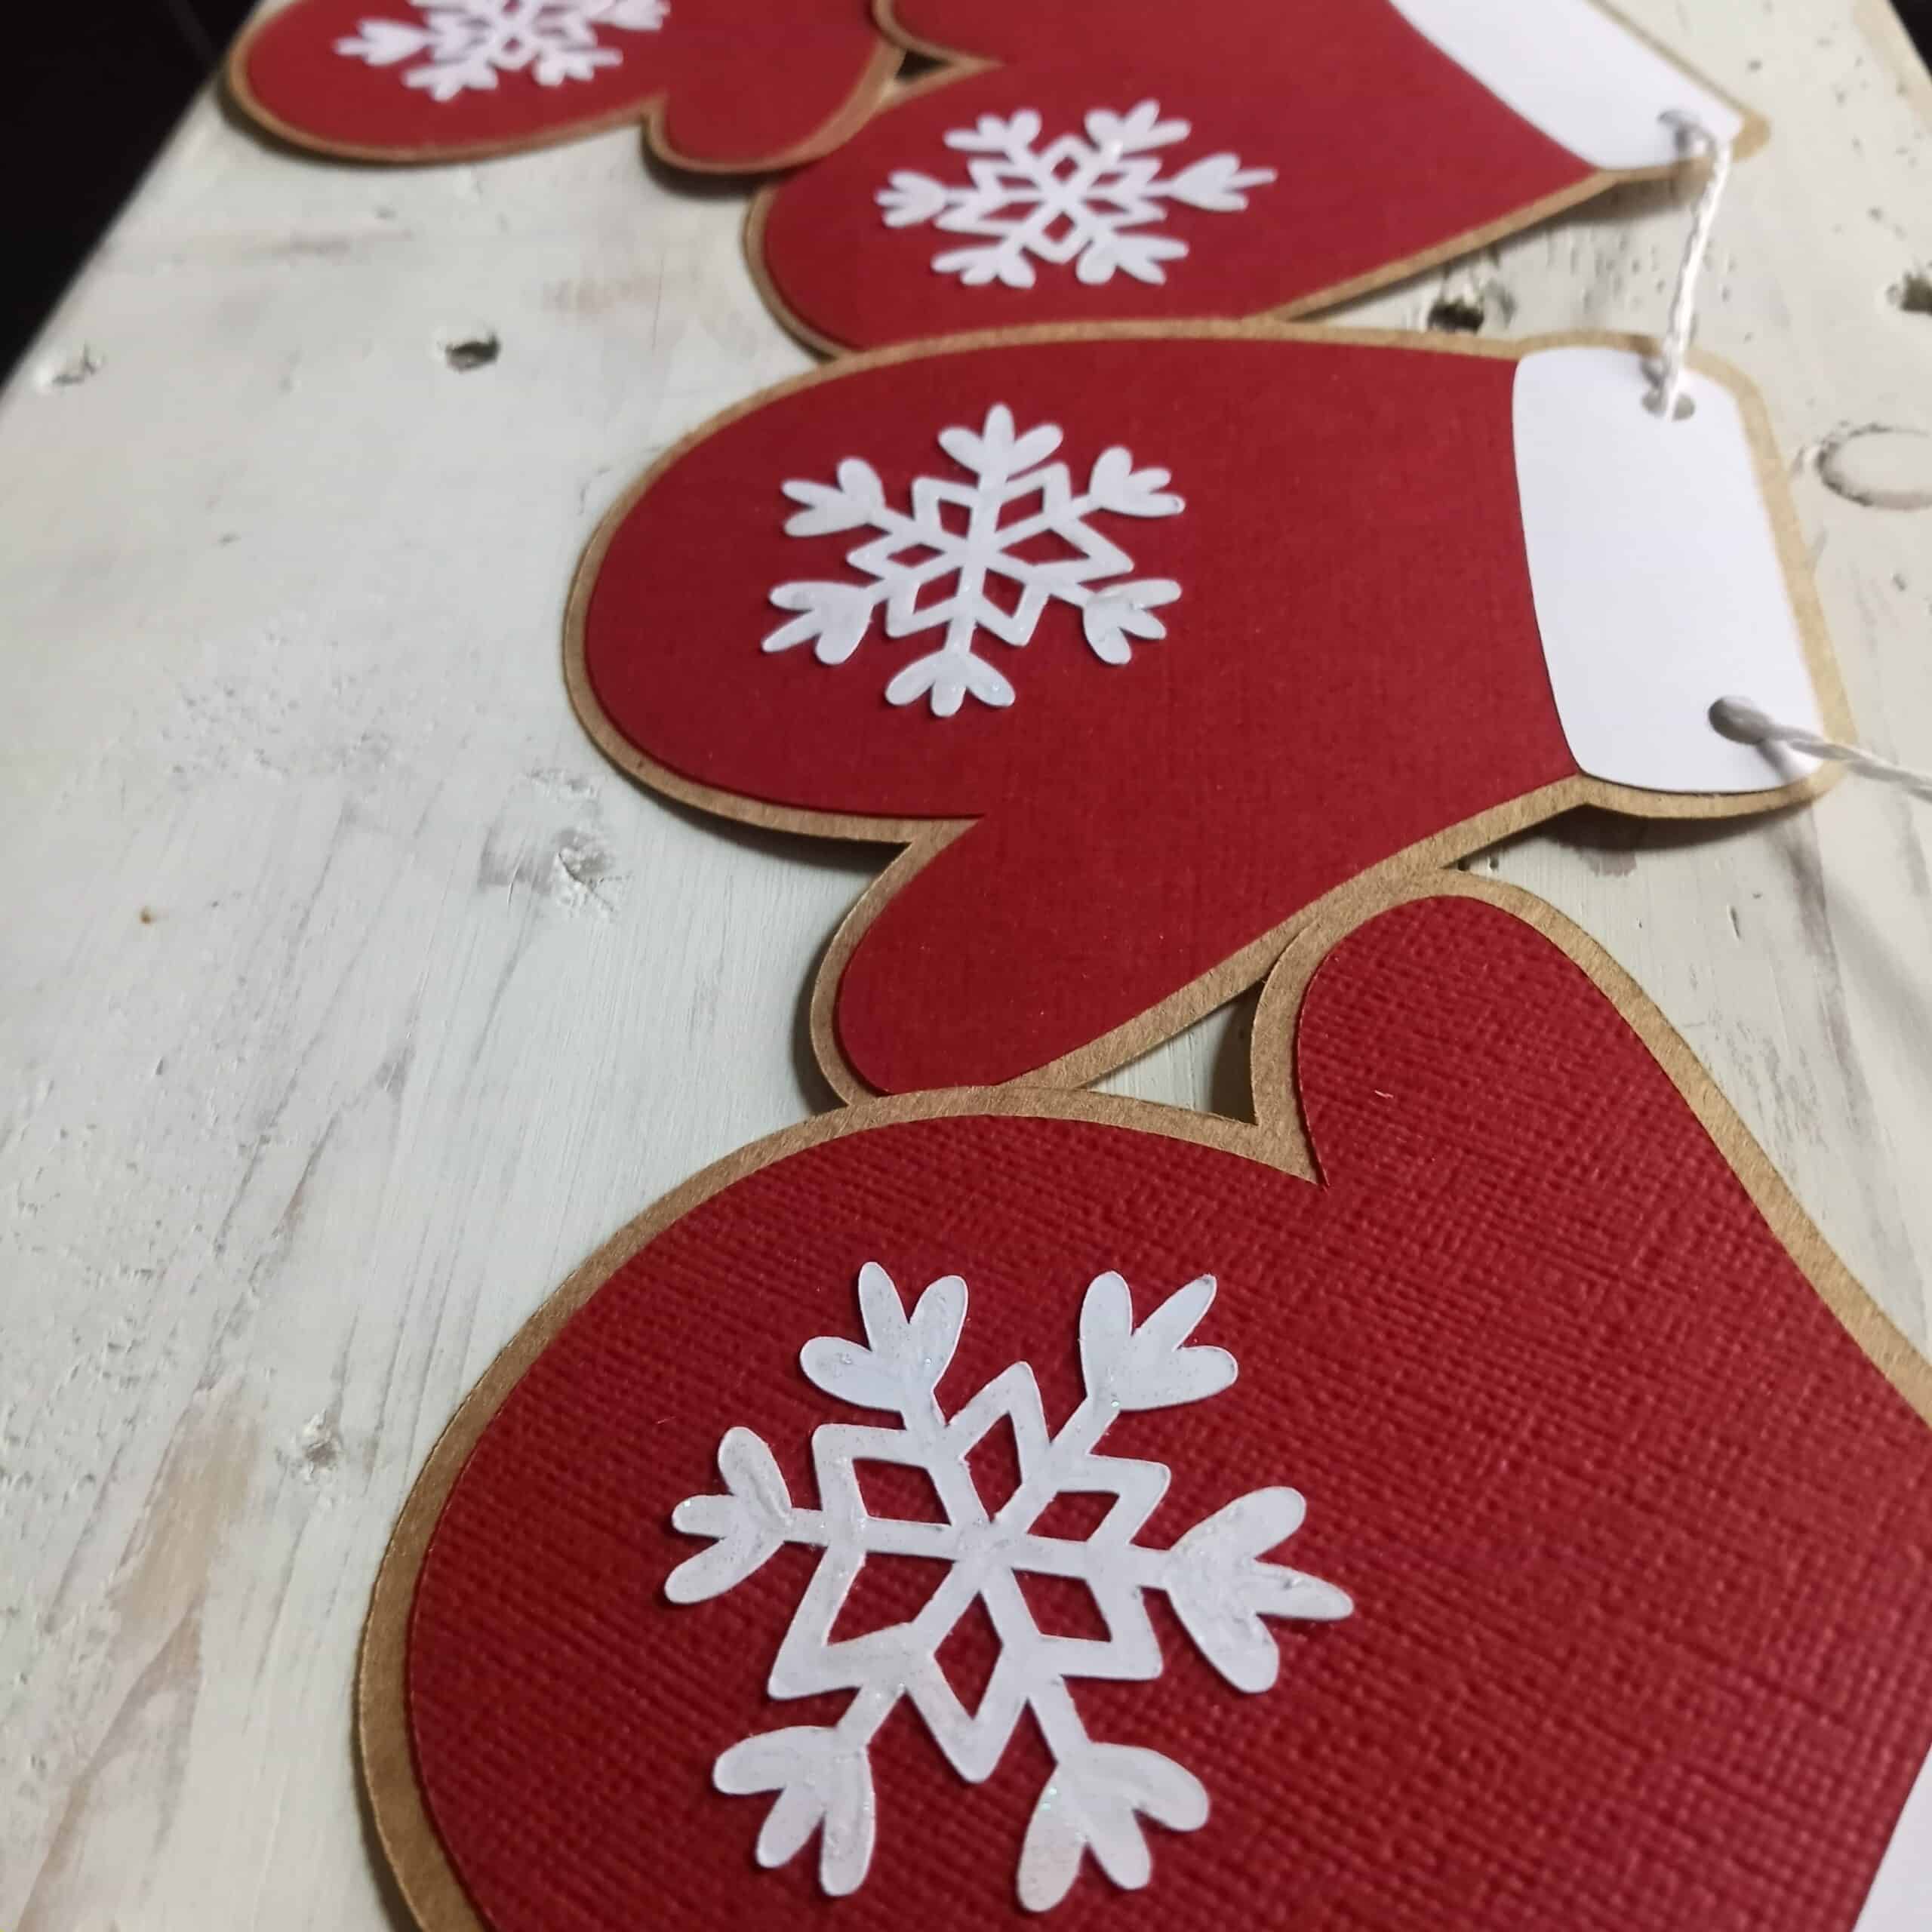
Making the Second Cricut Gift Tag
For the second Christmas Tag I created in Design Space I used patterned papers from the Bo Bunny Family Heirlooms Collection as well as plain textured cardstock that I purchased at Joann Fabrics.
If you have something in your stash that isn’t necessarily Christmas, it can still be used to create something for the season.
I added a simple pearl to the snowflake and did a little bit of distress inking around the “To: and From:” circle. Then I used some cord I had in my stash, and frayed it to match my vintage look. Here is a little bit of a close up of those vintage papers.
I love how these tags turned out. They were quick, easy and I can’t wait to use them this Christmas. Let me know if you created this tag using Cricut Design Space. If you did, I’d love to have you share it in my Facebook group.
Happy Crafting and we’ll see you next time!

More Christmas Tags in Design Space
Cardboard Gift Tag With Cricut Maker