How to Make Reusable Stencils with Cricut Maker
Are you tired of using pre-made stencils that don’t quite fit your creative vision? Look no further than the Cricut Maker. Whether you’re a DIY enthusiast, a professional crafter, or someone who simply loves to personalize their belongings, the Cricut Maker is a game-changer. In this post, you’ll learn how to harness the potential of your Cricut Maker to design and cut stencils that are tailored to your specific needs. From choosing the right materials and images we’ll walk you through how to make your own reusable stencils with your Cricut Maker.
Why Reusable Stencils?
For instance, you want to paint a pattern on a wall or a piece of furniture. Rather than cutting up vinyl rolls for vinyl stencils, why not use a reusable stencil? There is less waste and you’re less likely to damage your walls or your furniture piece with the reusable stencil.
Reusable stencils are also a game-changer if you’re a sign maker getting ready for a craft show. It’s a huge time saver and your profit will be higher since you aren’t using all the vinyl. Plus you don’t have a one-time-use product going into the landfill.
If you are a card maker, stencils are a great way to create amazing backgrounds for your handcrafted cards.
Some people even create food-safe stencils for the top of cookies and cakes.
When you go to the store or shop online, the stencil options can be somewhat limited. But what if you could make your very own?
You can with your Cricut Maker!
Learn How to Make Reusable Stencils with the Cricut Maker
This post may contain affiliate links for your convenience. This means that I may earn a small commission if you make a purchase after clicking on one of these links. It won’t cost you any extra!
Supplies You’ll Need for a Reusable Stencil with your Cricut Maker
- Your Cricut Maker
- Strong Grip Mat (highly recommended)
- Sharp blade in your machine
- 5 mil Mylar Stencil Material
- A Stencil Design (see the bottom of the post for a few from my SVG library)
My Favorite Stencil Material for Reusable Stencils
One of my favorite materials for making reusable stencils is 5 Mil mylar. This is a great material that holds up to repeat use but is not so thick that it’s a problem to cut. These sturdy sheets can be washed after use and then used over again on another project.
In the past, I’ve also used transparency material for making stencils. This works great for small stencils or stencils that aren’t going to get lots of use. You can see more about that in this post.
Other Tools and Supplies
Use a strong grip mat, and masking tape at the edge will also help to hold the mylar in place.
Be sure to have a sharp blade. I like to use these blades because I know they work amazingly well and I’ll always have a new blade on hand.
What Makes a Stencil Design?
Cricut Access has some stencil designs. If you type “stencil” in the search bar under “All Images” you’ll come up with some ready-made designs if you want to experiment. But as we’ll see, there are many images that can be used.
There are also some stencil fonts that you can find in Cricut Access, purchase online, or even find for free. You may also consider creating bridges in some of your own text so that it can be used in reusable stencils. Be sure to continue reading if you would like to learn how to do this.
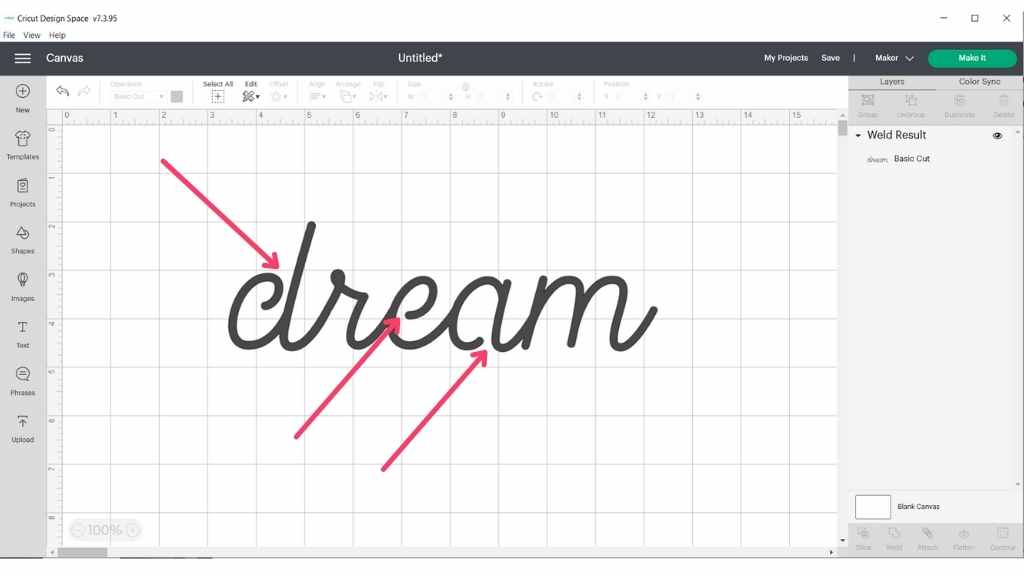
Let’s take a look at one of the stencil fonts in Cricut Design Space.
I typed out and welded some text from the Alyssa Stencil Script font.
You can see that the lower case letters d, e, and a are open. This creates the stencil bridge that you need so that the middles of these letters do not fall out when you cut your stencil.
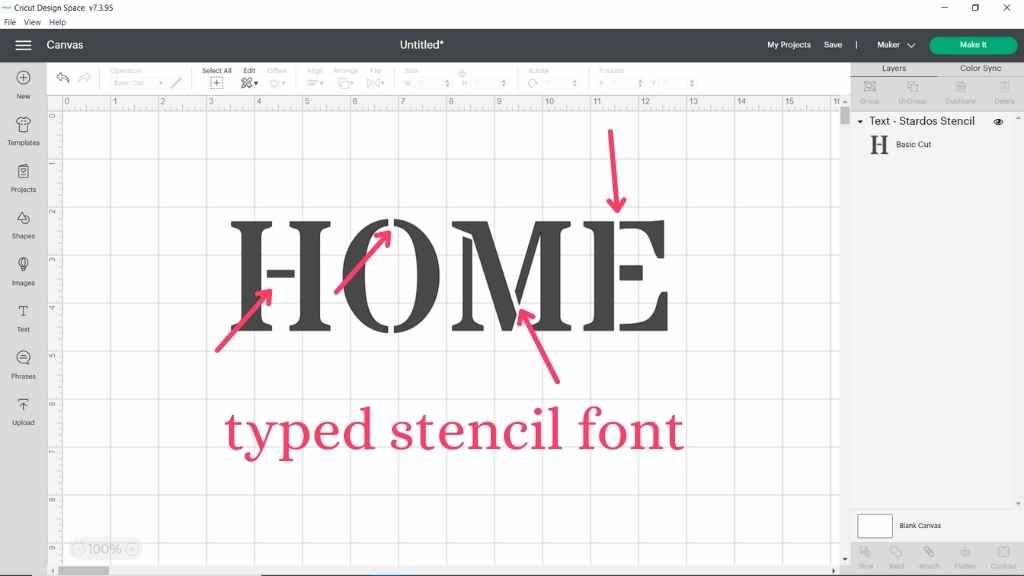
Here is another example: With this font, Stardos Stencil from Font Space, you can see there are multiple bridges, even in letters that are not enclosed.
It can be an advantage to have bridges in letters so that you don’t have floppy parts that shift around while you stencil. Plus there’s less chance that those areas will get damaged while cleaning and storing your stencils.
What If I Want to Use a Font That’s Not a Stencil Font?
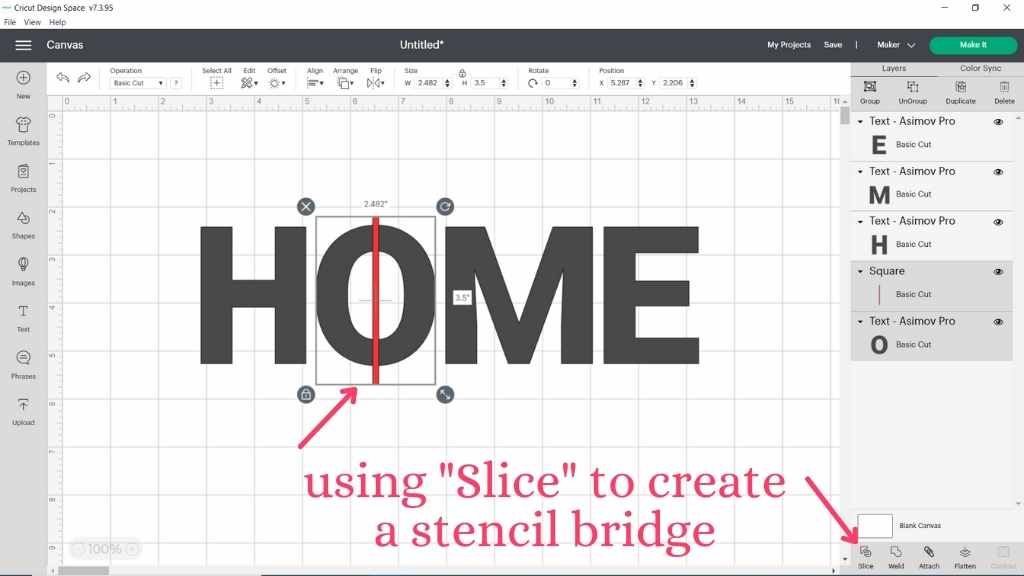
You can use non-stencil fonts, but then you’ll have to create those bridges yourself. This is more easily achieved in design programs, but it can be done in Cricut Design Space as well. You can use the slice function to create your stencil bridges.
In the photo below I’ve lined up a rectangle to my “O” in “HOME”. Now I can select both and “Slice” to create my stencil bridge.
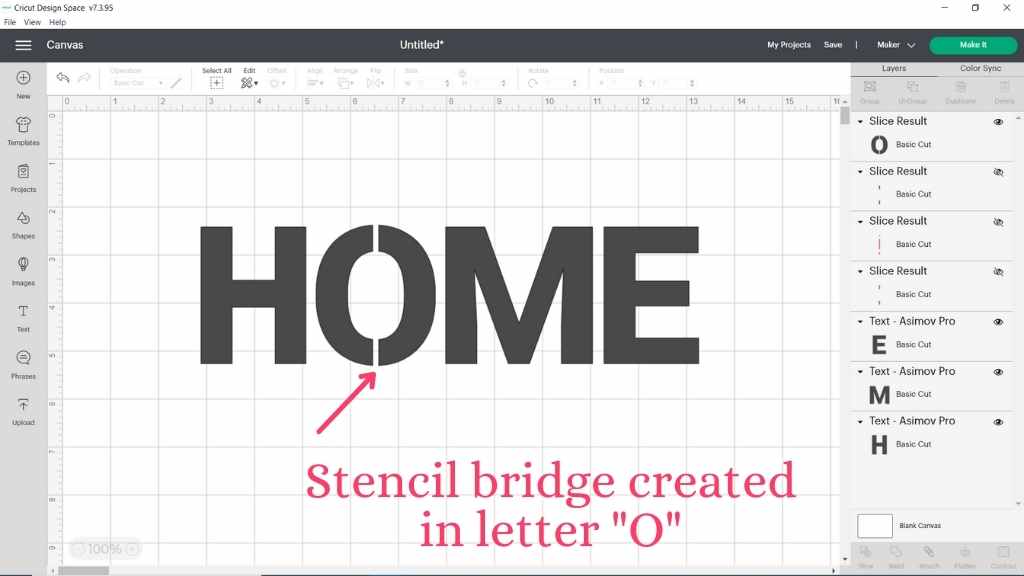
Now that you’ve sliced, you can hide or remove the “Slice” result and your letter has the bridge needed for the stencil.
What About Using Images for Reusable Stencils?
Now that we have discussed a little bit about using fonts for stencils, let’s take a look at using images in Cricut Design Space. There are many images in Cricut Access that would work well for stencils.
The thing to keep in mind is the same thing as with fonts. You want to make sure that you have images where pieces will not fall out of the image when the stencil is cut.
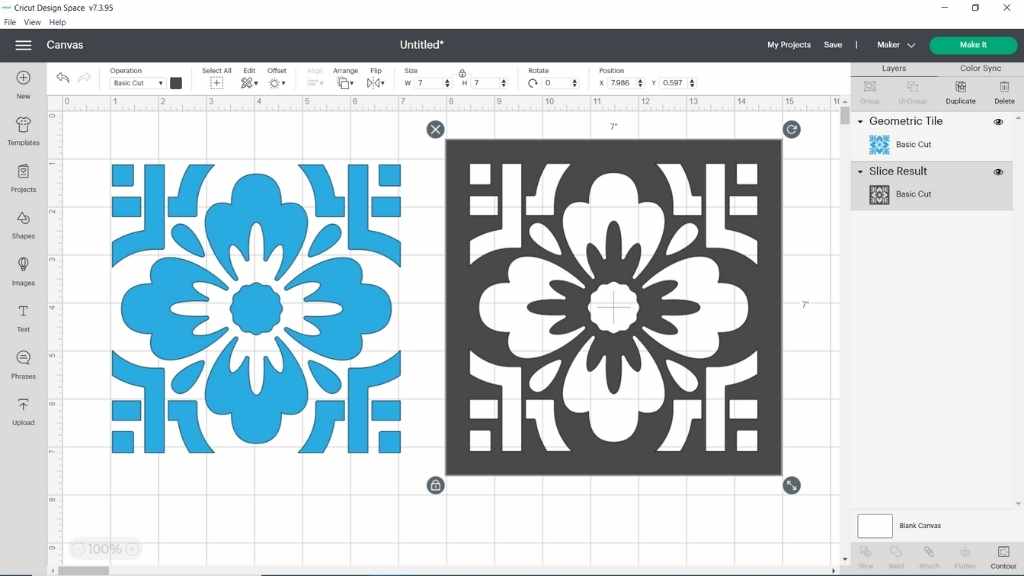
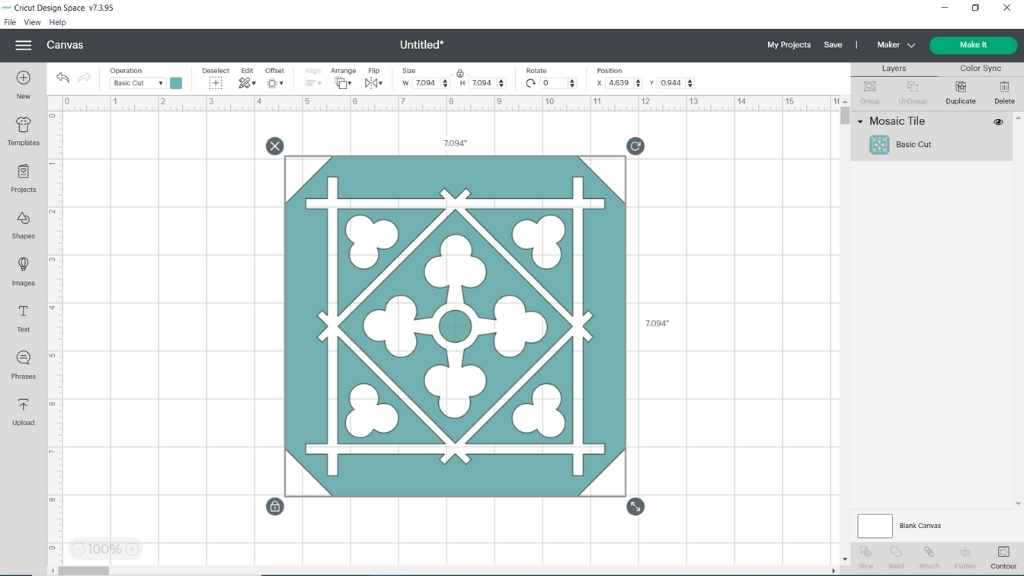
For instance, I chose this tile image and sliced it to a square. It already had all the necessary bridges that were needed for a stencil without having to make any.
What Doesn’t Work
Below is another tile image. This time it is clear that it would not work for creating a stencil. You would have to weld bridges in order for it to work for a stencil. There are clearly areas that would fall out if you were to try and cut this from your stencil material.
So be very careful about choosing images for stentiling. You want to make sure your pieces will stay in the stencil, or you’ll have to create bridges to make them work.
More Examples of Images that Work
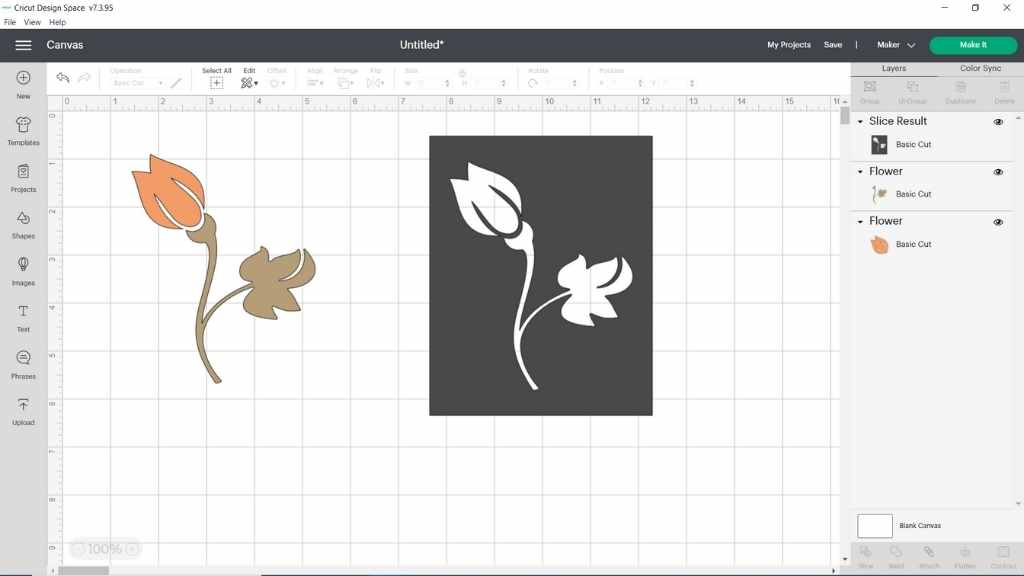
This flower image below is an example of one that would work to be cut as a stencil. You can see the separation of the pieces and while bridges could be made for a little more stability, it is one that could work without.
So it’s worth looking through the images and examining them to see if they would work out for stencils. You may be able to combine images and text to create something that works for your project.
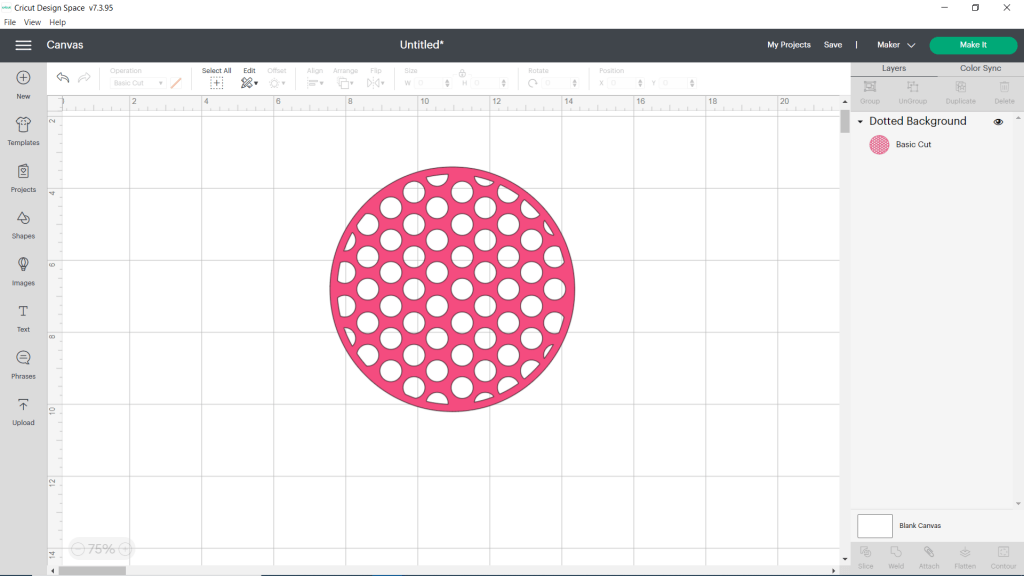
Think about how you could use repeat basic shapes for stencils, whether you make your own or use those that are already in Design Space images. Here is a dot pattern that I found in Design Space Images that could also be used as a stencil.
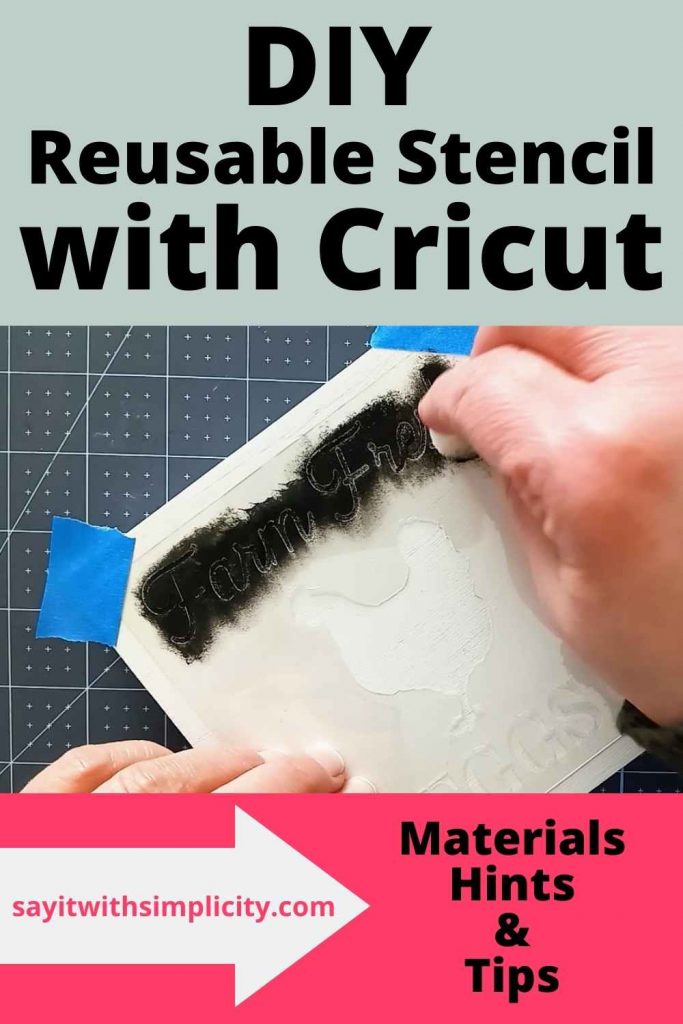
Let’s Get Ready to Cut a Reusable Stencil with Our Cricut Maker!
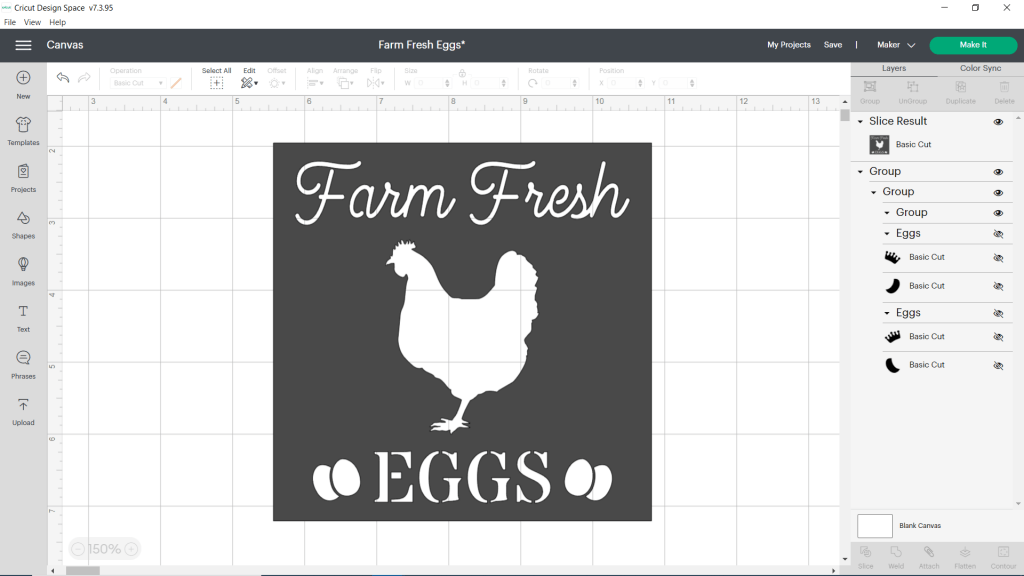
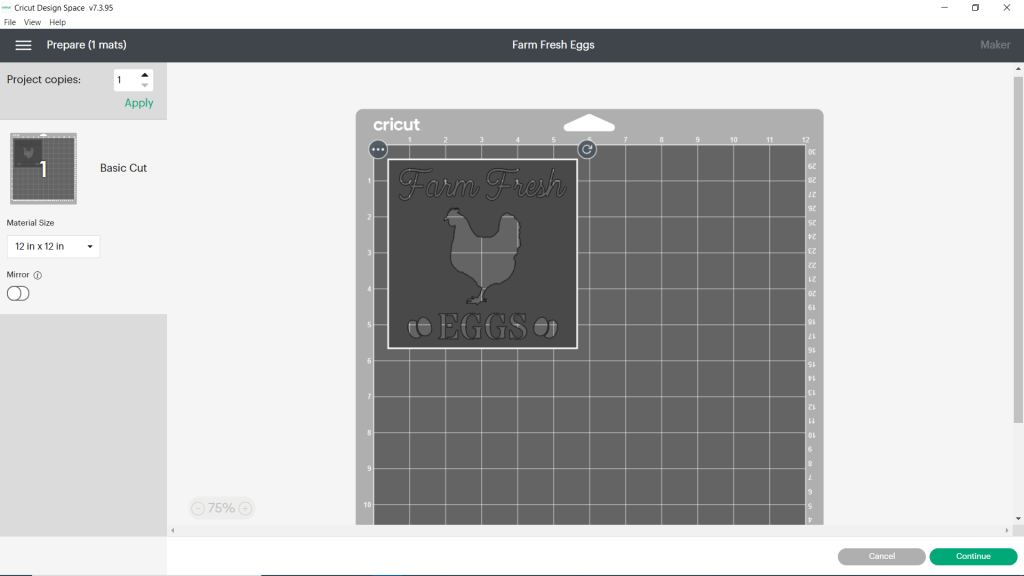
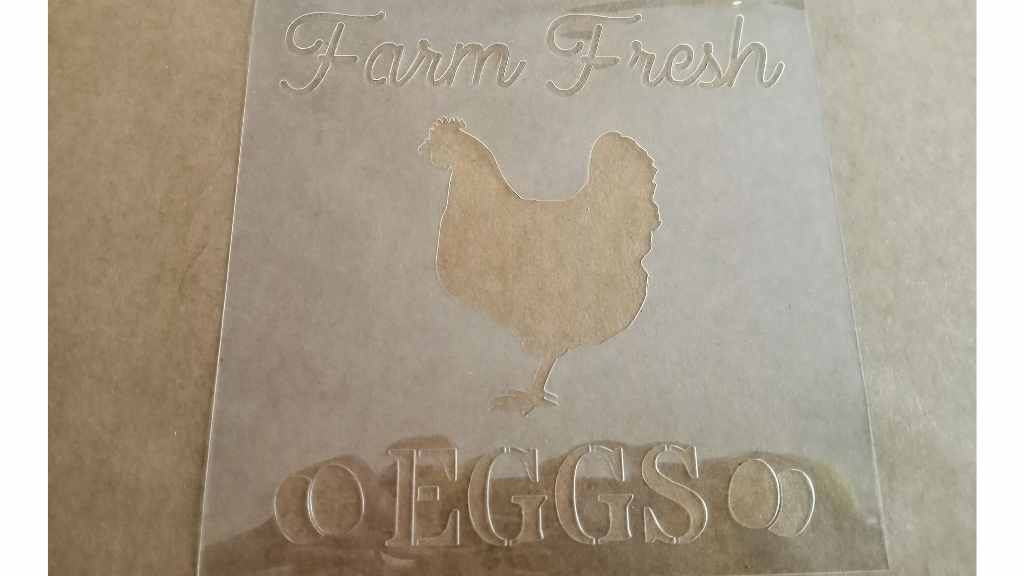
I’m going to cut out this “Farm Fresh Eggs” stencil. I designed this in Cricut Design Space using a chicken image, the Alyssa Stencil Script, and the Stardos Stencil font from Font Space that I mentioned earlier in this post.
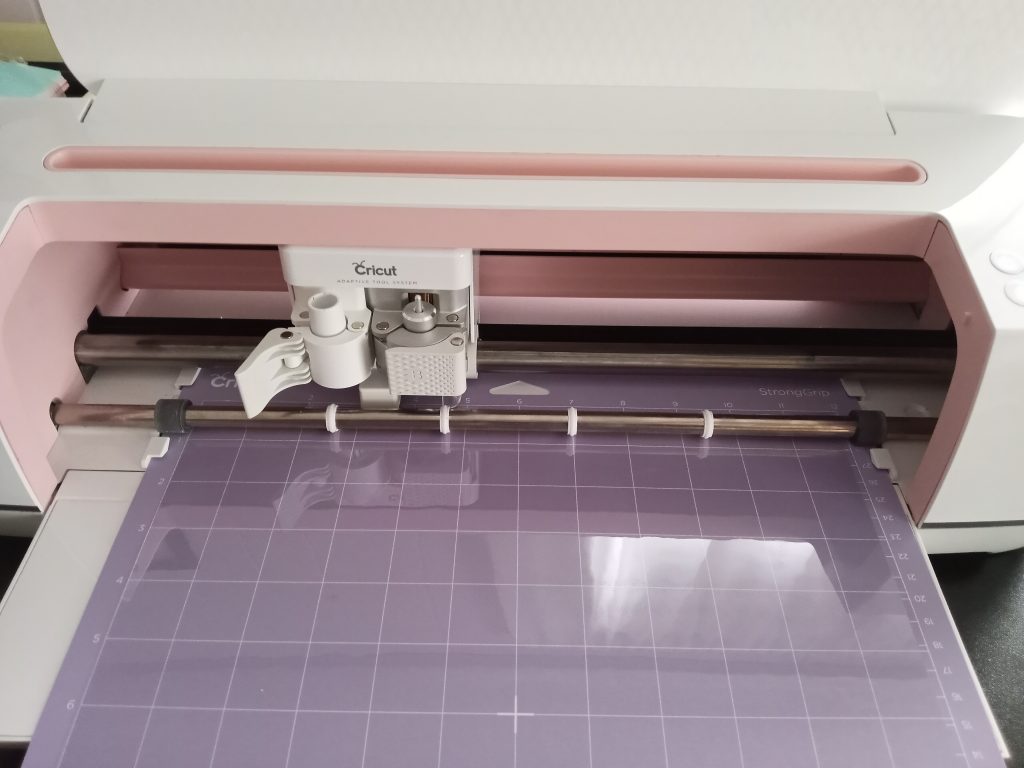
Using my strong grip mat, I’m going to place my stencil material on the mat.
I’ve sized my stencil in Design Space to fit on a board that is about 5 3/4 inches square.
My stencil material is loaded on my strong grip mat and I can send my design to my Maker to be cut.
So hit “Make it” and now you’ll go to your next screen.
Click Continue.
For this stencil material, I set my Base Material to Stencil Film and More Pressure. I’m using the Fine Point Blade.
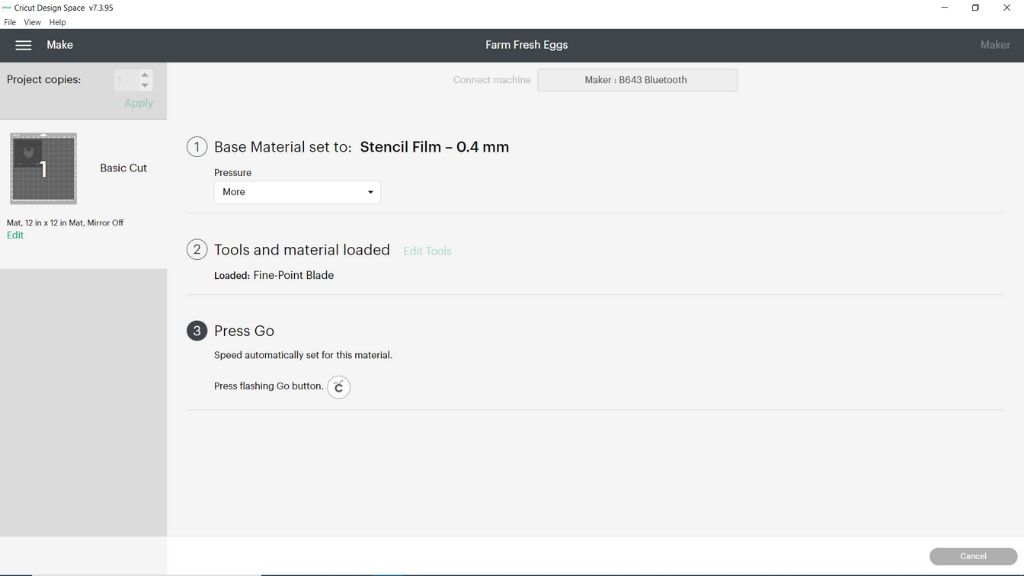
In just a minute we’ll have a nice reusable stencil for our project. Hit the “Go” button to start cutting!
Before you remove your mat from the machine, check to see that your stencil cut all the way through. My cut was clean so I was able to eject my mat and remove my stencil.
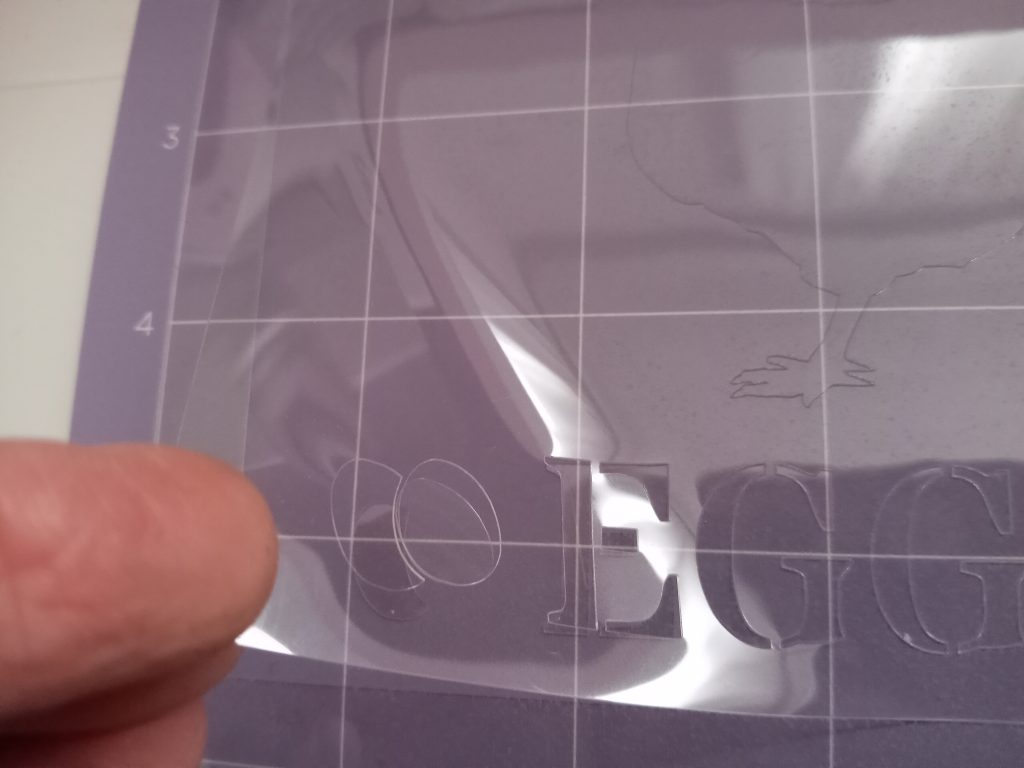
Now our reusable stencil made with our Cricut Maker is finished and we’re ready to start painting our project.
How Do I Care for My Stencils?
If you aren’t going to reuse your stencil right away, you can rinse it with soap and water. With some of the paints, it isn’t really necessary to get every last bit of paint off your stencil. You want to avoid having too much paint build-up, especially on the back.
Pat your stencil dry with a paper towel being careful around the edges of the cut-out areas.
Hanging stencils is a great way to store them. If you have store hangers with clips, these would work well for some of your larger stencils.
For smaller stencils, lay them between pieces of cardstock and keep them in a file system that works for you.
Let’s Paint a Sign With Our Stencil
I like to use chalk paints to paint my wood signs. Here I’ve created my own blank from a piece of Aspen. I sanded my blank with an orbital sander and painted it with Waverly Chalk Paint in the color “Plaster”.
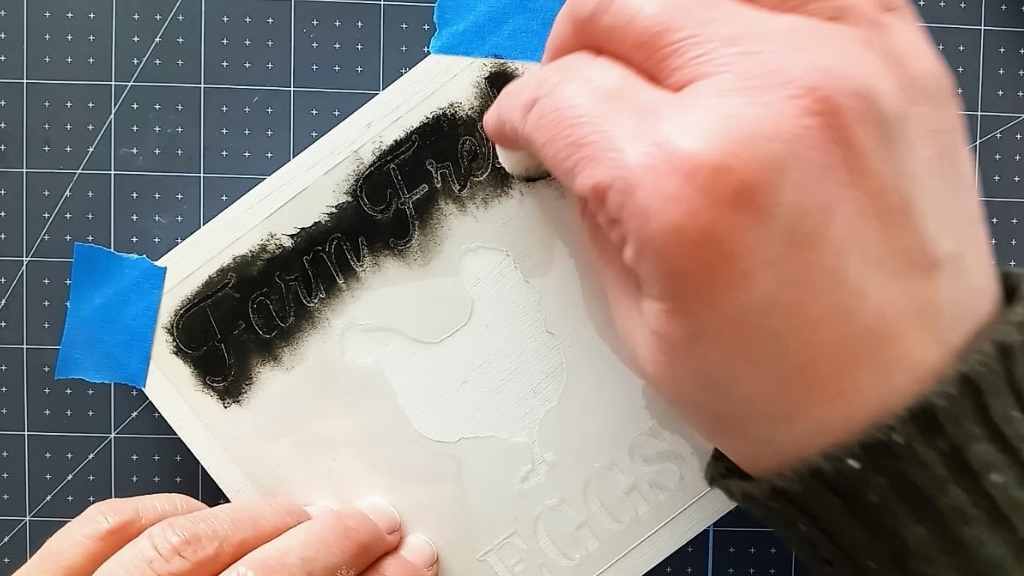
Now I tape my stencil to the sign using painter’s tape. I did not use adhesive spray.
If you feel more comfortable using adhesive spray, this is the one I’ve used in the past.
Keep in mind that the secret to clean lines with your reusable stencil is a very small amount of paint and a very light hand while stenciling.
Use a stencil brush or make-up sponges to paint, blotting off excess paint.
Now using a light tapping motion, lightly start filling in the stencil. Don’t fill in completely. Go back and fill in after your first coat is dry. 2-3 light coats are better than one heavy one.
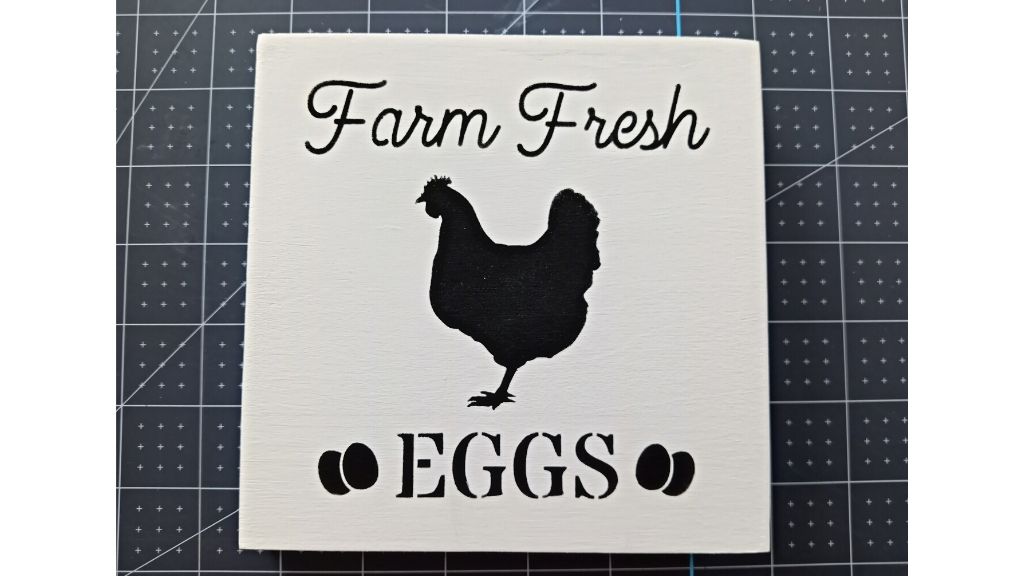
Now the sign is finished. I like to spray with a matte clear coat to protect my signs.
Have You Made Reusable Stencils with your Cricut Maker?
What kind of projects did you use your stencils with? Did you create your own designs?
If you have questions, comments, or just want to share a photo of a project, hop on over to our small but growing Facebook Group. Would love to see you there!