Silhouette Studio: The Power of Subtract and Subtract All
Silhouette Studio is a powerful, yet user-friendly software designed for crafters and professionals alike. There are a wide range of tools for creating unique designs, and among these, the Subtract and Subtract All functions are invaluable for image editing. Let’s explore how to use these features to manipulate your designs, so that you achieve the desired results.
Understanding the Basics
Before delving into some specific uses of Subtract and Subtract All, it’s important to understand their primary purposes as outlined in the Silhouette manual. Remember, you can find a PDF of your manual in the Silhouette Software. For windows users, this is found in the top drop-down menu under the Help section.
- Subtract: This option is used to remove overlapping parts of images that are in front of other images. In other words, it keeps only the image located in the back while removing the overlapping portions.
- Subtract All: This option takes it a step further by not only removing overlapping parts but also erasing any portion of an image that is located behind another image.
Now, let’s break down these functions and explore how they can be applied in your projects.
Subtract: Removing Overlapping Parts
When you have multiple images layered on top of each other, the Subtract function is handy for precisely removing parts of the front image to reveal the image beneath it. Here’s a step-by-step guide on how to use it:
- Open Your Design: Start by opening the design containing the images you want to manipulate.
- Select the Images: Click on the images you want to work with. They will be highlighted or have a bounding box around them to indicate selection.
- Access the Subtract Tool: Navigate to the “Modify” panel on the right-hand side of the Silhouette Studio program. Here, you will find the “Subtract” option.
- Click Subtract: Once you’ve selected the images, click the “Subtract” option. Silhouette Studio will remove the overlapping parts of the front image, leaving only the image located in the back.
Let’s continue!
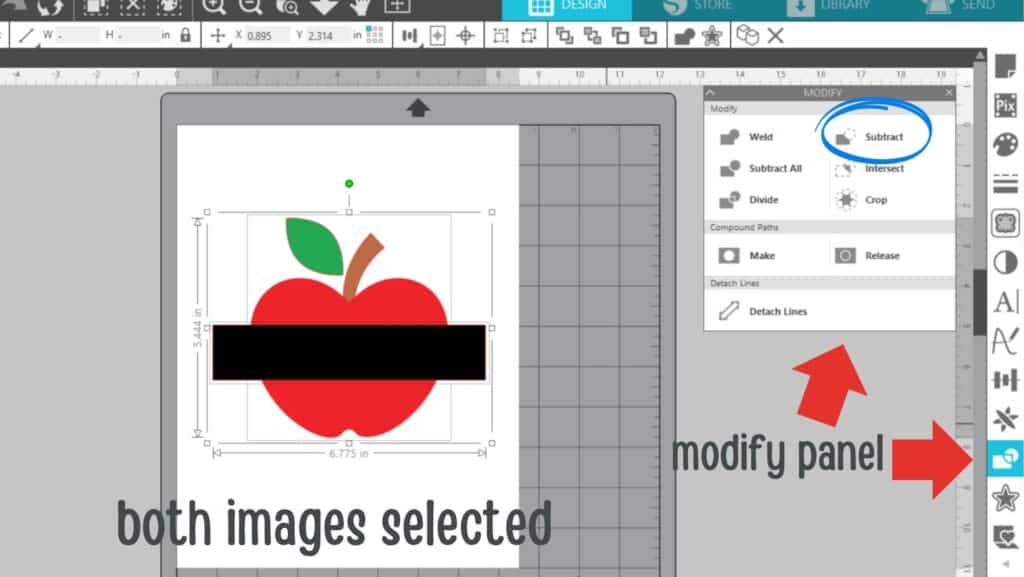
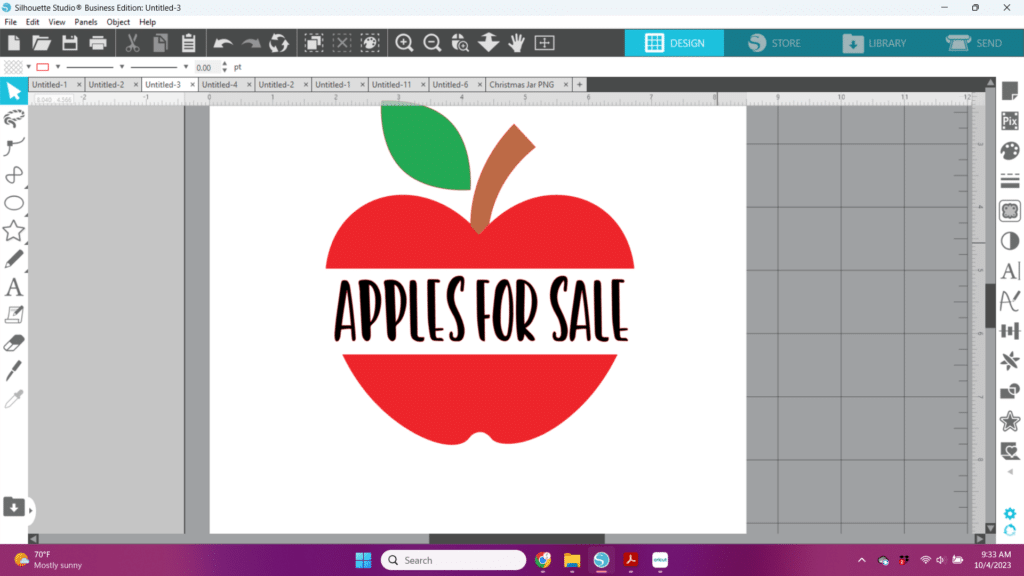
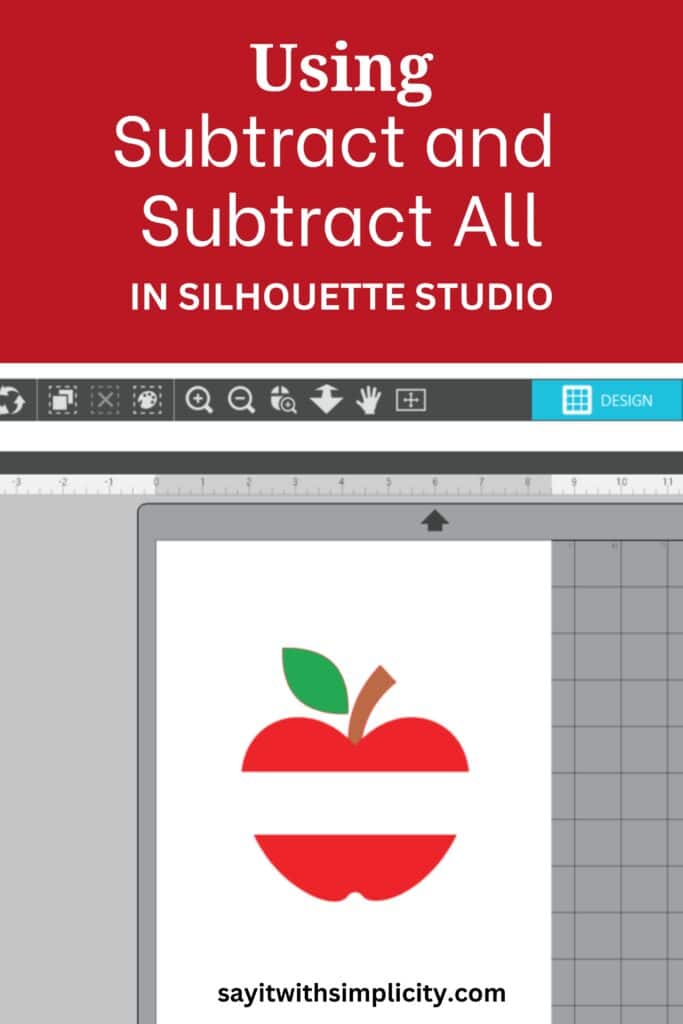
In the example below, I’ve placed a rectangle has in front of an apple image. Let’s subtract the rectangle so that we can add some text inside the apple. The subtract function works with single layers or groups, so in this case, I’ve grouped the different sections of the apple image.
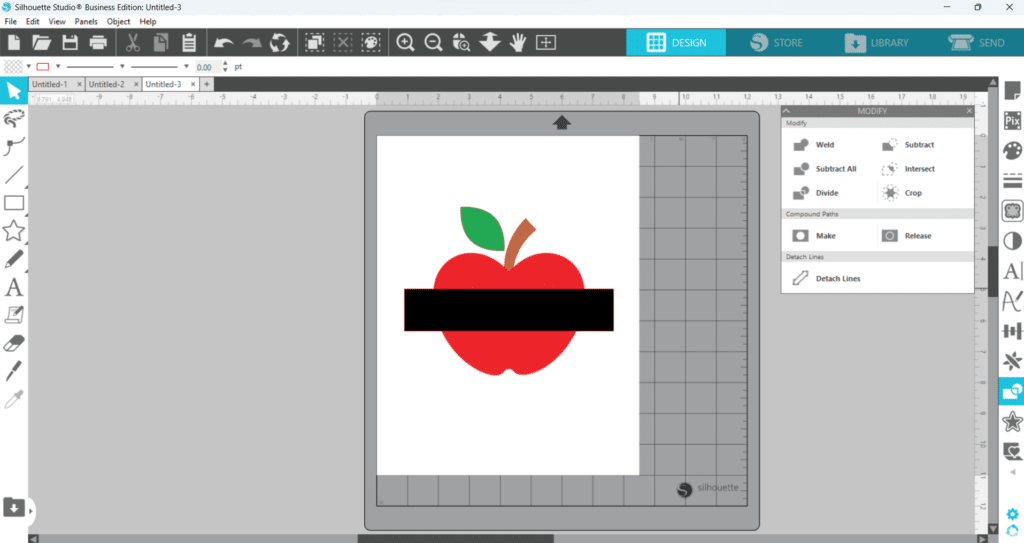
I’ll select both the rectangle (in front) and the apple (in back) and use the modify panel to subtract. This will leave me the space the insert my text inside the apple image. In following screen you can see the bounding boxes around both images indicating that they are both selected.
You Did It!
In the next screen you can see that the rectangle overlapping the apple has been subtracted. How fun! We’ve just created a unique design with the modify panel and the subtract tool.
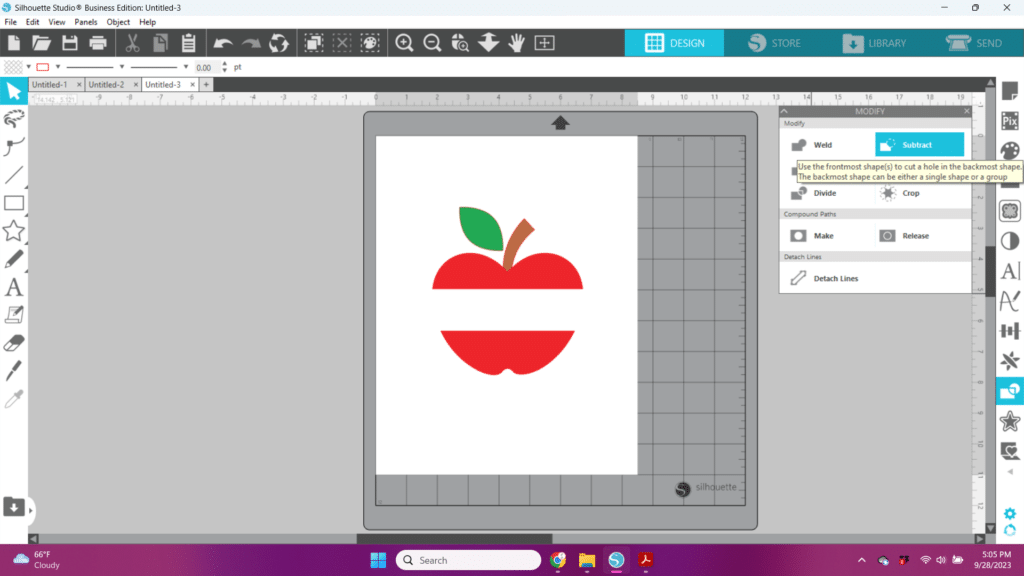
Now this area is open to insert text. You could do any number of things here. In this example I’ve simply inserted “Apples for Sale” as my text.
Subtract All: Removing Hidden Portions
The Subtract All function takes image editing to the next level by removing overlapping parts while leaving the top image in place. Here’s how to use it:
- Prepare Your Design: Start by arranging your images in the desired order, with the image you want to keep in the back and the others in front of it.
- Select All Images: Click on all the images in your design.
- Access the Subtract All Tool: Just like with Subtract, navigate to the “Modify” panel.
- Click Subtract All: Click on the “Subtract All” option. Silhouette Studio will now remove all overlapping parts and any portion of an image that is behind another image.
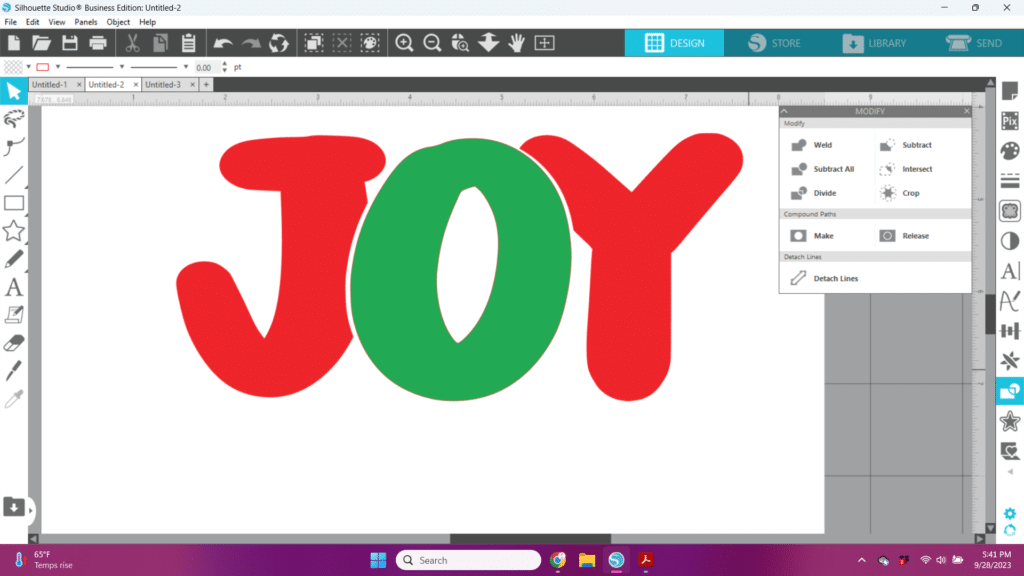
In this image I’ve used a bold font to type out the word JOY. I’ve ungrouped the letters and you can see that I’ve changed the colors so that the center “O” is different from the J and Y. I’m going to use “Subtract All” to remove the parts of the J and Y hidden behind the “O”.

I’ve completed the Subtract All function and I’ve moved the letters apart slightly so you can see the difference. The overlapping sections of the “O” have been removed from the J and Y.
One More Example of Subtract All
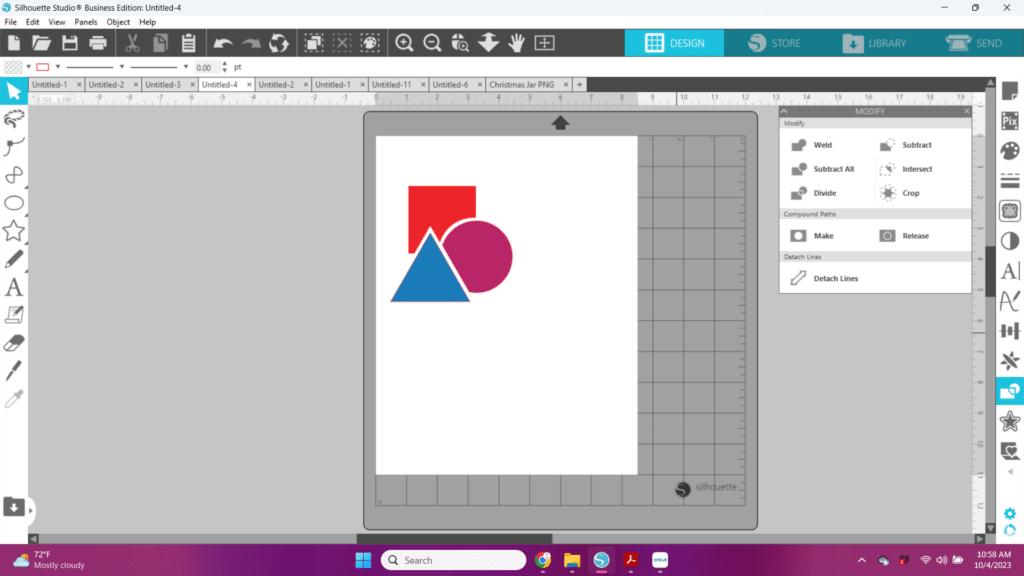
In this example I’ve placed 3 objects in my work area. If I select all the images and use the Subtract All tool, you will be able to see how the object on top controls what is removed from the one it overlaps.
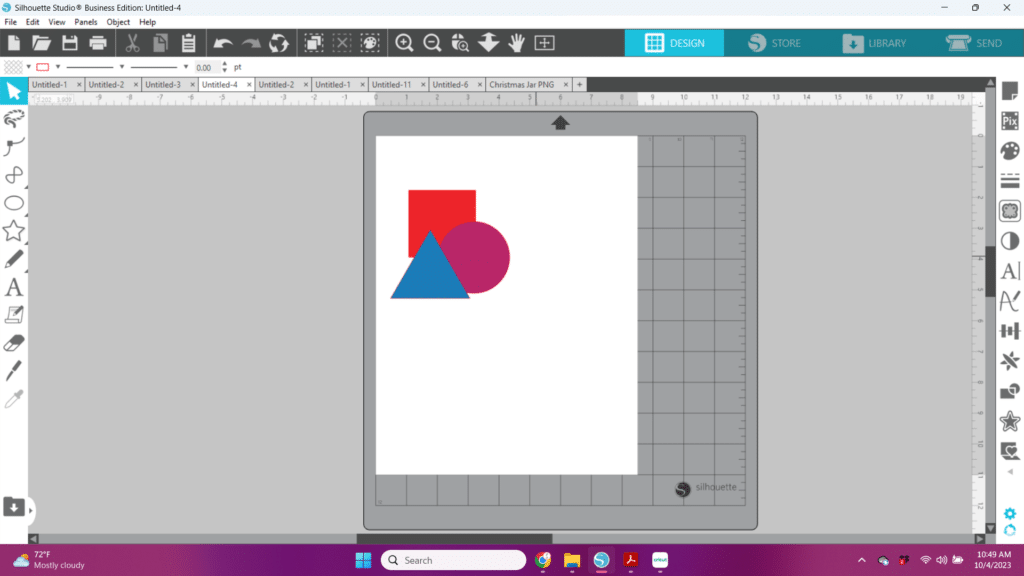
The triangle overlapped both the circle and the square and so removed areas from both of them. The overlapping portion of the circle was removed just from the square, as it was on top of the square only.
Ways to use Subtract and Subtract All in Silhouette Studio
There are some great applications for this, but I find it particularly helpful when using heat transfer vinyl. I try to avoid layering heat transfer vinyl whenever I can, and I find this method very helpful for that.
Another way I find this method useful is when I buy a design, and I want to modify it in some way. Maybe I have a 3D box, and it has a Christmas tree knock-out design. I can release the compound path, remove the tree, add a pumpkin instead. Now I have a fall design!
There are many ways to use Subtract and Subtract All. When you experiment in Silhouette Studio, you’ll find many more.
Simply Creating for Home and Family
A few years ago I helped my grandson make this “I Love Chickens” shirt. His science class had hatched out chicks for a project and it started a whole chicken and egg hobby for his family. Who can complain about fresh eggs, right?
We used the subtract technique when designing his shirt.

So now that you’ve learned about the Subtract and Subtract All function in Silhouette Studio, what ways do you think you will use it? If you have any creations you’ve made, be sure to share them in the Say It With Simplicity Facebook Group.
Silhouette Studio’s Subtract and Subtract All functions are powerful tools for image editing and design manipulation. Whether you need to remove overlapping elements or completely erase hidden portions, these features provide the flexibility you need to achieve your goals. By learning these tools, you can take your crafting and design projects to the next level. I hope you can think of ways to use these tools to create some fun and amazing designs.