S’Mores Station and Free SVG
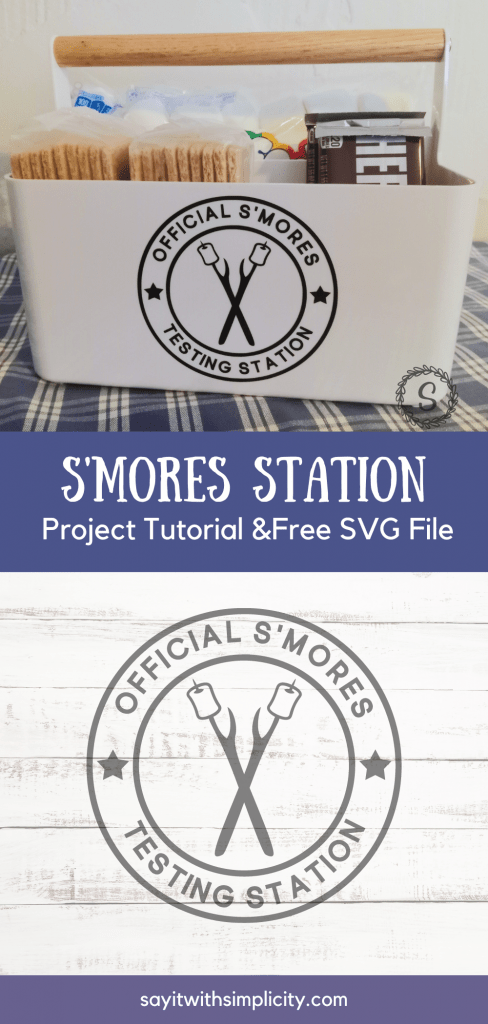
Today I have a super fun project that you can make with your Silhouette or Cricut. This S’mores Station was a quick and easy project and works great for keeping your ingredients together. Grab the whole caddy, go outside and relax by the fire.
Remember how I said quick and easy? I put together this project in well under an hour using a ready-made storage organizer. This is a sturdy little tote that will fit well on the pantry shelf. The best part is, there’s nothing to build.
Make one for yourself. Create one to give as a gift for a family member or friend.
Are you ready to get started?
This post contains affiliate links for your convenience. If you purchase after clicking on a link I earn a small commission, while you don’t pay one penny more. Read my full disclosure policy…
Here’s What You Need
- Permanent Vinyl (I used Oracal 651 in Black from Expressions Vinyl)
- Transfer Tape (I chose Expression Vinyl Clear Grid Transfer Tape)
- Plastic Portable Storage Organizer
- Scraper
- Measuring Tape
- Electronic Cutter (Silhouette, Cricut or Other Cutter)
- Cut File (See link below the post)
- Alcohol Wipe or Lint-Free Cloth
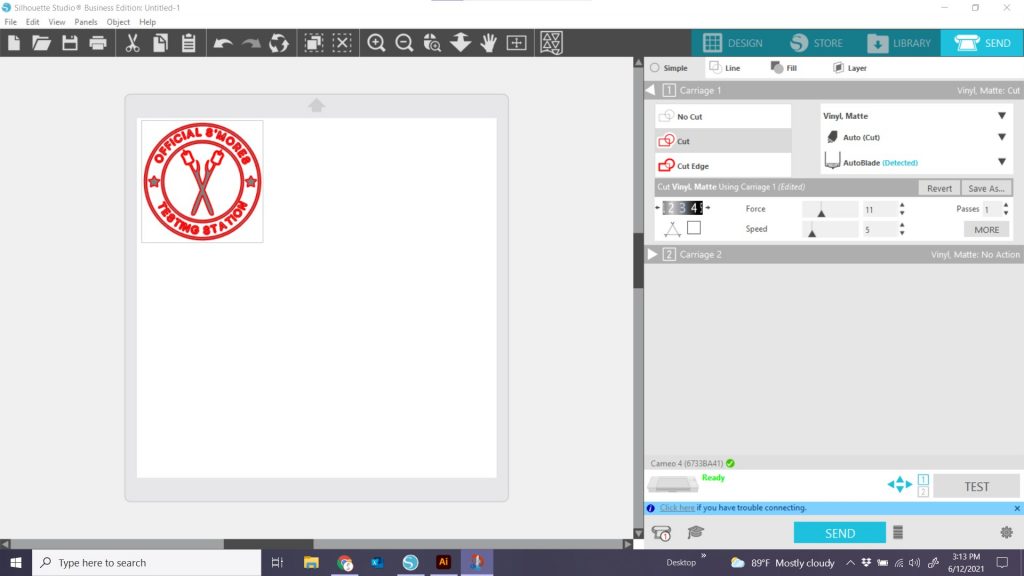
Step 1: Sizing the Design in Silhouette Studio
I wanted to be sure that I had my design size right for this project, so I did a couple of test prints before cutting my vinyl. This is a good way to take a look at your design without cutting into the vinyl. It also gives you and idea how small those sneaky little middles can be.
I used my measuring tape to measure my organizer caddy and did a couple of test prints at different sizes. My goal was to have an optimal size for weeding the design that would still fit well on the organizer caddy.
Silhouette Studio Tip:
To print your design go to your File Menu in the Upper Left Hand Corner of your screen and print as you would for other documents. You’ll get a Print Preview Screen and then tap Print.
In the end, I sized my design at 3.875 inches, which worked out perfectly for this project! In the photo below you can see the little paper template that I made to check the sizing.
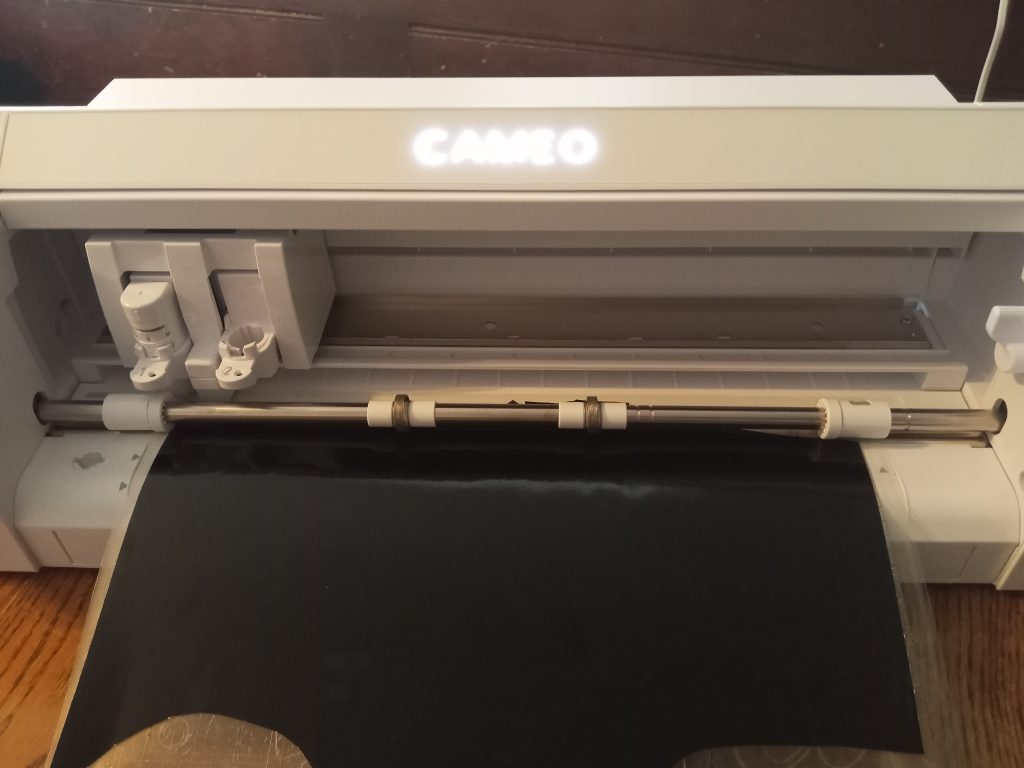
Step 2: Cutting the Oracal 651
I cut my Oracal 651 Vinyl on the mat using my Cameo 4. I’m showing my send panel in the picture below. Always remember to do a test cut with your vinyl. I have both a Cameo 3 and Cameo 4. This same vinyl cuts at totally different settings on these different machines.
I used Blade 3, Force 11, Speed 5 with the Auto Blade for this project.
I placed my vinyl on my mat and loaded it into the machine.
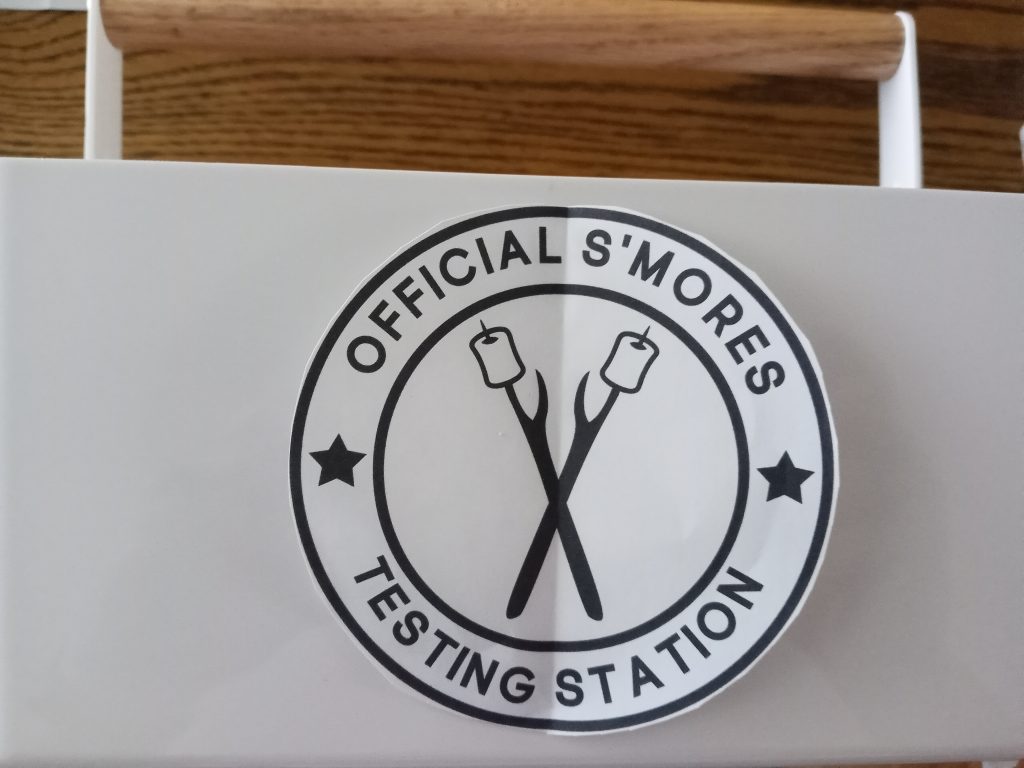
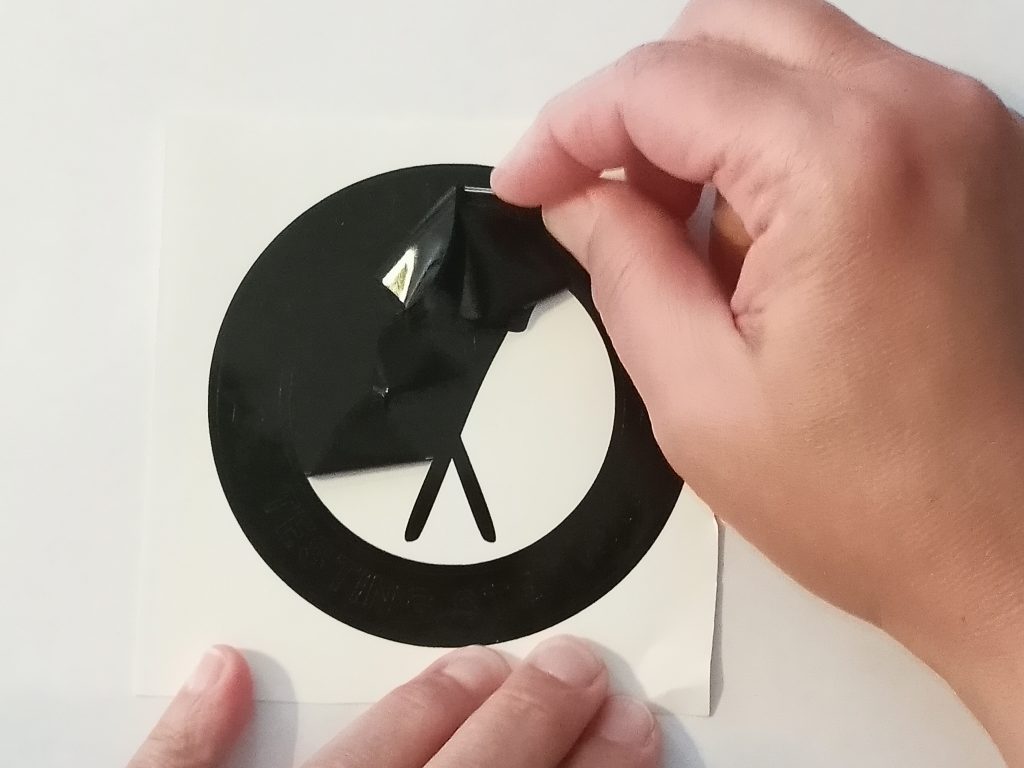
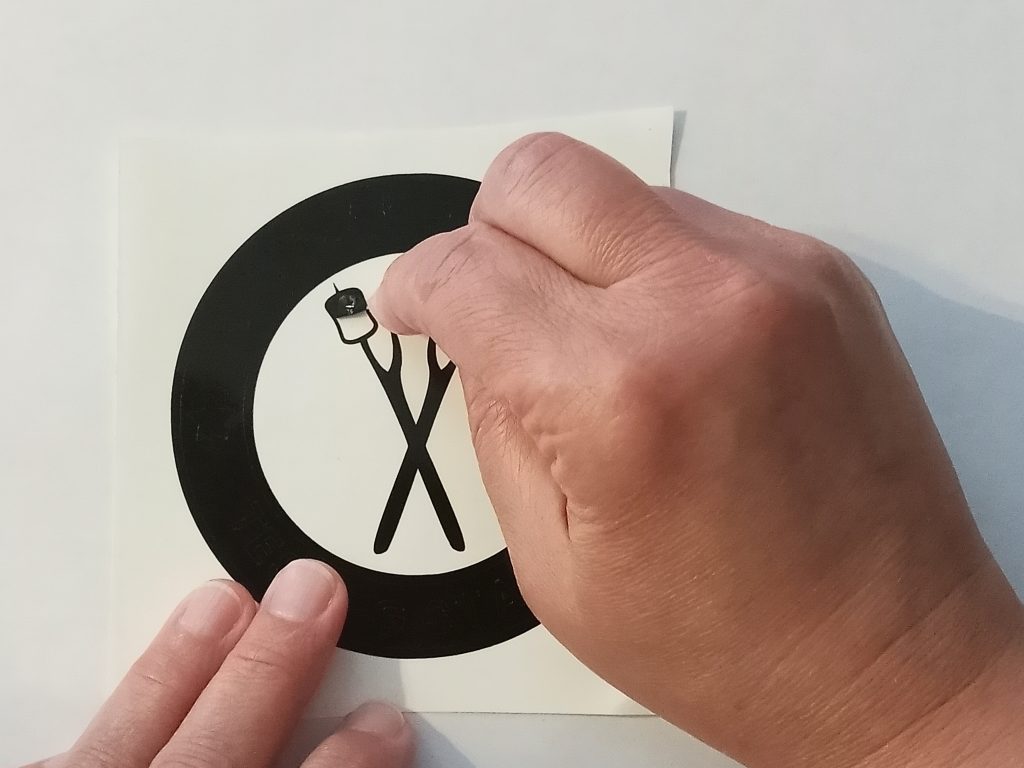
Step3: Weeding The Design
Now it’s time to weed the design. If you are a beginner to vinyl projects, with adhesive vinyl you keep all the parts that you want to transfer to your project and take away the rest.
Even though this design was small, it was very easy to weed.
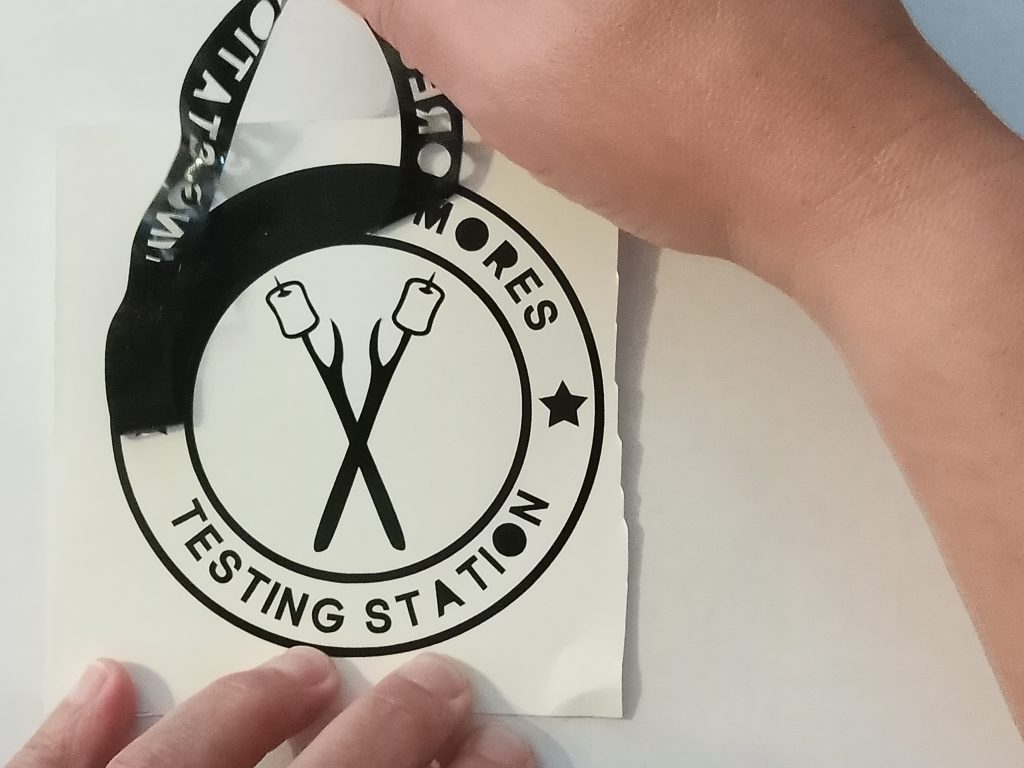
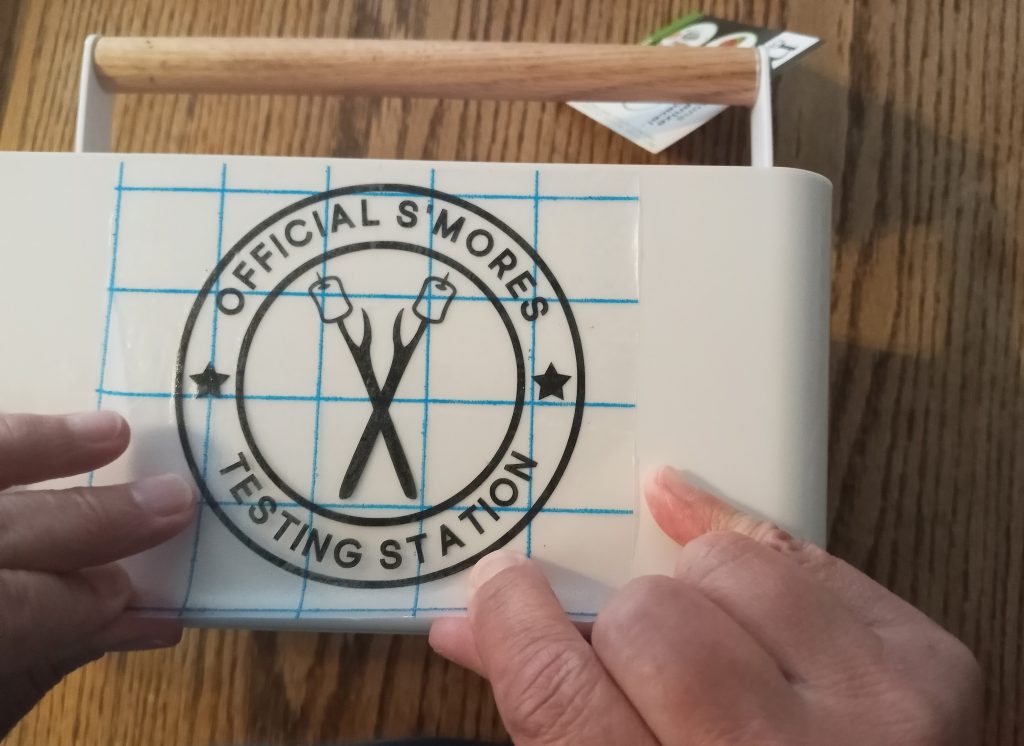
Step 4: Transferring Your S’mores Station Decal
The rest is pretty simple. Apply your transfer tape to your design…
Wipe the area you are going to place your vinyl with an alcohol wipe or lint-free cloth and let it dry completely.
Now measure your caddy to find the center so that you can line up your decal. I used a pencil to make a little mark at the top and it wiped away totally just by smudging it with my finger when I was done.
You can eyeball you placement, or you can fold your decal in half vertically and line it up with your pencil mark that you made.
Remove your backing from your vinyl. I didn’t get a photo of this part, but first I folded mine only halfway down to make sure I had good placement. Then I removed the rest and smoothed it down on the organizer.
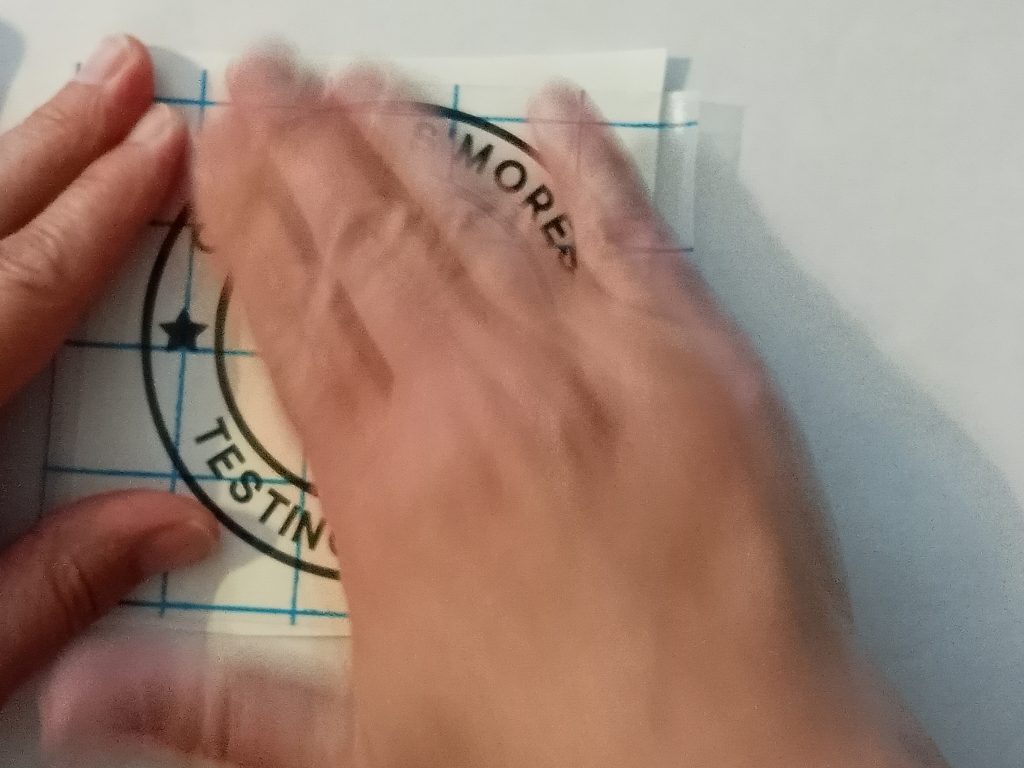
At this point you can take your scraper tool and burnish your vinyl down. The vinyl sticks very well to the plastic caddy.
Now just lift up the transfer tape. I didn’t have any trouble with the vinyl pulling up when I removed the transfer tape. The vinyl decal is there to stay!

If you wash your caddy, I recommend washing it by hand with mild soap and water. The instructions say not to put the organizer caddy in the dishwasher.
Will you be giving away or selling your S’mores Station?
If so, you might consider creating a little care tag. This is a great project to do with Silhouette Studio or Cricut Design Space and could be done as a print and cut.
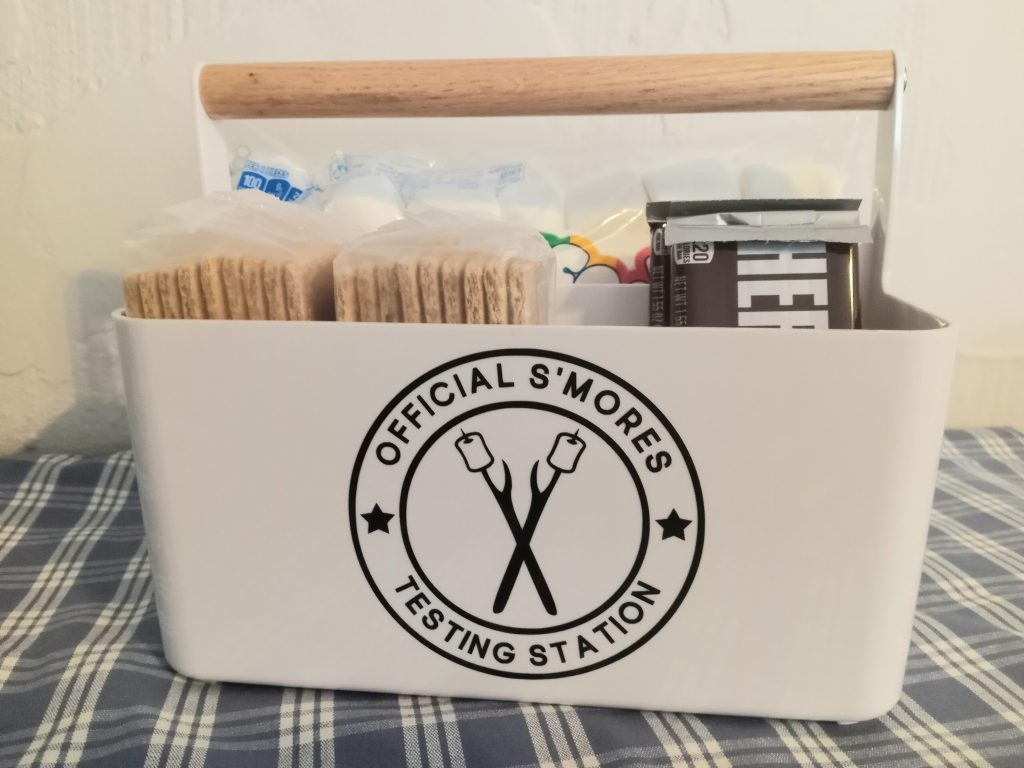
The S’mores Station is Ready to Use
Now it’s finished and ready to be loaded up with the s’mores goodies. Three packages of crackers will fit side by side with chocolate bars on the end. The organizer is divided and the marshmallows fit perfectly in the back part of the unit. Already to grab and go!
Get the Free Limited Time SVG
Would you like to the the SVG for this project?
The button below will take you to the download page. If you make this project, I’d love to see you share it in my Facebook group. If you haven’t joined the Facebook group, you can find it right HERE.
I hope you’re having and enjoyable summer. Be sure to throw in some fun projects for your home and family!