Creating Signs from Scrap Wood
[disclosure]
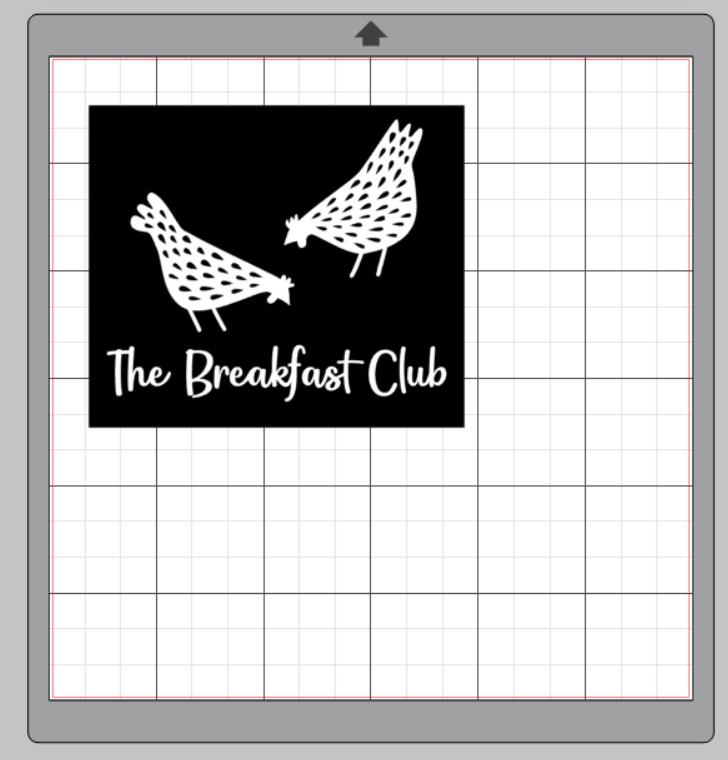
The Breakfast Club Wood Sign
When I saw these chicken images in the Silhouette Store, I knew that I needed to use them on a project. I had them in my library a long time until one day when I was hunting through my scrap pile of wood and came up with a perfect plan…”The Breakfast Club” wood sign.
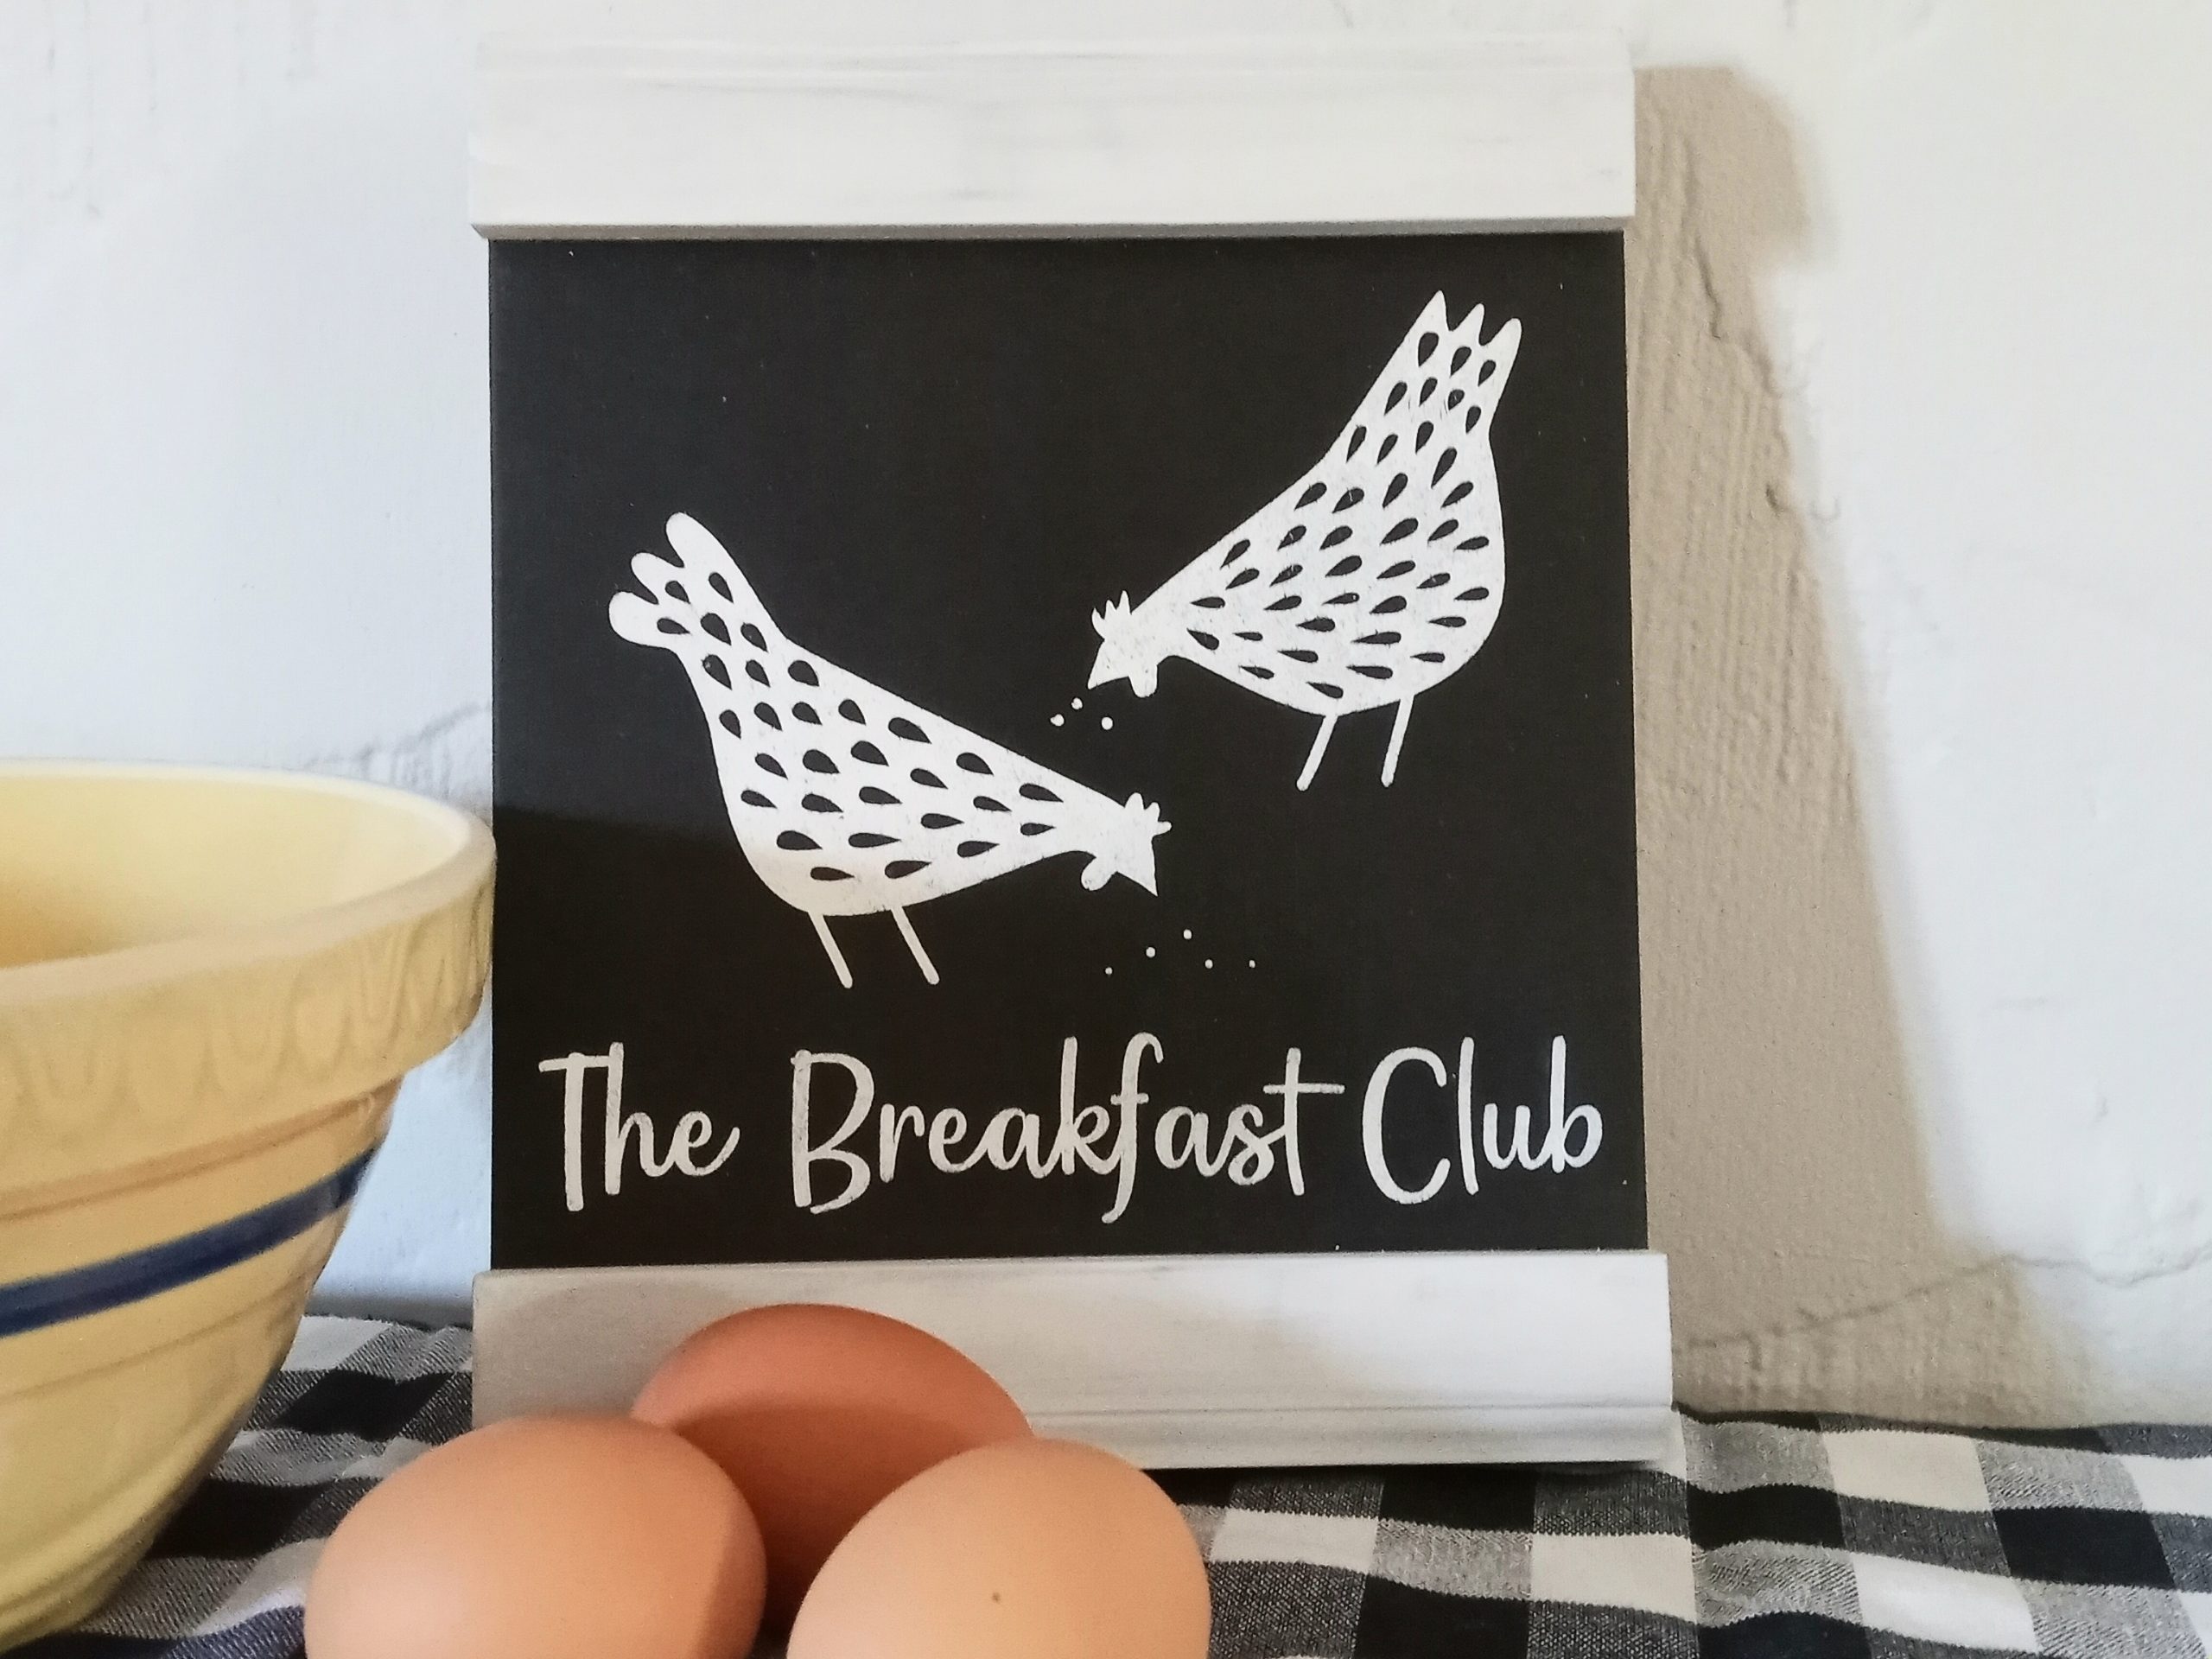
I also had some window stop trim leftover from a recent remodel of our son’s room and I wondered if it would work to sort of frame out the sign, so I went to work.
This post contains affiliate links. As an Amazon Associate, I earn from qualifying purchases. I only link to products that I use and highly recommend.
The piece of scrap I had was just 9 inches tall, but 7 inches wide. I painted this with Waverly Chalk paint in the color “Ink” and let this dry over night.
Waverly White Chalk paint was used for the trim and I did a dry brush with a little Dixie Belle in the color Manatee which is a gray color. I wanted the trim to have a little bit of a distressed look.
The area where I would be painting would only be about 6 inches tall once I added the trims. I created an area in Silhouette Studio where I would put my images and text for my stencil.
The Font for this Wood Sign
The font I used is the Astronauta Script from Creative Fabrica.
Cutting The Vinyl Stencil
I cut the vinyl stencil using my Silhouette Cameo. The stencil material I used was the Avery Yellow Paint Mask Stencil Film that I order from MI Vinyl World. This is my favorite stencil vinyl and worked perfectly for the little chickens with all their detail.
Use this link to get a $10 coupon for MI Vinyl World.
Before transferring the stencil, I lightly marked with a pencil, the edges of where the wood trim would go by sort of test fitting the trim to the sign. I didn’t want to attach it until I was finished with the painting.
After the stencil was weeded, I transferred it to the wood using my Transfer Rite transfer film. I love this film. It’s a medium tack, so it isn’t a fight to remove it once the vinyl is placed. I can use a piece over and over again. It has a grid so it works well for alignment. Plus a roll of it lasts a LONG time.
Next I stenciled with Waverly White Chalk Paint using a stencil brush, then removed the stencil.
Attaching the Trim
I cut the trim using my power miter saw and then sanded and touched up the ends. Using Gorilla Wood Glue Gel I attached the trim to the sign on the top and bottom.
I did my best to line this up with the edges. You have a little time to do this with the wood glue gel. Once you have it in place, you want to hold it firmly in place for about 45 seconds while it sets. It has a really strong hold and I think it will stay without having to add brads or nails. Be sure to let it cure for a full 24 hours before using your sign.
I sprayed my sign a couple of times with Chalked Clear Matte Spray, letting it dry between coats. When using chalk paint, you should always apply a clear coat to your signs. This could be a wax or clear spray. I like the clear spray because it’s quick easy and has a matte finish.
Add a sawtooth hanger to the back and you’re all set!
What Do You Think of Creating Signs with Scrap Wood?
Do you have some small pieces sitting in your garage or shed. Sometimes you have to think outside the box and the perfect project comes together. We have a vendor booth where we sell signs, so grabbing that extra little piece of wood and doing something might be totally worth it!
Remember the little Bee Happy Sign? This was one of the first signs I sold when I first opened my booth and it was just a tiny little sign that could be made with a scrap piece of wood.
I love how the scrap wood “The Breakfast Club” sign turned out. I hope you do too!
Keep creating and keep having fun with your cutting machine. We’ll see you next time!