DIY Easy Wood Tag
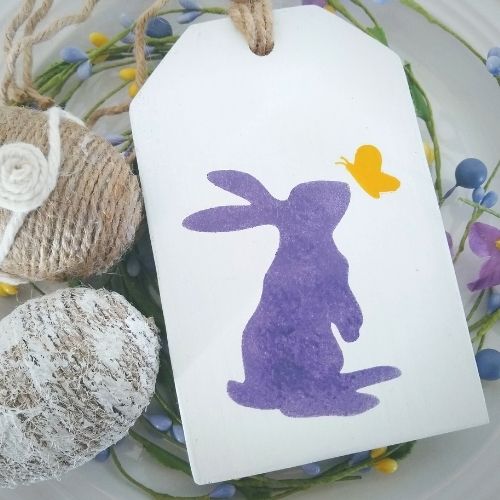
Create easy wood tags for your tiered tray or for a seasonal centerpiece from stock lumber. Today I’m making an Easter Themed wood tag in bright colors.
*This post contains affiliate links. If you make a purchase, I may make a small commission at no additional cost to you. As an Amazon Associate, I earn from qualifying purchases.
To create this easy wood tag, I purchased a 1″x 4″ at a local home improvement store and cut several tags from it. When looking at the overall dimensions, keep in mind that a 4″ lumber is actually 3 1/2 inches wide.
I cut these on my power miter saw, but you could cut these with a simple miter box. Here is a diagram of how I cut my tags. I’m not a professional wood pattern designer, but I hope this helps to visualize my process as you make your own.
Cutting the Wood

I drilled a 5/16 inch hole in the top of my tag with a drill press for adding twine later on.
Paint The Wood Tag
Now you can paint these tags in your favorite colors and themes and stencil them with your favorite designs for any season of the year. Chalk paints work really well, but you can use whatever paints you have.
You could also make a vinyl decal with your cutting machine. If using a vinyl decal be sure your surface is smooth and free of anything that would hinder your vinyl from adhering well.
For my Easter-themed easy wood tag, I used THIS SVG from my Free SVG Library. I simply ungrouped and left off the text.
Creating a Re-Usable Stencil in Cricut Design Space
Using reusable stencils makes it easy to repeat your work if you are making multiple copies of a project. You could alternatively make a vinyl stencil. I like to use Oracal 631 when making re-usable stencils. I’m including my process and settings here for my reusable stencil.
I created a reusable stencil in Cricut Design Space with my image simply by making a rectangle around my image that was the width of my lumber, 3 1/2 inches, and then about 4 inches tall. Use the “Attach” function to keep your images together when they go to be cut.
Using the Cricut Maker, the stencil was cut from 5 mil Mylar on the poster board setting. Be sure to test your machine cut settings so that you don’t waste any material.
I was super amazed at how well my Maker cut the detail on the butterfly antennae.
I used painters tape to temporarily hold down my stencil and then used a stencil brush to stencil my images.
My advice for crisp lines is dabbing some of the paint off your brush and using light pouncing motions. Fill in gradually and you should get a neat crisp line. Too much paint and you’ll get bleed under your stencil.
When finished I threaded some heavy jute cord through the top. All I had was 6mm jute, so I would recommend a lighter one, probably a 4mm. I just unraveled mine and removed some of the strands. It still turned out great.
I love these bright colors, but you could use neutrals or your favorites to match you décor.
That’s it for today. I hope you’ll create some tags of your own. If you have any questions or comments, I’d love to hear from you.
Have a great day!