Crafting Musical Elegance: DIY Musical Rosette Poinsettia Gift Tag
With the holiday season just around the corner, it’s the perfect time to add a personal touch to your gift-giving. Get ready to embark on a delightful DIY project that combines the grace of a poinsettia with a touch of musical charm. This “Festive Musical Rosette Poinsettia Gift Tag” is bound to leave a lasting impression.
This blog post contains affiliate links, and we may earn a commission if you make a purchase through these links. We want to be transparent with our readers about our affiliate relationships and the products we recommend in this DIY project. These commissions help support the time and effort we put into creating content, and they come at no extra cost to you.
The neat thing about this project is, most of the work is done for you as this is a project I shared on my profile in Cricut Design Space.

How to Create Your Own Festive Gift Tag
Step 1: Gather Your Materials
Before you dive into this creative project, ensure you have all the necessary materials at your disposal. Each component contributes its unique charm to the final product.
We will be cutting all the pieces that are in the shared project in Cricut Design Space. Use colors that you have in your stash of paper and cardstock.
I purchase much of my cardstock from Joann Fabric and Crafts. For the “Print Then Cut” I used a 28lb premium inkjet paper in my HP Envy Printer. The 28lb paper is great is it scores and cuts beautifully without being to weighty to create the rosette. For the white flags I used scraps of my favorite Neenah 110 lb white cardstock.
These pieces include:
- 6 pieces for the rosette (This is set up as a print and cut)
- Circle for backing of rosette (shown in black)
- Gold foil circle for front of rosette
- Red circle for framing of Gold circle
- Musical note x3 (Layer these to create one image)
- White flag pieces (You’ll want to edit the writing to meet your needs. Be sure it is “attached” before sending to your machine.)
- Poinsettia, Leaves, Poinsettia Center
Materials for your DIY Musical Rosette Gift Tag:
- Cardstock in choice of colors and textures
- Premium white inkjet paper for print and cut
- Cricut Standard Grip Mat
- Cricut Light Grip Mat
- Walnut Stain Distress Ink
- Antique Linen Distress Ink
- Double sided adhesive tape
- Liquid Adhesive
Step 1: Frame the Foil Circle
Frame the foil circle by placing it on top of the red cardstock circle. Use a good liquid adhesive to assemble all the layers of this project. I like to use Bearly Art Glue. This is a strong adhesive that doesn’t warp. It comes with various tips for better flow control.
Step 2: Musical Rosette
The centerpiece of your creation is the musical instrument print used to create the rosette, conveniently found inside Cricut Design Space. This is found in the “Print Then Cut” options, under patterns. I’ve already chosen an antique look musical instruments print for this project. I also moved the score lines to the back of the image so they do not print on top of your rosette. While you don’t see them, they will still score. You will need your scoring wheel for best results.
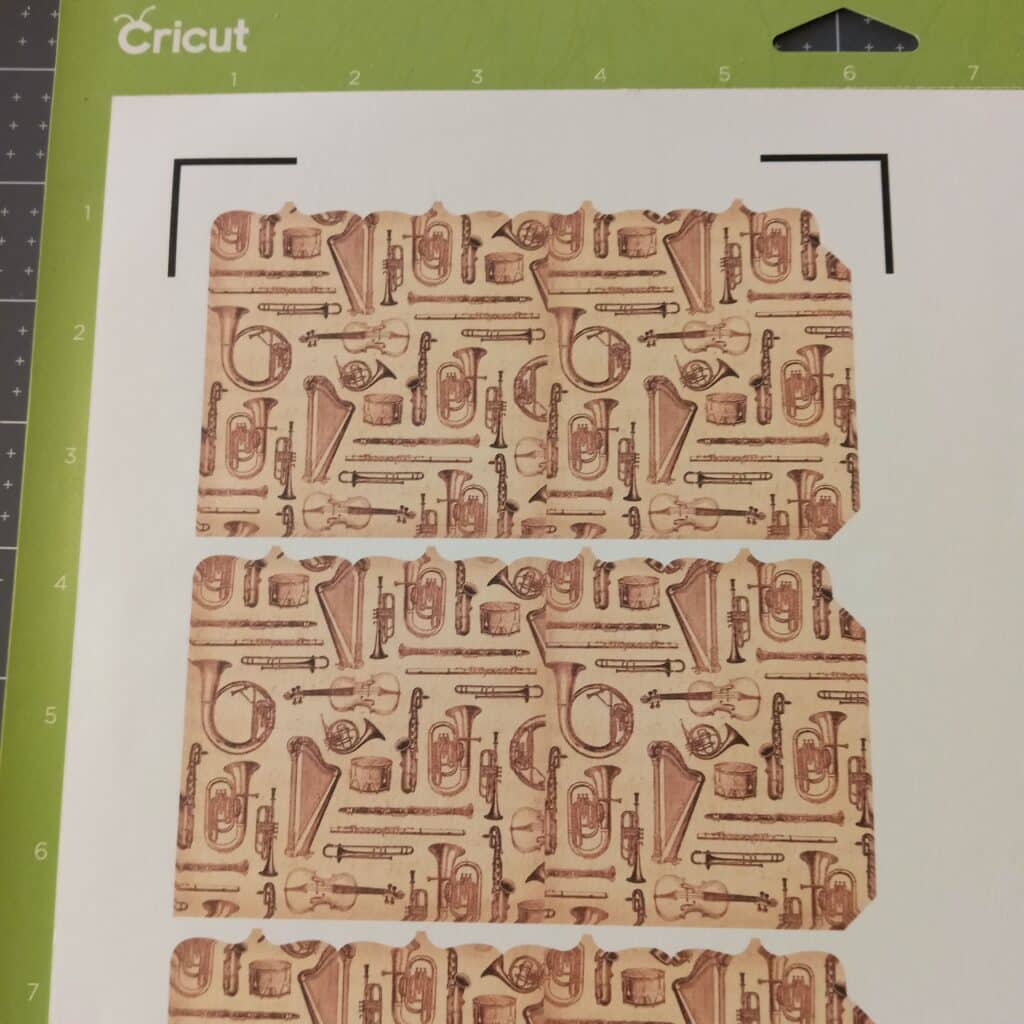
For a textured and antique look, gently apply walnut distress ink to the tops of the creases and to the edges. This Print Then Cut already has an antique look, but this Walnut Distress Ink brings it out even more. My sons gave me a pack of these small distress inks for my birthday and I love this set from Scrapbook.com.
Use an adhesive tape to tape the sections of you rosette together. Put the flap under the next section as you go along.
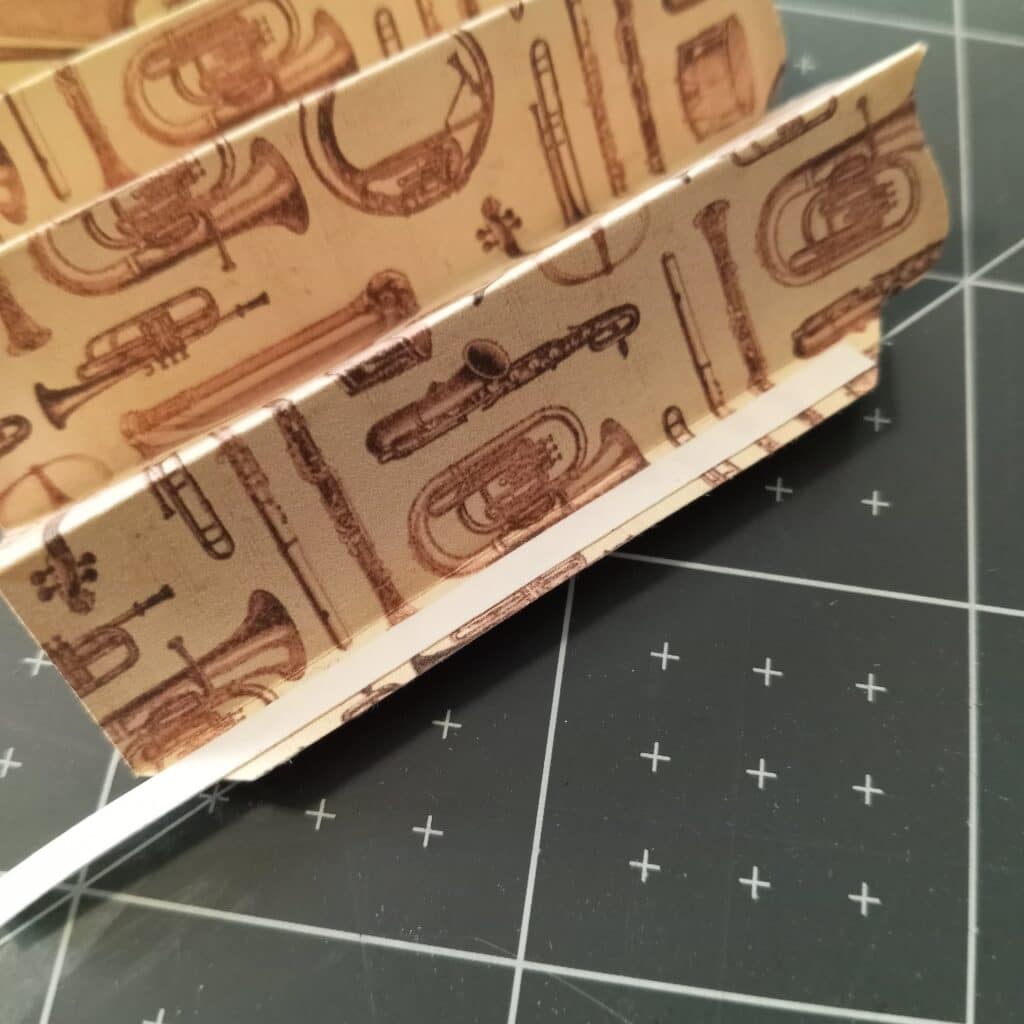
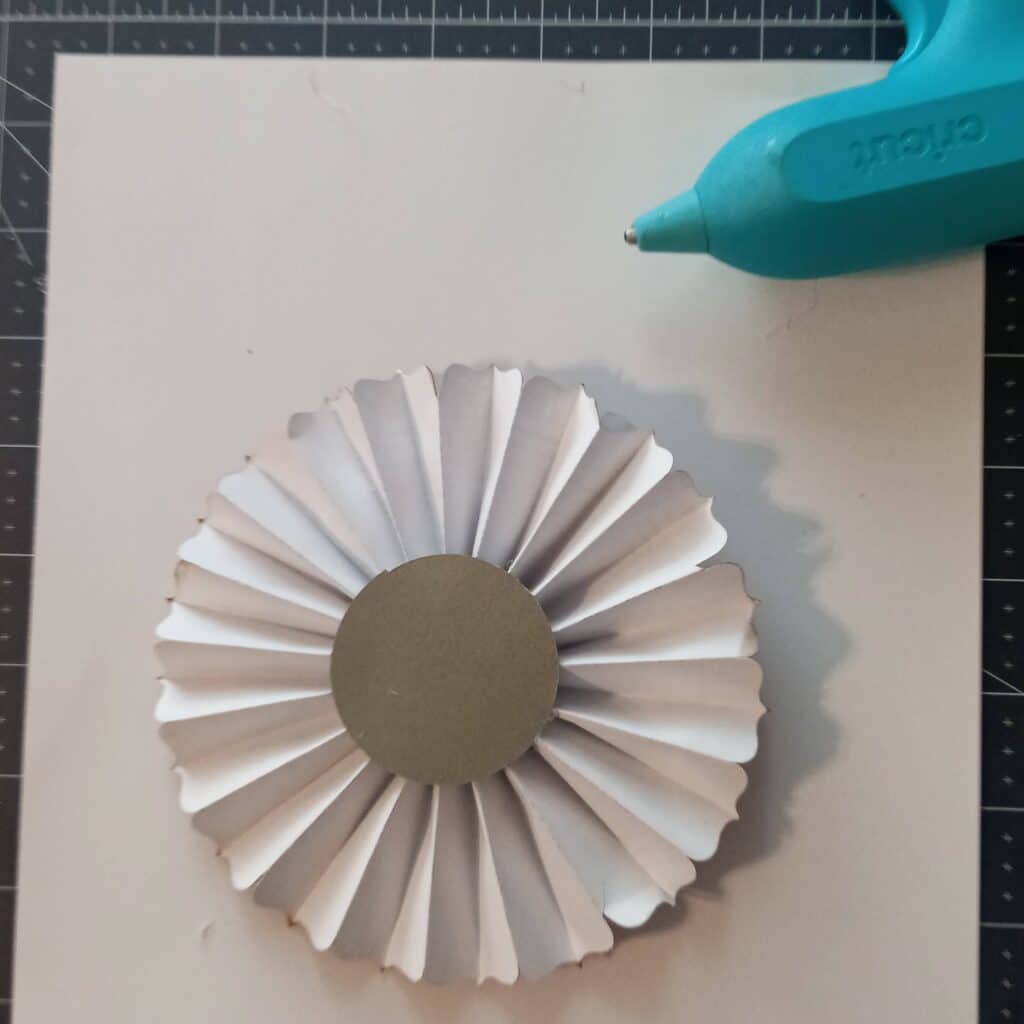
Once you have all the sections of the rosette adhered together, you’ll want to press it down. Then bring everything toward the center. From the back, I added hot glue and used a cardstock circle to hold the folds in place.
Step 3: Poinsettia Perfection
For the poinsettia, I cut out red cardstock with gold foil cardstock for the center. Cut out the leaves that go with the poinsettia. You could create a white or pink poinsettia. This is totally up to you!
This is a small and easy to assemble piece. I paired it with the musical note for a festive touch.
Step 4: Adding the Musical Note
Next I took the three copies of the musical note that were cut from black cardstock and glued them together for more dimension. You could pop the entire image up on foam tape for even more dimension. Place the black musical note alongside the poinsettia to complete the ensemble. This subtle grouping will make your tag truly stand out.
Step 5: Personalization for your Musical Rosette Gift Tag
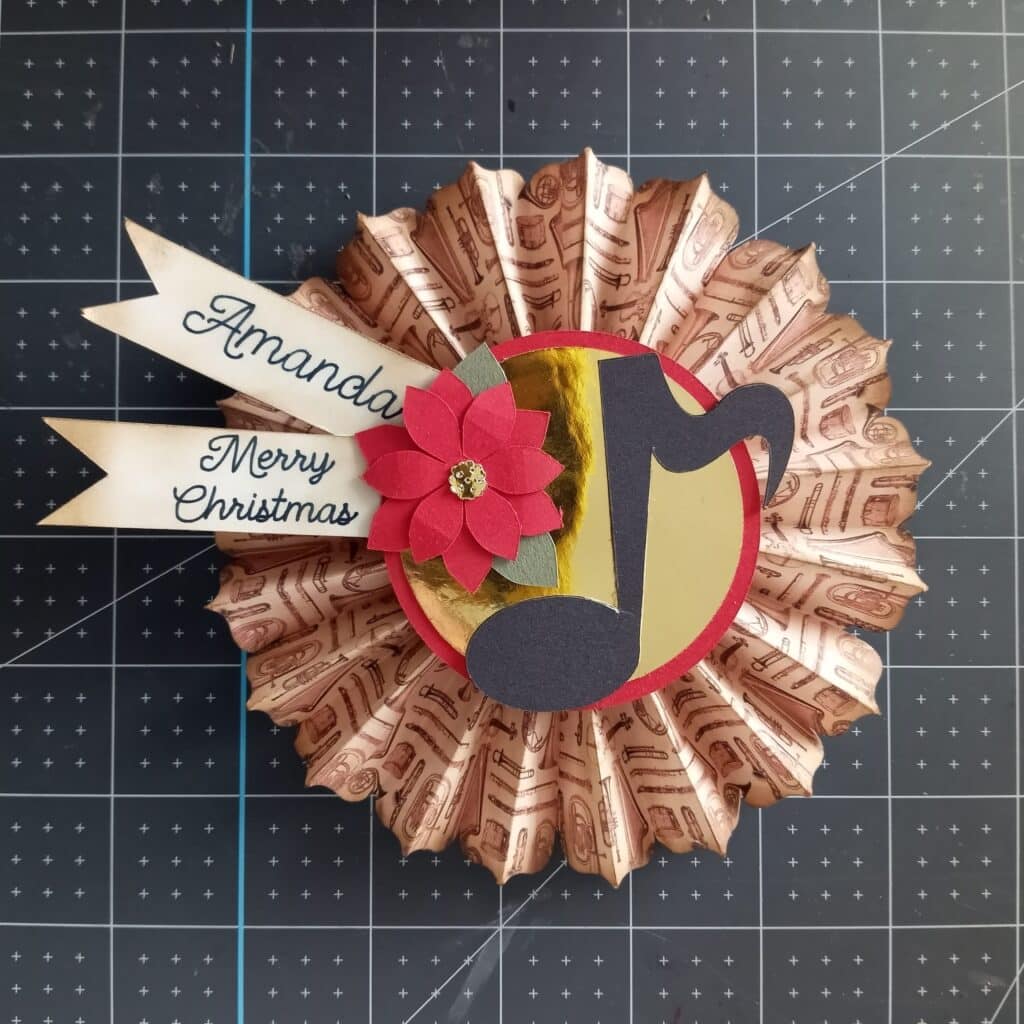
Remember, personalization makes any project extra special. Add the recipient’s name and the heartwarming message “Merry Christmas” using two flagged pieces. Tuck them under the circle, near the poinsettia and use a liquid adhesive to adhere them.
Step 6: Finish the Assembly and Admire
Your tag is complete! The foil gold circle and red cardstock poinsettia create a visually pleasing contrast with the musical rosette. The result is a unique and beautiful gift tag.
Share Christmas Joy with Your Musical Rosette Gift Tag
Now that you’ve crafted your Festive Musical Rosette Poinsettia Gift Tag, it’s time to share your creativity with the world. Share photos of your project on social media and inspire others to add a personal touch to their holiday gifts.
Remember, it’s the personal touches that make the holiday season special. Your handmade gift tag will convey your thoughtfulness to your loved ones. So, go ahead and craft your musical elegance this holiday season and share your creations with pride.
Happy crafting, and may your holiday season be blessed with music and joy!
Gift Tags with Free Elements in Design Space
Easy Gift Tags with Heat Transfer Vinyl
Cardboard Gift Tag with Cricut Maker