Customized Gift Bag with Adhesive Vinyl
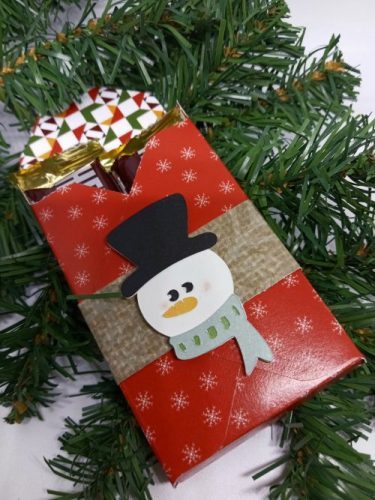
Hello Friends! Welcome back. Do you ever feel that finding the right gift wrap is almost more difficult than buying the gift? Maybe you created a really sweet handmade gift, but don’t have gift wrap or a gift bag for it. Today I’m sharing inspiration for turning a blank Dollar Tree Bag into a customized Christmas gift bag using adhesive vinyl.
Creating personalized and customized gift bags and gift wraps with your cutting machine can be really fun! The possibilities are endless. Imagine having a stash of plain bags or wrap and being able to turn it into something unique and special.
I don’t know about you, but I reuse many of the gift bags that I get. No doubt your work will be admired and maybe even passed along!
What You’ll Need for Your Customized Gift Bag
- Paper Gift Bag with Blank or Neutral Background
- Adhesive Vinyl (great way to use up scraps)
- Your Silhouette Cameo, Cricut or another cutting machine
- Cutting Mat
- Images or SVG files (You may even be able to design your own)
- Weeding tool, scissors, scraper, ruler, tweezers Link to the set I use all the time
- Transfer Paper or Tape
- Parchement Paper (optional)
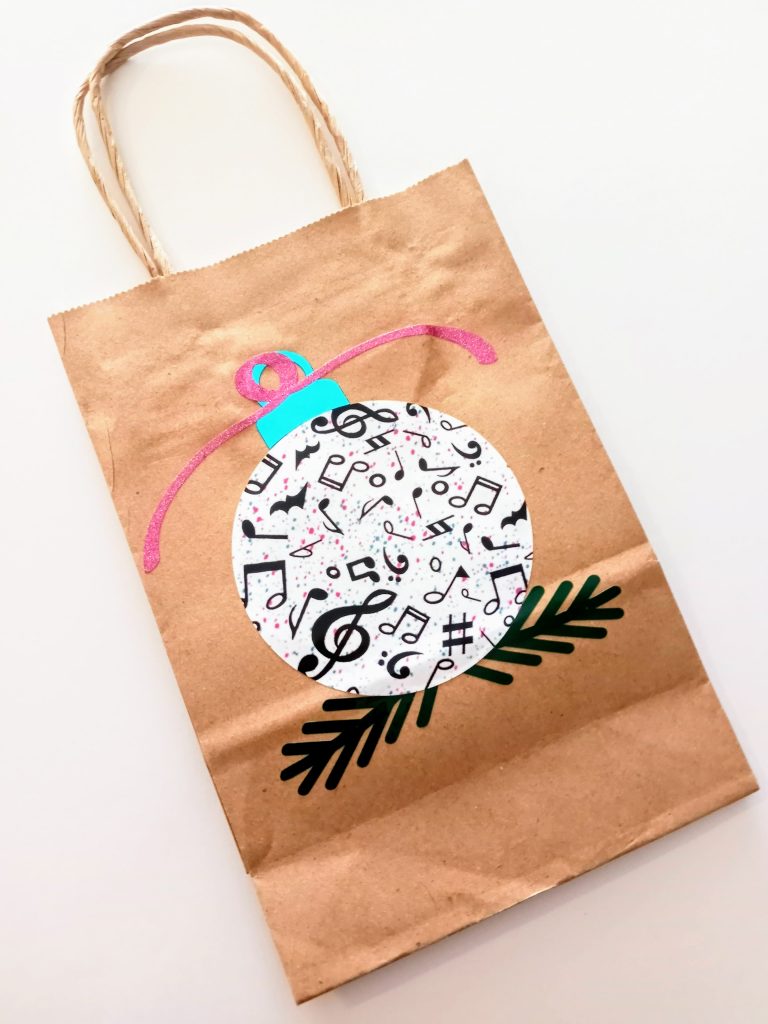
My gift bag was for a special music lover and I grabbed some adhesive vinyl from my May Mystery Box from Expressions Vinyl. This had some patterned vinyl called “Musically Inclined” that I used for the main part of my ornament and some “Pink Flirt” glitter vinyl that I used for the ribbon. The ornament hanger and evergreens were cut from other permanent vinyl that I had in my stash.
You could also use heat transfer vinyl for this project. Check out my previous post Easy Gift Tags with Heat Transfer Vinyl.
Quick Transfer Tape Trick
I cut my images on my Silhouette Cameo and transferred them to my bag using Expressions Vinyl Gridlined Paper Transfer Tape. I find this Transfer Tape to be less sticky than the clear transfer material. But there is a trick to removing some of the stickiness ahead of time.
Simply place sticky side down on a piece of fabric (a clean flour sack towel works) and remove it. Do this a couple of times and your transfer material won’t be as tacky as it was when you removed it from the roll.
Making Your Customized Gift Bag
If you’re used to working with adhesive vinyl, then this gift bag is going to be super easy. The main thing to keep in mind is to keep the images simple and be sure that your transfer tape is not so sticky that it tears the bag.
With simple images, you may not even need transfer tape. You may be able to place it like you would a sticker on the bag.
For more complex or layered images you may want to learn the parchment paper method of layering and transfering vinyl designs.
If you are a member of Creative Fabrica, you may want to check out the class by Corinne Blackstone on How to Layer Vinyl Designs the Easy Way. I truly can’t say enough about this presentation. It’s the best! Plus Creative Fabrica is a great resource for fonts, SVG files, sublimation designs, printables, patterns and more!
SVG File for This Gift Bag
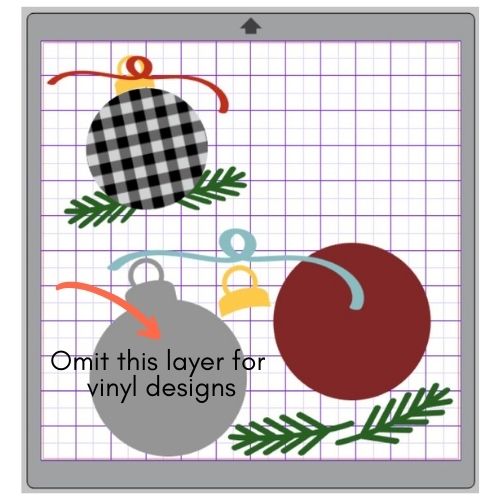
I’ve created an ornament SVG that I used for this gift bag. Patterned vinyl works great with this design. You could also create gift tags, greeting cards and other products with this SVG.
For the gift bag you will not need the back layer of this image. I designed this layer to be used with cardstock cuts. Ungroup the images before cutting.
I hope this post will provide some inspiration for creating your own gift bag with vinyl from your craft stash. I’d love to see your creations! Feel free to share them on the Say It With Simplicity Facebook group. See you next time!

Disclosure: I am an affiliate for a the links provided above as well as an Amazon Associate. I earn from qualifying purchases and it does not cost you anything extra.
Thank you for supporting and sharing my content and the Free SVG files that I create.