How to Use Attach in Cricut Design Space
It comes as a surprise to many people when they have a nicely lined up project in Cricut Design Space, they group their images or use a grouped image and they hit the Make It button.
These images were once nicely lined up….
Now they look like this when sent to your mat. If you are a new Cricut user this may be confusing. What happened?
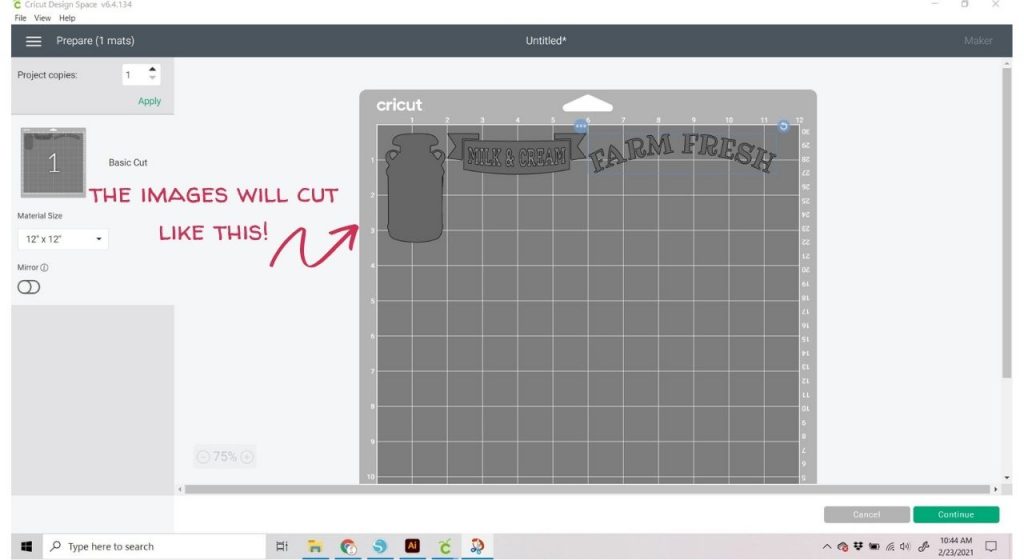
Cricut Design Space wants to save you material, so it nests them for cutting. This is a great feature, but how do you fix it if you want it to cut as one image?
In this tutorial we’re going to talking about using “Attach” in Cricut Design Space.
Using the Attach Tool
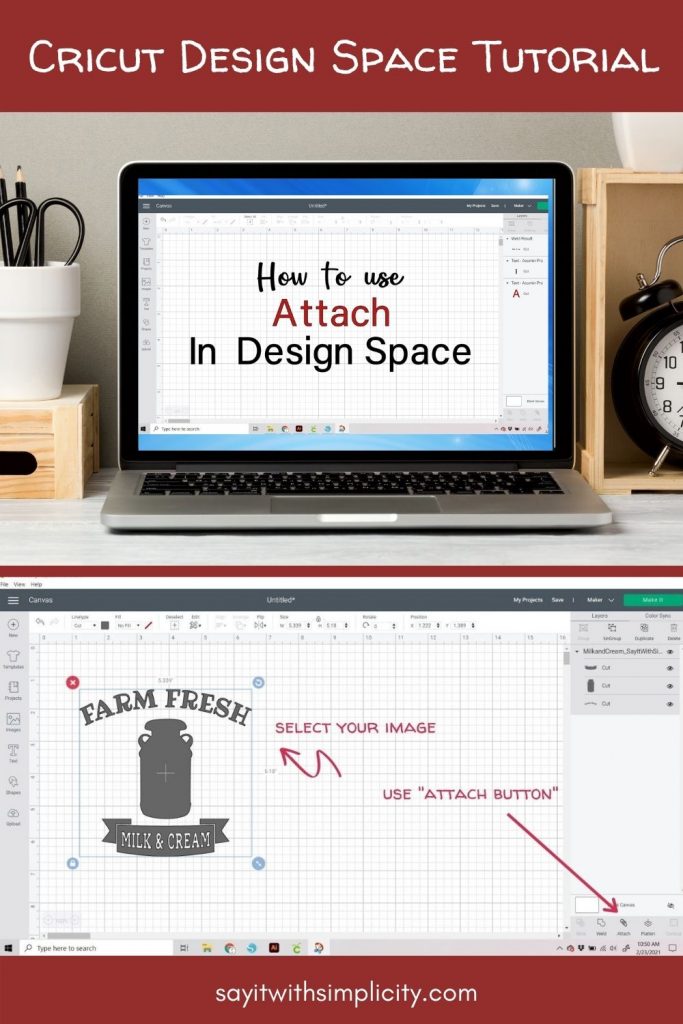
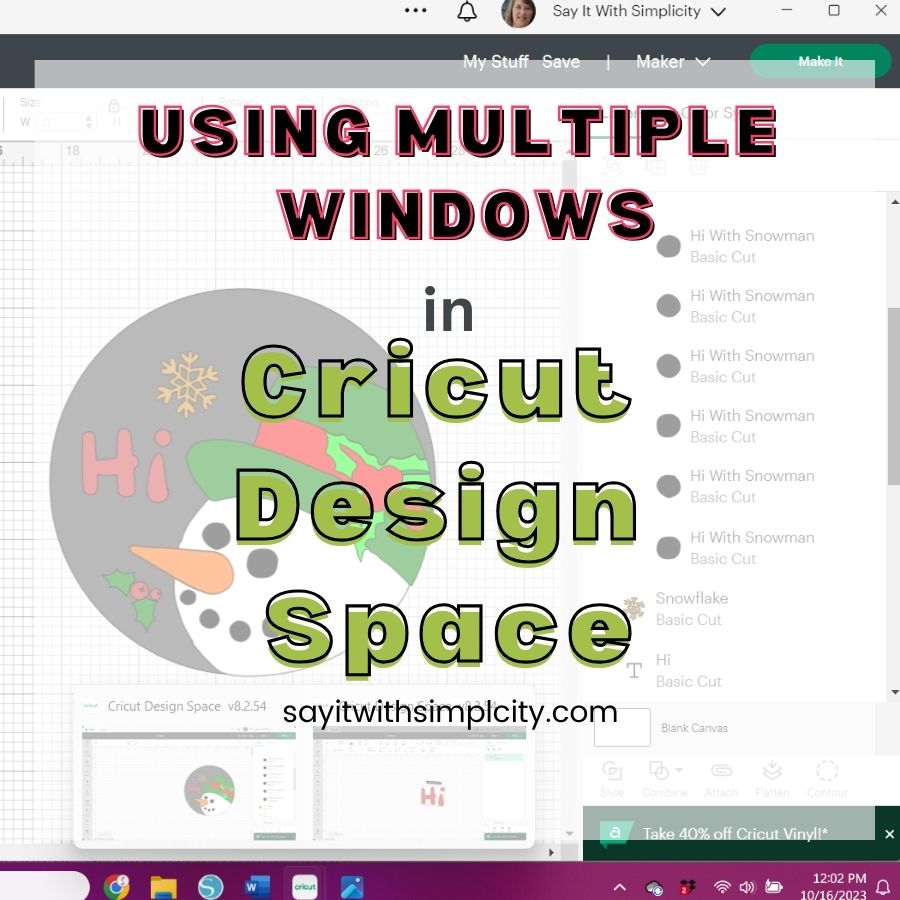
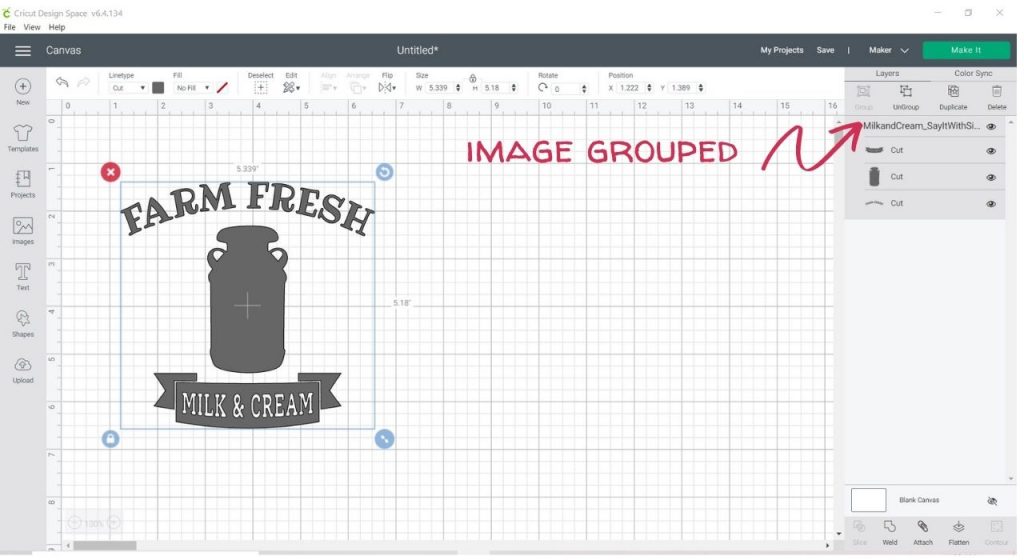
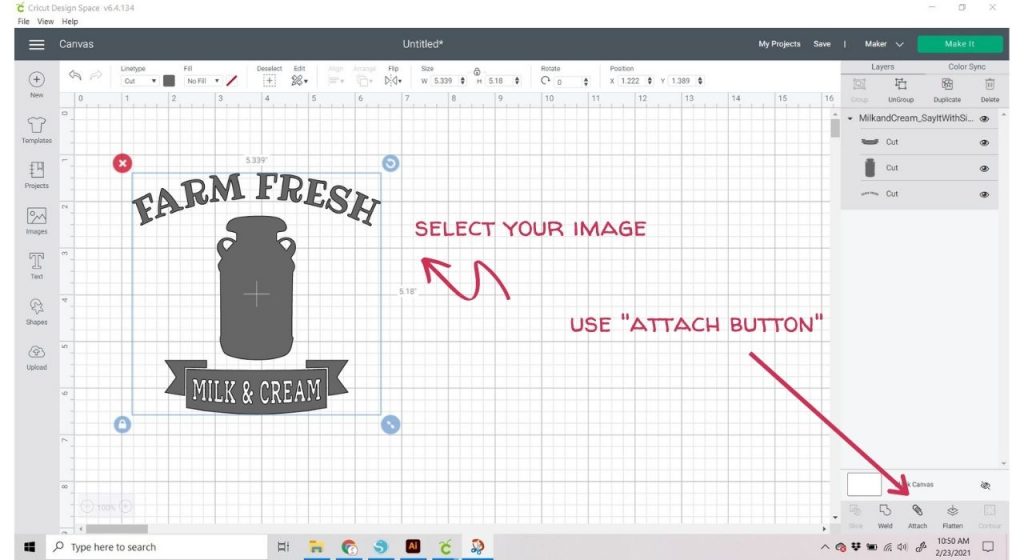
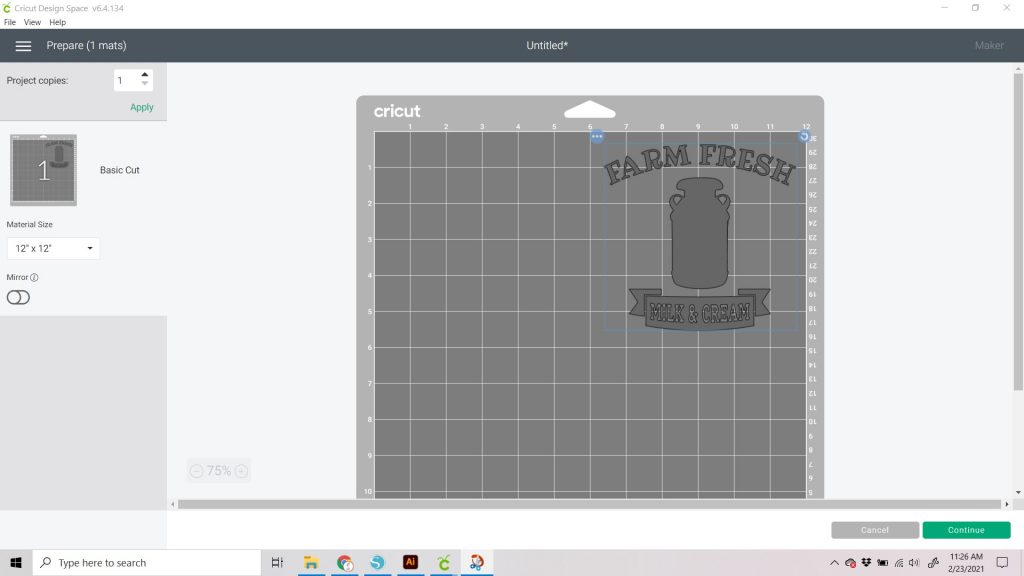
The Attach tool in Design Space works in one of two ways. It holds images in the same position as you place them relative to one another. I’m using the Milk & Cream SVG from my Free SVG library as an example.
It would work the same way if you used an image or images from Cricut Access or added text to an image or images. In order to hold your spacing and placement you’ll want to use your attach tool.
Where Can I Find the Attach Tool?
The “Attach Button is located in the lower right-hand corner of your Cricut Design Space screen. With your image selected, simply hit “Attach.”
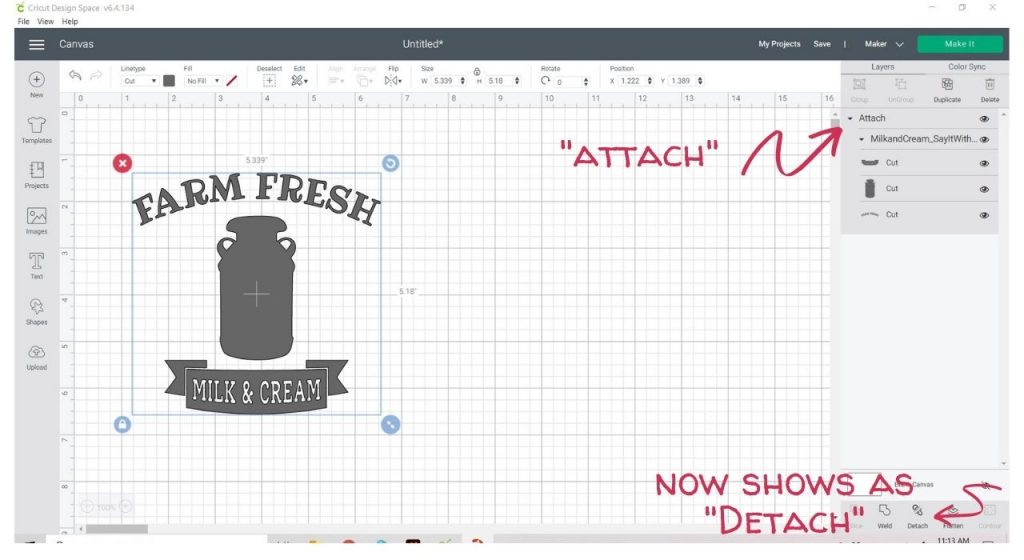
At first, it may not look like anything happened. But if you look closely, your grouped image will say “Attach” and down on the right-hand side your “Attach” button will say “Detach”. This means that your “Attach” function has been activated. Keep in mind that you can use the “Detach” to go back and make changes to your design.
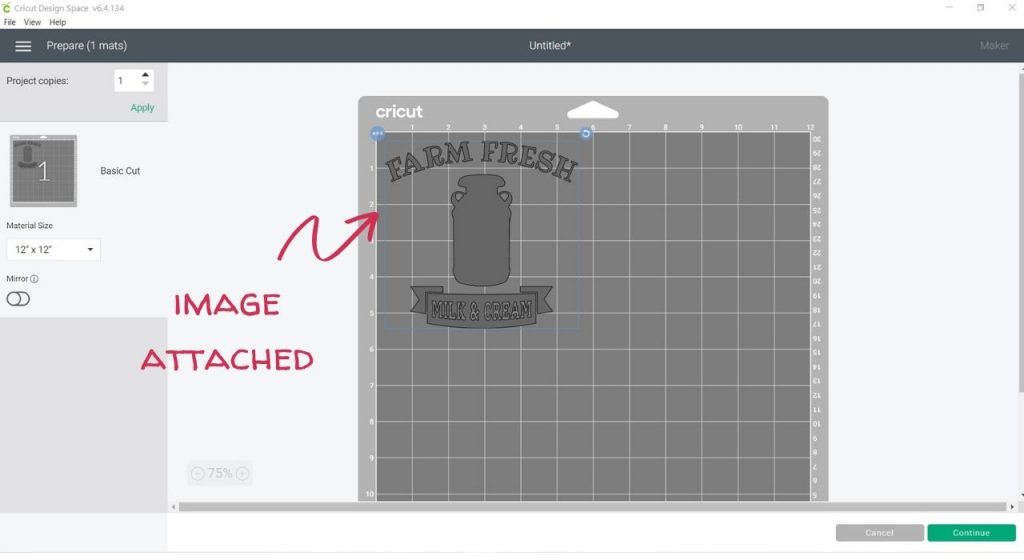
Now you can see what happens when you go to your mat. No more worries. Your image is all in one group and will cut as shown on the mat.
Keep in mind that using the “attach” tool means that you are holding the relative placement of your image elements. If you had a scrap of material and wanted to cut on another area of the mat, you could move your attached imaged to a different area on the mat to be cut as shown in the photo below.
Other Ways to Use “Attach”
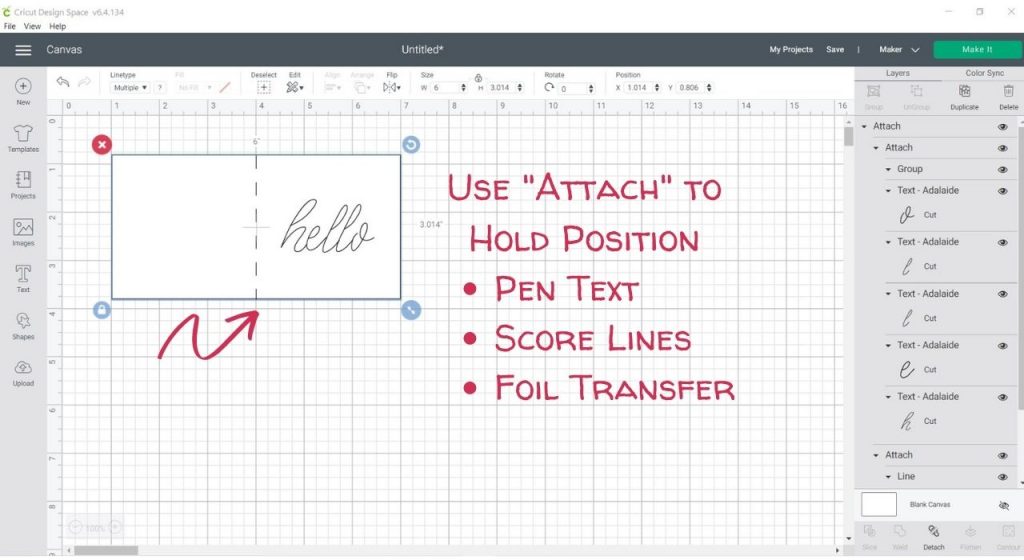
There may be other reasons to use the “Attach” tool such as if you want to hold a scoreline in a card or craft project design or keep the position of your pen fonts. Here I created a little mock notecard as an example.
Keep in Mind When Using Attach
You’ll likely use “Attach” When you use the attach button all the grouped elements in that attached group will be one color. If you want to use your SVG as a multi-colored design, then you’ll have to ungroup them and change your colors on the canvas so that they go to the appropriate mats for cutting.
“Attach” is a valuable tool in Cricut Design Space that you will use again and again.
What’s Next?
Got questions? I’d love to help. Please be sure to drop them in the comments below.
Be sure to share this tutorial.