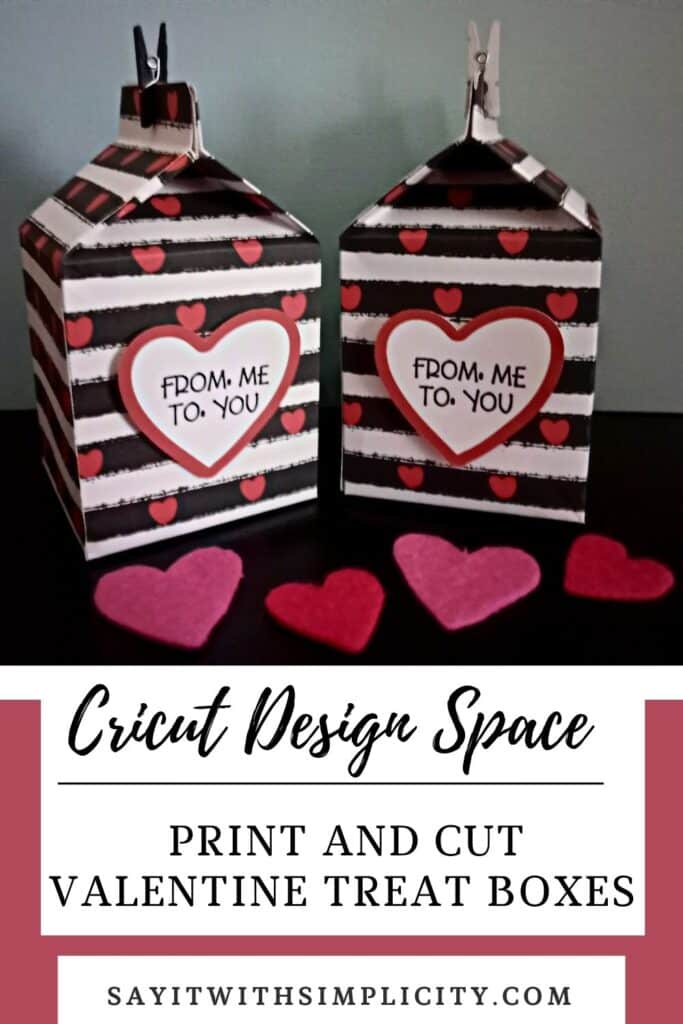
Milk Carton Valentine Treat Boxes with Your Cricut
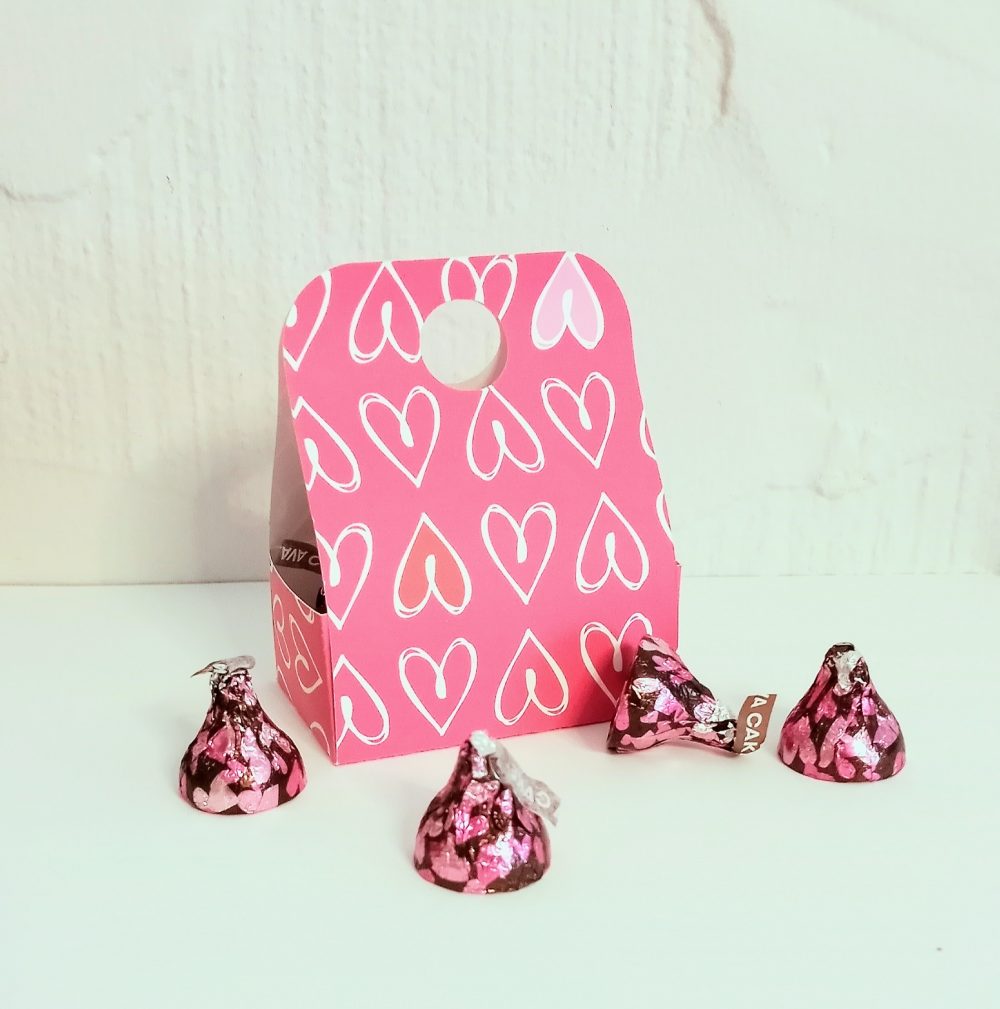
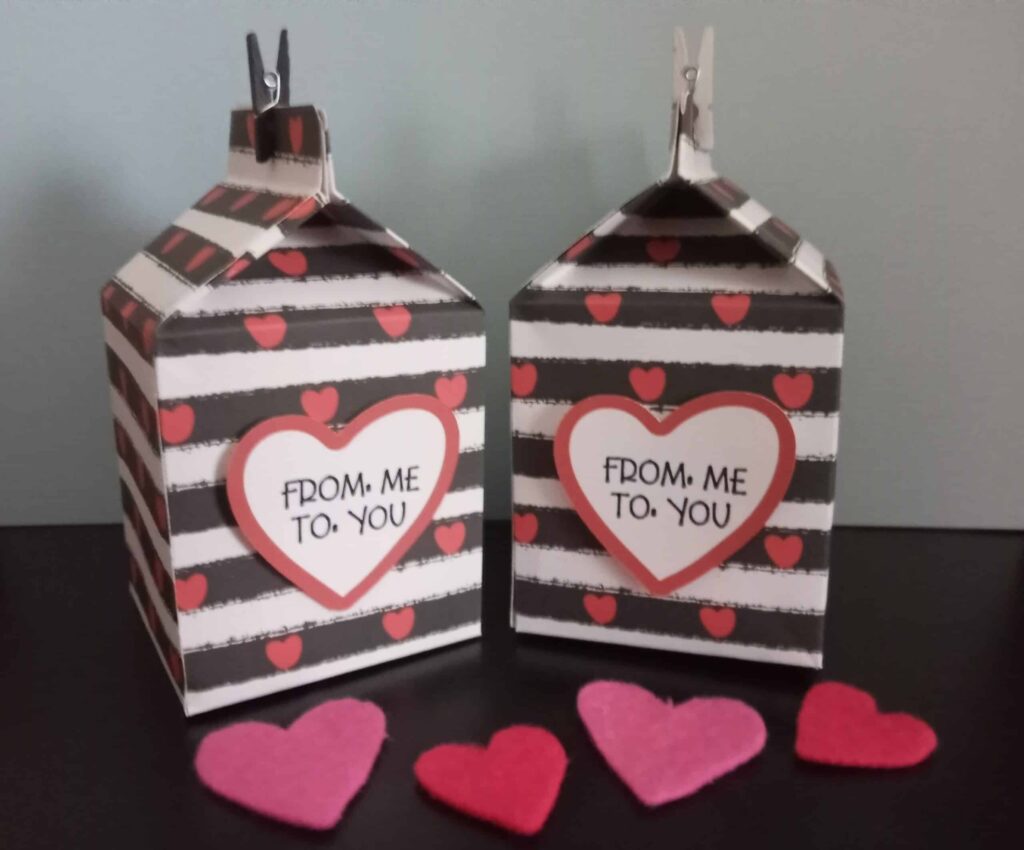
Create these adorable milk carton treat boxes with just a few clicks in Cricut Design Space! These little boxes make a great gift for your special someone, and they’re sure to make them smile.
This post may contain affiliate links and I may earn a commission if you make a purchase when following these links at no additional cost to you. Thank you for your support of Say It With Simplicity.
Get creative by uploading digital papers from your favorite sites for a custom look, and change the wording to fit your needs. I’ve already sized this file and put it together and it measures approximately 2 1/2 inches across the sides.
I’ve shared this project in Cricut Design Space, and it’s ready for you to Print Then Cut and Assemble. HERE is the link to my project. Choose “Customize” to change your project to a fill pattern of your choice. If this pattern is not uploaded in your Design Space, you’ll have to upload one of your own or choose one of the many patterns available.
Uploading Digital Fill Patterns in Design Space
The digital paper that I used is from Creative Fabrica and is a black and white stripe with red hearts. I used a heart from Cricut Access and flattened it to create a writing space for custom text. This I popped up on foam tape on the side of the carton.
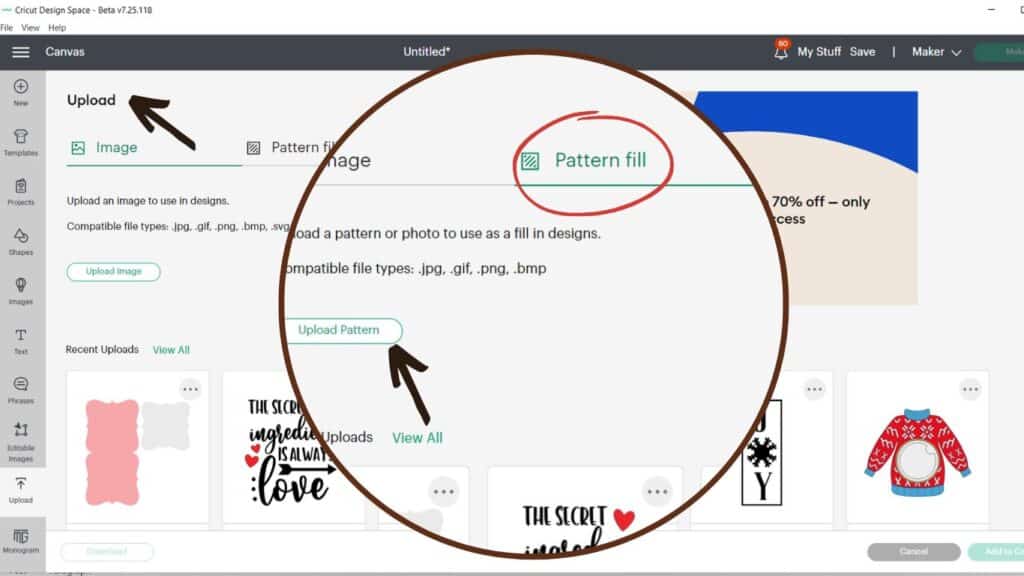
To upload your favorite digital papers for your projects in Design Space, simply go to the Upload Area of Cricut Design Space.
Instead of choosing “Upload Image”, choose “Upload Pattern”. Your pattern must be one of the file types listed. Most include a PNG file type, so you should be okay.
Find your file on your computer, and upload it the same way that you would for an image.
Important note about pattern uploads!
Patterns will not show in your recent uploads panels as an image does. It may look like nothing happened at all.
But, you will be able to search for your pattern in your fill patterns option in Design Space.
Creating the Print Then Cut
In another post I created a Print Then Cut with one of my Freebie SVG files.
Freebie Valentine Treat Box SVG
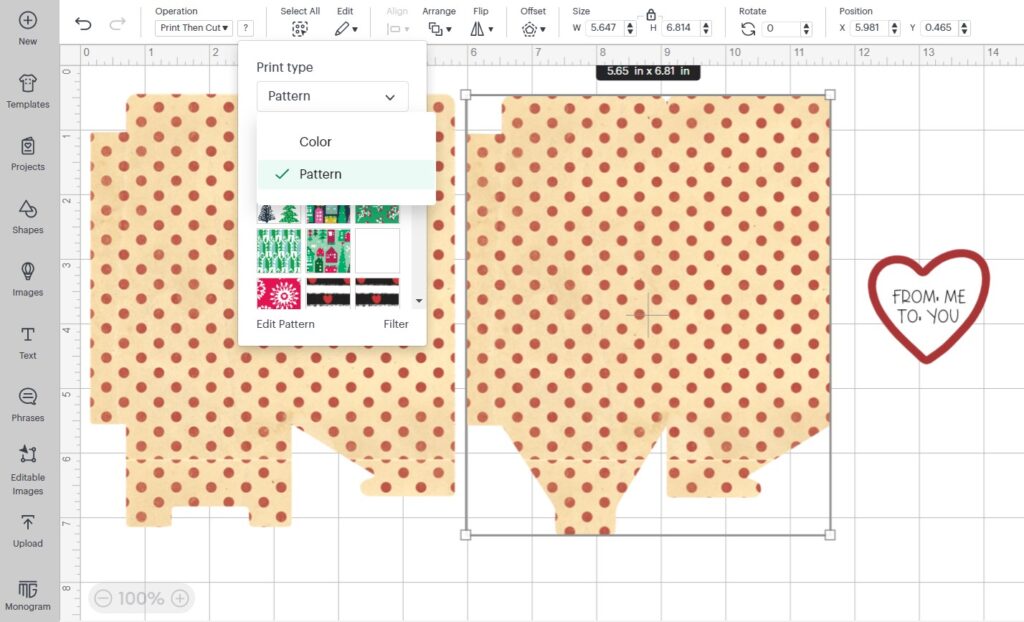
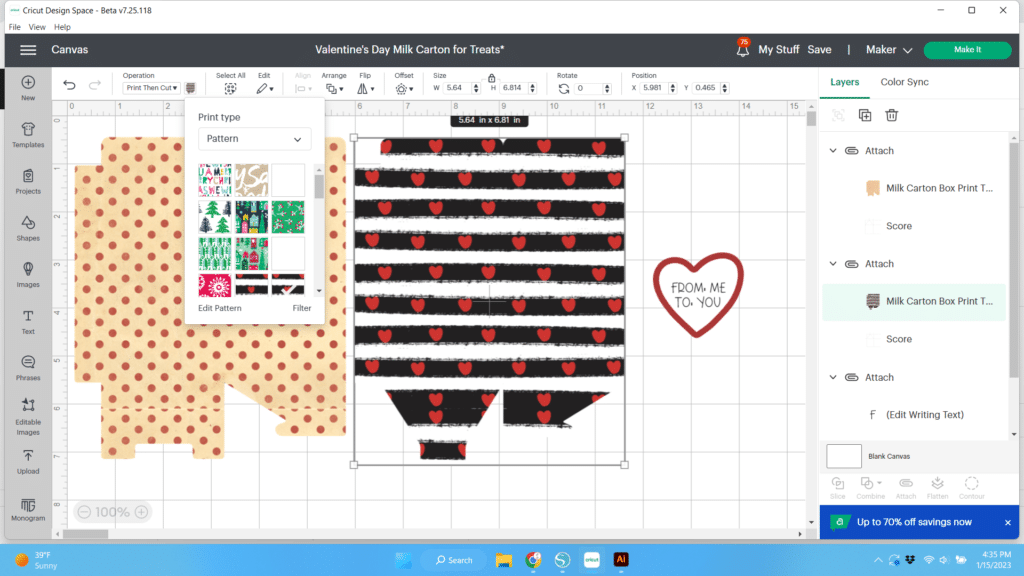
Change your design to “Print Then Cut”. Now from the drop down menu select “Pattern”. Search for the pattern that you uploaded and change your image to that pattern.
You can also us the “Edit Pattern” button to change the scale, edit the angle, and pan through the pattern vertically and horizontally.
Once your pattern is selected, be sure your score lines are attached. I prefer to send my score lines to the bottom of my image. The score lines in the shared project appear in the layers panel and are designated as “score lines”.
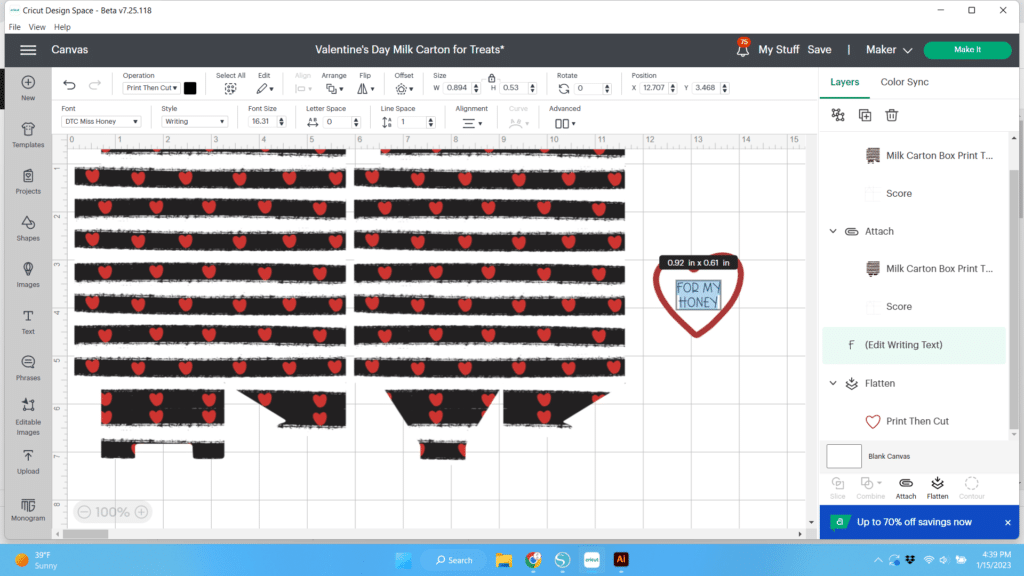
Editing Your Text
If you double click into the text box in the middle of the heart, you can edit the text. I kept it generic, but you can change it to anything you wish.
Printing the Milk Carton Valentine Boxes
Once you have your file all set up on your home screen, you’ll send it to print before cutting.
First click on the “Make It” button in the upper right hand corner of your screen.
Next you’ll be taken to the screen where it shows your print and cut preview. Don’t stop here, click on “Continue”.
Now you’ll want to select “Send to Printer”. You’ll get a pop-up box and you’ll want to toggle to “Add Bleed” and “Use System Dialog”.
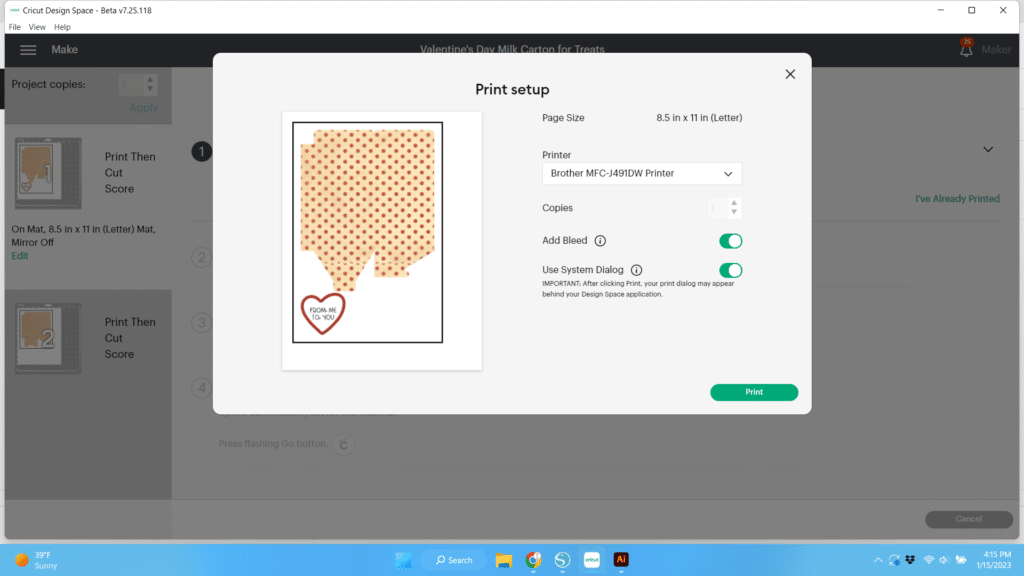
Then click “Print”. Your image will not print yet, because you’ll have to set your print settings for your printer.
**Note: While the writing font shows in the print preview, it does not print. It will be blank when your copy prints.
Choose your print settings carefully for the best results. You’ll want to set your printer for high quality.
The paper setting is also important. A plain paper setting gave me a faded look, so you may need to change the settings for your printer depending on your experience. I had nicer results when I chose Ink Jet paper settings, even though I used cardstock for my paper.
Because this is a two page document, you’ll have to repeat the steps for each page. Once you have printed, then you can go back to cut your image.
Cutting Your Images
I chose heavy cardstock for my Base Material.
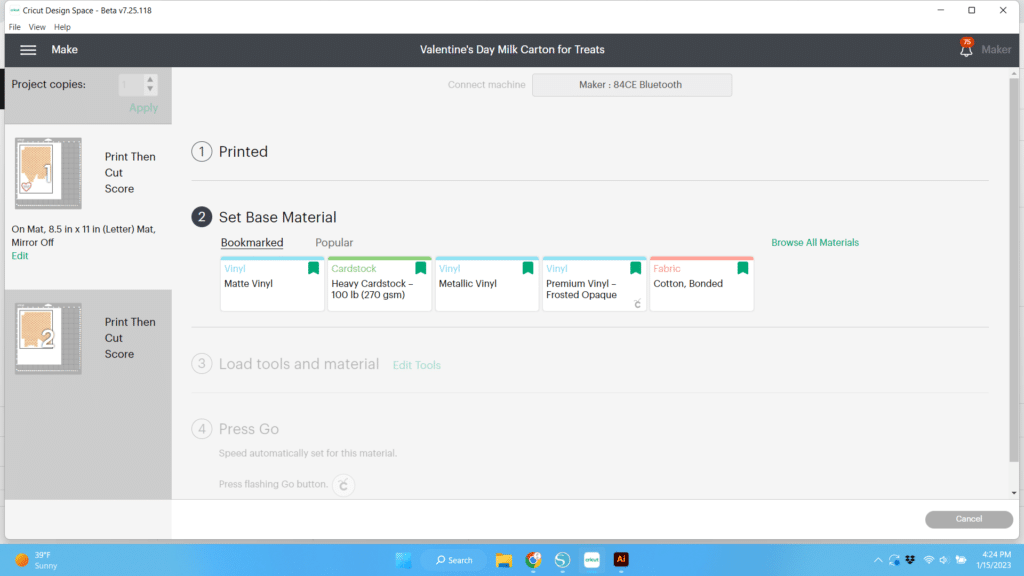
Follow the prompts on the screen for your tools. You’ll need to have your scoring wheel and your pen installed for the first pass. Then you’ll be prompted for your blade. Do this for the second page as well.
One of the things I love about Cricut is the screen prompts that make this step so easy.
Press your “Go” button when it begins blinking.
Once finished, remove your images. Fold along the score and crease well. Use a liquid adhesive to assemble being sure to hide the side flaps on the inside.
I felt that it worked best to adhere the sides first, then fold in the bottom.
Mini clothespins or other clips work for closing the top. You could also punch and add ribbon.
Pop your heart up on foam tape for added dimension.
These would work great for any time of year. Make them for Easter, Halloween, Christmas, Birthdays and more.
Share your project in Our Facebook Group
I’d love to see your completed project in the Say It With Simplicity Crafting Group on Facebook. We have a small but growing number of crafters there and are always looking for more shares and inspiration! Hope you’ll join us.
If you have questions or comments about this project be sure to join us and learn how to create these types of projects with your Cricut.
Thanks for stopping by today and we’ll see you next time!