What You’ll Need for a Successful Mug Sublimation Project
This post walks you through some of the basics of how to get amazing when using your Cricut Mug Press for mug sublimation.
This post contains affiliate links for Amazon or Cricut. I may earn a small commission at no extra charge to you.
What is sublimation?
Scientifically speaking, sublimation is the transition of a substance directly from the solid phase into the gas phase.
For those that are doing sublimation printing and using the Cricut Mug Press, you are using specialized ink, printing on special paper, and transferring the printed image to a specially coated mug.
The thing that’s so neat about sublimation is that your printed image becomes permanently infused into the product. Rather than sitting on top, the way vinyl does, you have a printed mug with no texture on the surface. You’ll be able to wash your mug without any peeling of your design over time.
I love my Cricut Mug Press. See my unboxing post and a few of my first mugs.
While it can take time to research everything and get set up for sublimation, you’ll find that mug sublimation is really a quick process that yields amazing results. All your hard work will lead to your first successful mug sublimation and many more thereafter.
There are so many unique and wonderful ways to customize mugs you’ll be giving them as gifts and maybe even starting your own business.
What Do I Need for Successful Mug Sublimation?
Mug Press
You’ll need a heat source for transferring your images to your mugs. There are many mug press options out there. I found the Cricut Mug Press to be compact and easy to use. It’s probably one of the most popular options out there for the home crafter.
If you already decided on a Cricut Mug Press, you have the heat source for transferring images to your mugs.
Now you’ll need a way to print your images.
What Printer Can I Use for Mug Sublimation?
I chose an Epson ET 2720 for my printer. While there are sublimation printers out there, I found that converting one of the Epson Eco Tank printers was one of the least expensive options for me. Doing your research will be your best bet as far as finding which printer will best fit your needs.
Once you get your printer, you’ll want to fill it with sublimation ink. It is important to note that you don’t want to fill the printer tanks with the ink that came with your printer.

Sublimation Paper is also an essential element in the mug sublimation process. You’ll want to be sure to choose a good quality paper. When combined with a good quality image and sublimation ink, you’ll have a print that will look amazing on your mug.
What If I’m Not Ready for a Printer?
If you don’t have a printer set up for sublimation you could get started with Cricut Infusible Ink. Cricut carries infusible ink sheets as well as infusible ink pens and markers. They also carry their line of mugs as well as other products that can be sublimated.
My first experience with sublimation of the infusible ink was these coasters that I made.
You can learn more about using the mug press and infusible ink over at Cricut Learn. Just type a topic in the search bar to get videos and tutorials about projects you want to learn more about.
Can I Sublimate on Any Mug?
When you are choosing a mug for sublimation, you want to be sure to have one specific for sublimation. The Sublimation mugs have a special coating for retaining the sublimation ink. Cricut has a line of sublimation mugs that work especially well with their mug press.
Another place to check for quality sublimation mugs is 143 Vinyl. They have a wide variety of products and great shipping rates.
Other Supplies You’ll Need for Mug Sublimation
- Heat Resistant Tape
- Butcher Paper
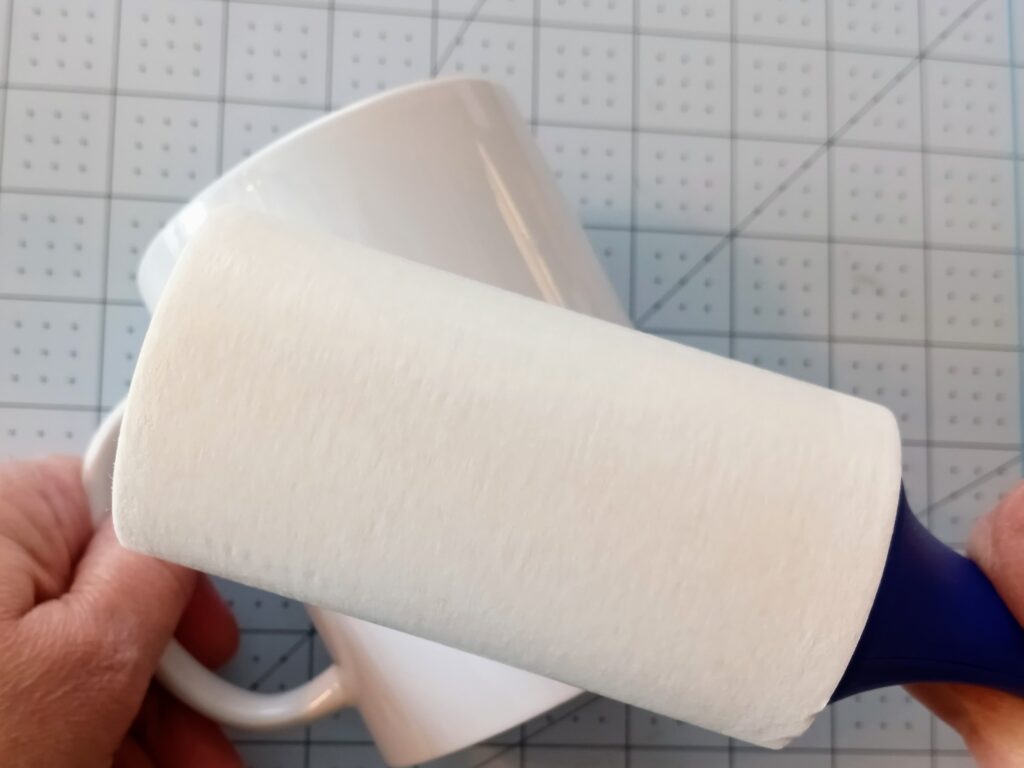
- Tear away lint roller
- Your high-quality PNG image
Steps for Cricut Mug Press Sublimation

Preparing Your Mug
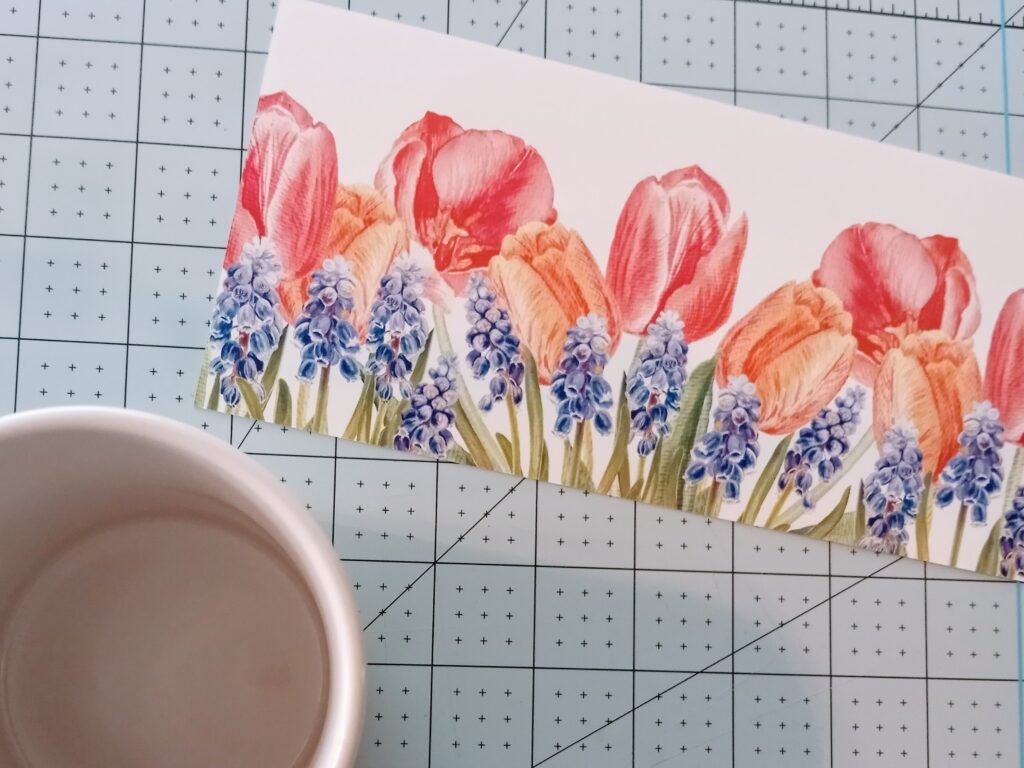
First, you’ll print your image using the printer set up for sublimation. I used a sublimation image that I purchased on Creative Fabrica.
Be sure to reverse your image, especially if you have any wording. I like to use my machine to cut my image as a full wrap. For large 15 oz mugs, this is 8.75″ x 4.25″.
Next, use a lint roller to remove any dust or particles from your mug. This is very important as there will be spots on your mug sublimation if there is anything in between the mug and your print.
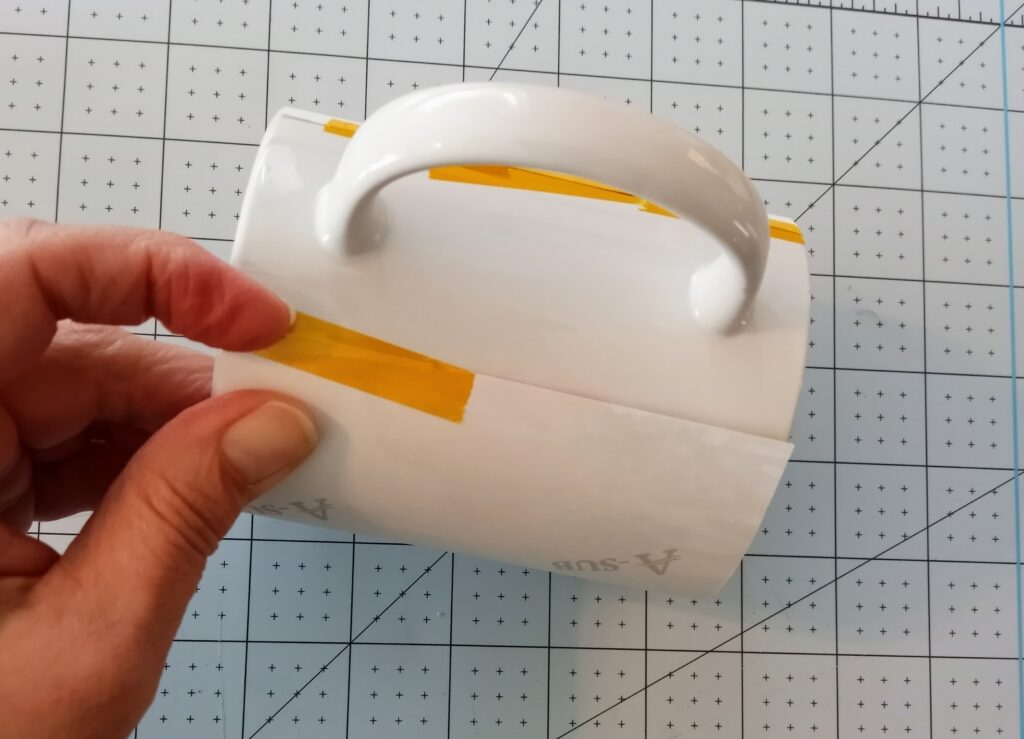
Wrap the image around your mug. You’ll want to center the handle in between the print edges. Be sure your print is right side up on your mug.
Yep! It happens. I have a beautiful “oops” mug with an upside-down sunflower print.

Now you’ll want to tape along the edge of your image. Be sure to tape one side, then smooth your image toward the other. You want the mug wrapped tight against the mug. Don’t skimp on the tape. I like to go all the way from top to bottom along the edge.
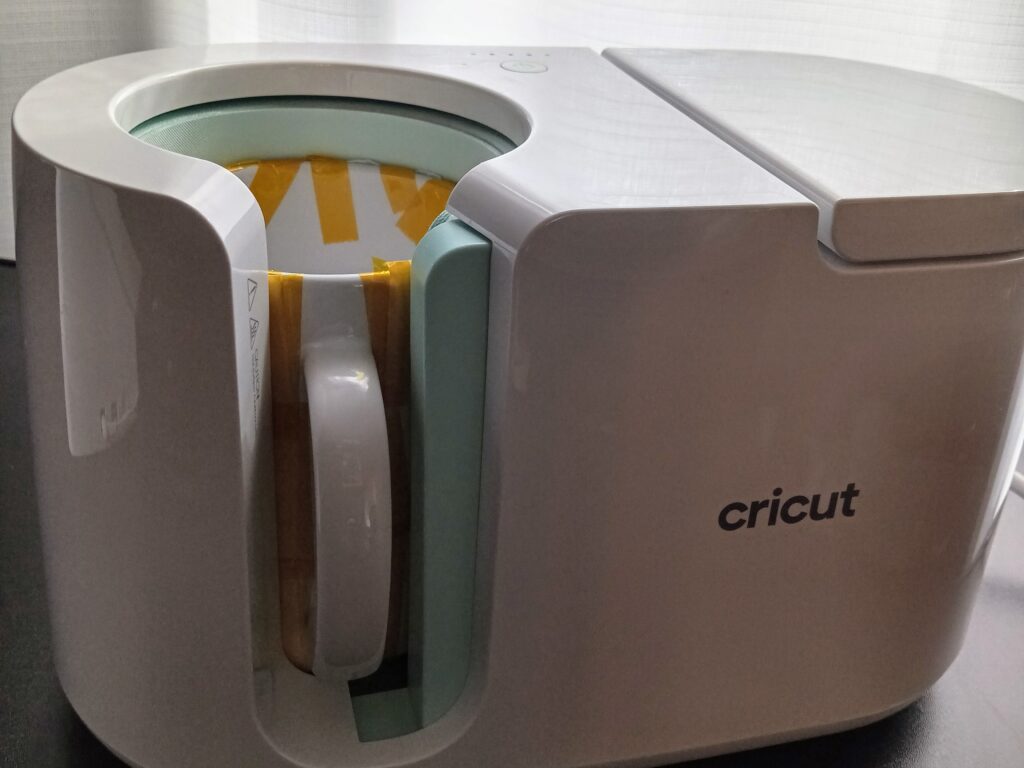
Now, you’ll cut three pieces of butcher paper and layer them over the top of your image, taping them down snuggly. This serves to absorb any excess ink and protect the sublimation against scorching.
Apply tape along the top and bottom edge as well.

Pressing The Mug
While you’re applying your butcher paper, you can heat up your mug press. Once it beeps, you’ll know it’s up to temp. When you have your mug all prepared, center the handle in the press and close the door.
The lever to the right on the machine closes the mug tightly. Your handle will be sticking out.
When the mug is finished, you’ll hear a beep. Lift the lever and remove your mug. The handle shouldn’t be hot, but be careful, the rest of the mug will be very hot!
I feel like this is the hard part! WAIT until your mug is cool to remove the butcher paper and mug wrap. After doing many mugs, I think the results are better if you allow the mug to cool.

Look at all that vibrant color! Is it coffee time yet?

Hey! Thanks for stopping by Say It With Simplicity. Hop to see you again soon!