Using Slice in Cricut Design Space
You may asking “What is the slice tool in Design Space and how do I use it? Follow through this quick tutorial about how and when to use “slice” to create personal designs in Cricut Design Space.
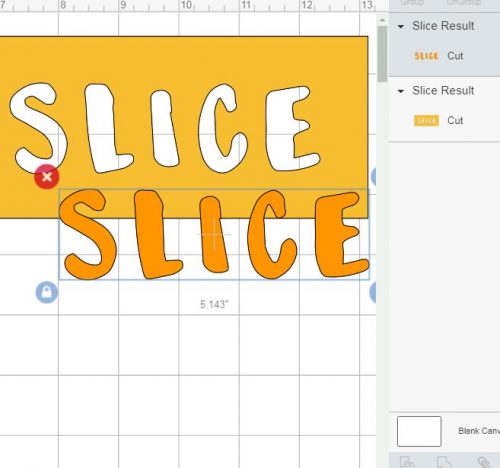
Using the slice tool is a way to cut out, or knock out one image from another image. As an example, I’ve place a circle in the middle of a square. When both images are selected, the slice button at the lower right will be highlighted and you’ll be able to click on it.
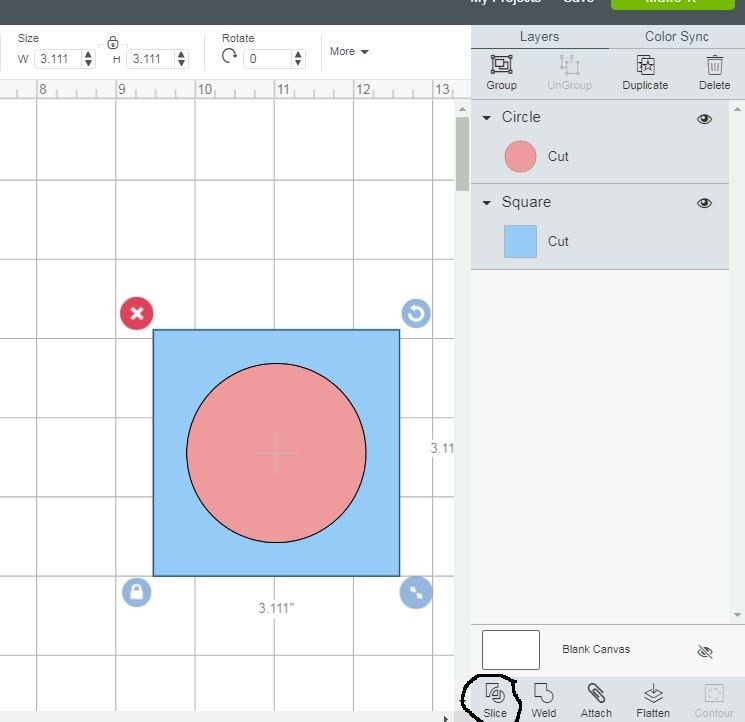
Now when I click the slice button, the image looks the same even though the slice has been performed. You can see the slice result over in the design column on the right side.
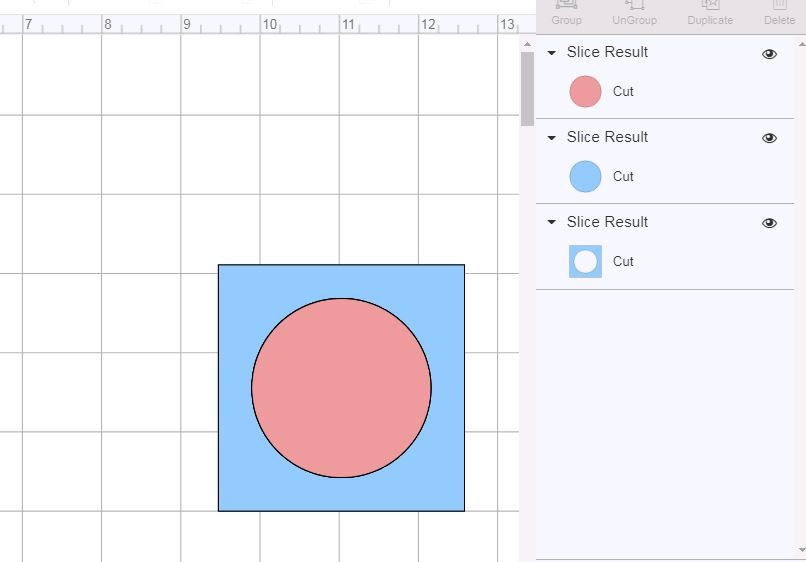
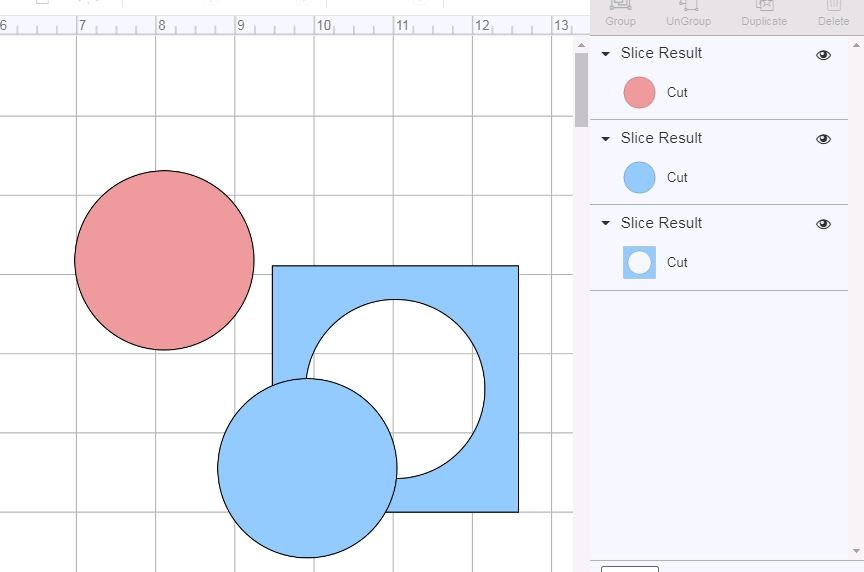
However, when I remove the pieces from my new image, I’m left with my circle in a square. It’s sort of like cutting your biscuits from your biscuit dough. The pink circle, in this case, acts as the biscuit cutter.
Other Ways to Use the Slice Tool
Make a Tag
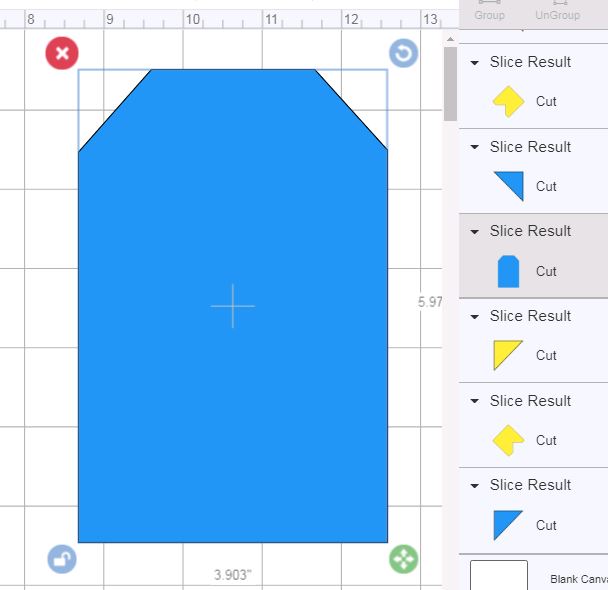
Use a square to cut off the corner of a rectangle.
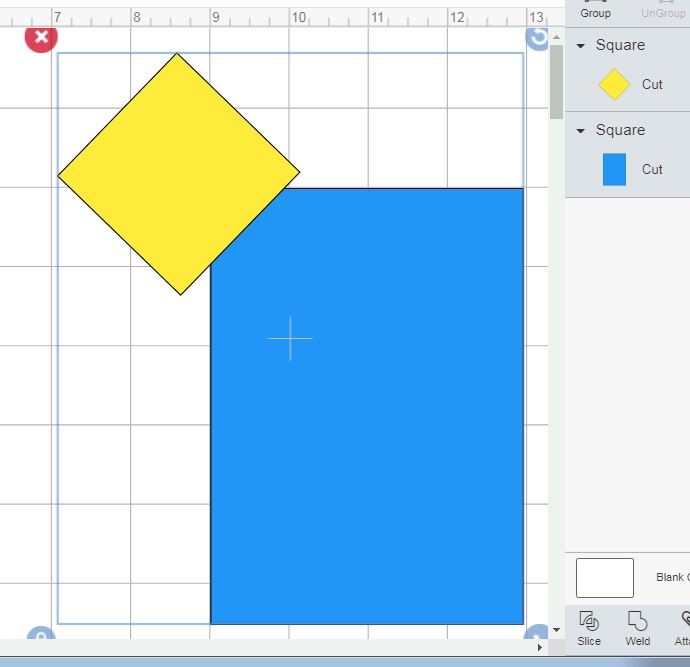
Now repeat on the other side to finish your tag shape. Slice a small circle for inserting your ribbon or string.
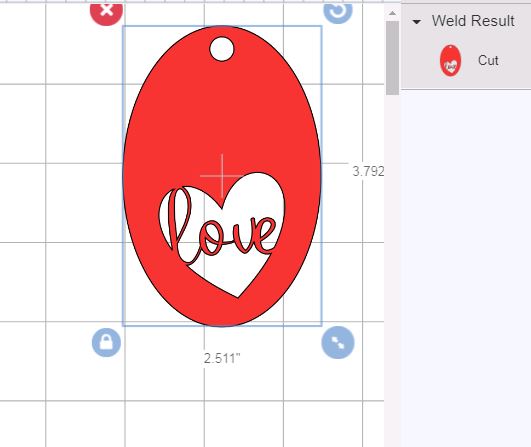
Two slices were performed to create this tag. A heart was sliced from the oval. Then a small circle was sliced to for inserting the ribbon or twine.
Now text was welded into the space created with the heart.
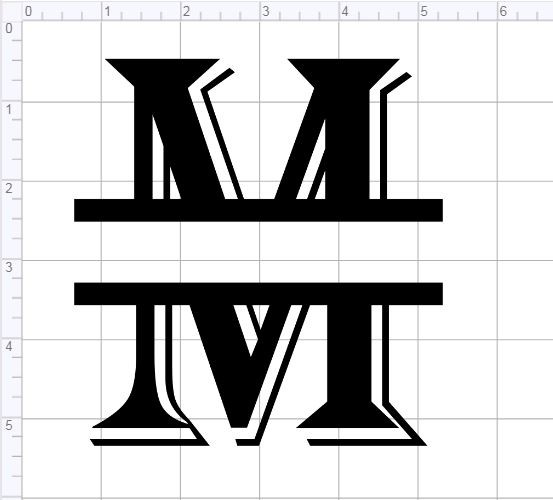
Create a Split Monogram
The split monogram is initially created using the slice tool. I may be able to do a tutorial on this one soon. But you can see the many possibilities of using the slice tool for creating unique designs. Make tags, unique backgrounds for handmade cards and more!!
I hope this tutorial was helpful. I’m certain you’ll want to open your design space, get out your Cricut and start creating with your slice tool. I invite you to stop by often as I create more projects and tutorials.
Have a wonderful day!!

