DIY Trick or Treat Bag
This DIY Trick or Treat Bag is a quick and easy project made from felt. It’s small and light for a child to carry. It is also reusable and makes a great alternative to plastic or paper shopping bags.
You could also have your kids help with this project and double your Halloween fun!
FELT TRICK OR TREAT bag Tutorial
Note** This post contains an affiliate link.
The supplies you’ll need to make your bag, like the one shown, are:
- Two pieces of Orange Felt 9×12 inches for the bag side pieces
- One Piece of Black Felt 9×12 inches for the handles and inside top of bag. The remnant of this piece will be used for your Jack-O- Lantern face.
- Sharp Scissors
- Sewing Machine
- Thread in coordinating color
- Rotary Cutter (optional)
- Easy Ruler for rotary cutting (optional)
- Pins, rulers and other notions as you find helpful for a simple sewing project.
- Glue for Jack-O-Lantern Features

DIY Trick or Treat Bag
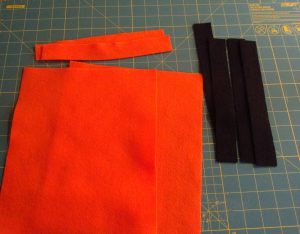
Just three pieces of felt.
Now if you were making several of these, you could buy felt from the yardage section of the fabric store. Joann, as well as other craft stores, sell these rectangular pieces in numerous colors.
I happened to pick up some already cut pieces in the craft section for 25 cents each when they were on sale. In addition to being quick and easy, this bag was super inexpensive.
For this project I chose the eco-fi felt that is made from recycled plastic bottles. You could also use wool felt.
First Steps
From your orange piece, cut two strips that are 9 inches wide, by 1 1/4 inches tall. I just lined my rotary cutter up at the 1 1/4 inch mark across the top of the felt piece and had my pieces cut quick and easy!
From your black piece you’ll cut four strips at 9 inches wide, and 1 1/4 inches tall. Save the rest of your black pieces for decorating your felt bag.
TRICK or TREAT bag.
If you don’t have a rotary cutter you can totally just mark and cut your pieces with a scissors.
Next Steps
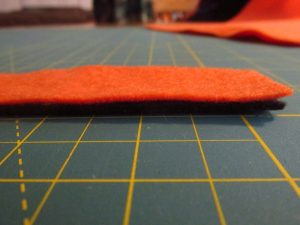
I like the idea of having a sturdy handle if the bag is going to be reusable. I layered one of the orange strips on top of a black strip. Then I sewed the two together along the edges.
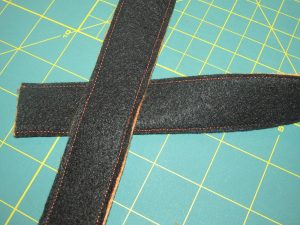
I used an orange thread, but you could use whatever you have. I used a little longer stitch length. It shows up a little better. For my machine it was a 3.5.
Sewing the Handles to Bag Side Pieces
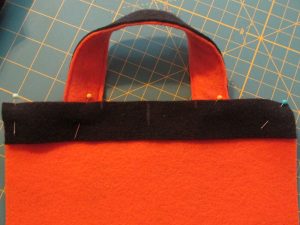
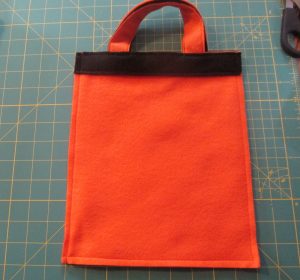
Now that your handles are sewn, you can sew them to the top of the bag side pieces. Your extra black strips are used as a sort of lining for the INSIDE top of the bag.
Here, I just marked the center, then marked 1 1/2 inches on either side of center. Then I sandwiched my bag handle between and orange bag side piece, and one of the black strips. You can see the placement at the marks in the photo.
Tuck the handles in securely because you want your machine to catch the handle ends when you sew across the top. Keep in mind that you haven’t sewn the bag side pieces together. This makes inserting the handles so easy.
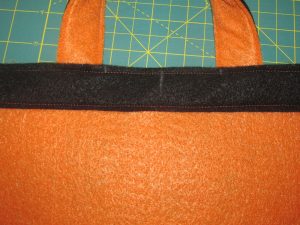
Sew about 1/4-3/8 of an inch from the edges of your black strip.
Now you can see that the handles are on. Be sure to keep the ends of the handles perpendicular to the top of the bag. Then you’ll be sure to sew over the entire end.
Do this with BOTH bag side pieces. Here the orange side of the handle is facing the inside of the bag piece. However, this is your project so, reverse them if you want. There really isn’t a right or wrong.
with handle sewn in.
Sewing the Bag Sides Together
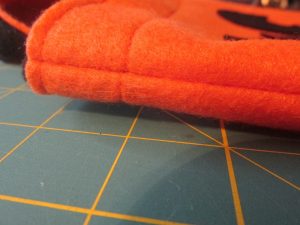
With the bag sides finished, you’re ready to sew them together. Lay right sides together. If you need to use pins or clips, then do so. Match up your side strips on the upper edges.
Hint: Because the felt is a little on the stretchy side, I sewed down one side from top to bottom. Then I sewed the other side from top to bottom, stitching across the bottom last.
The reason for this is that if you sew from one top corner, down, across the bottom and back up, you may find that you aren’t perfectly lined up at the top on one side. It’s really no big deal, but it looks much nicer all lined up.
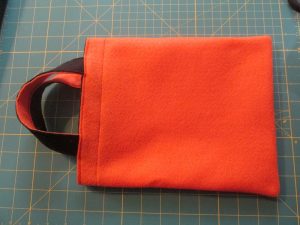
Clip all threads, be sure your pins are all removed. (Try not to sew over any, but it happens sometimes.) Now turn your bag right sides out.
Adding the Jack-O-Lantern Face
At this point, there isn’t too much that’s Halloween about this bag, except that it’s orange and black.
You can totally make this your own and cut out bats, letters, or whatever you want. You should have a generous piece of felt left from making your handles.
Opting for a different look with other colored felt is another option that’s really up to the maker. Have fun! Be creative.
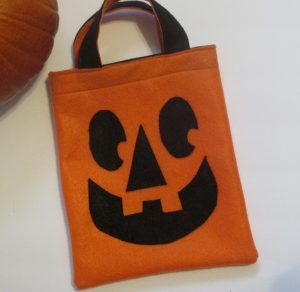
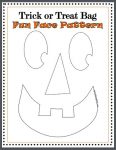
If you want to use the face I made, I’ve created a PDF pattern sheet in the link below. I used hot glue to glue on my Jack-O-Lantern face.
There is felt glue that you can also use. I personally like the Aleene’s glue projects and have used it when I’ve taught 4-H craft classes.
Fun Jack-O-Lantern Face PDF File
That’s it for today. Hope you enjoy this project. If you have any questions or comments, feel free to leave them in the comments section below.
Be sure to enjoy some time creating for your home and family today!
** “As an Amazon Associate I earn from qualifying purchases.”