Even though I’ve been paper crafting for some time, there is always something new to learn when making handcrafted cards.
Last time I shared some of my favorite basic tools and tips. Today I wanted to share a few more basic tips that will help you to get started in making handcrafted cards, especially when you have a strict craft budget.
Keep It Simple When Choosing Cardstock
It is easy to get carried away with buying card stock when you’re first starting out with card crafting. I purchased a rainbow of colors when I first started making cards, and then didn’t really know what to do with them all.
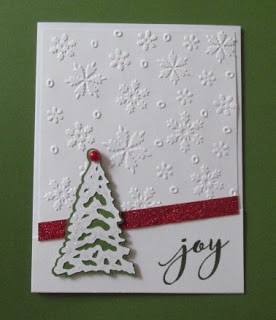
Lately the two card stocks I choose most often are basic black and basic white.
With these these two choices, you can make a huge variety of beautiful cards. An 8 1/2 x 11 sheet of quality white card stock will give you two A2 card bases.
Black card stock makes most colors stand out even more, and I love the look of black mats behind simple stamped images.
I’m not saying “don’t buy colored cardstock” but if you’re just starting out, get the basics.
If You Only Had One Ink Pad
If I had to choose one ink pad that I use the most, it would be Memento Tuxedo Black Ink. This ink dries quickly on most papers and is water and fade resistant. This is my go-to ink for stamping sentiments and outline images.
This cute ladybug card below was crafted using the Memento Tuxedo Black Ink. I bumped up the card making a notch by using patterned papers from the Authentique Cheerful Collection. I think they work very well with the ladybug image. Do you?
I also created mats for my patterned side strip and behind my sentiment using colored scraps. So don’t throw away those scraps, they might come in handy!
Once again, only simple supplies were used for making a great summer card. A simple “HI” stamp that I had from Stamps of Life was enough to complete this simple note card.
Let The Patterned Papers and Images Speak
Layering patterned papers are a way to take your card making up to a new level. They add color and texture to your cards, while still keeping them simple. The dot patterned paper in this card doesn’t overwhelm the image but gives a nice background that complements the stamped image. This time I used a layer of gold to bring out the golds in the flower bouquet.
On my wish list of supplies is a really nice set of makers. Whether you are using Copics, or inexpensive Leisure Arts markers as were used here, you can create some stunning cards by using some easy to learn coloring techniques.
This stamp, by the way, was another thrift store find, and I only paid $1.00 for it.
While there are many wonderful newer stamp sets in my collection, I want to emphasize that you CAN start out this hobby with a minimal investment.
Add Dimension and Depth
There are a few simple ways to add dimension and a sense of depth to your cards.
These cards use basic layered mats to give the cards dimension. The softer more subtle colors of the patterned papers give the card on the right a softer tone, while the layers of green ink on the trees in the background add a little more depth.
Remember earlier when I said that black makes colors pop. The black layers of the card on the left, intensify the pink patterned paper and image.
- Use of foam tape adhesive
The card on the left uses a foam tape adhesive to give a little bit of a lift to the stamped image and can be used in different ways to add more dimension to your handcrafted cards. Foam tape is a double-sided adhesive tape that can be found in craft stores or even in the hardware department. I’ve also purchased it at Dollar Tree Stores.
Learn to Make the Most of Your Supplies
Over the years I’ve collected quite a few stamps and other supplies, but as of this writing, I’m able to keep everything in a couple of drawers of filing cabinet space and a couple of craft totes with dividers. I remember shopping with one of my daughters, and as I looked at craft supplies, I was going to throw a pack of patterned paper in my cart.
My daughter looked at me and said, “You HAVE lots of paper!” She was right. I decided not to get any more paper that day.
Less is More
Sometimes I go to the drawers where I keep my supplies and there is a sense of overwhelm at how much I actually do have. While I don’t have a room full of supplies, I still can get bogged down when trying to decide what to make.
I often offer myself challenges during my hobby and crafting time. This is something you can do as well. I’ve been on a number of craft forums and it’s a common problem. “What do I make?” Sometimes there are too many choices!
Keeping the receiver of a card on hand is often helpful. But if I’m just generally stocking my card stash or making cards for a charity, my challenge to myself is to limit myself to one stamp set, one theme, or one simple sketch. Maybe one day I decide that I’m only going to use paper from my scraps. Simplifying the process is one way that I keep my crafting momentum and
save money on craft supplies.I hope I’ve given you some tips and things to think about. I’d love to hear your basic card making tips, ways you save money on craft supplies, or simplify your craft process. Feel free to share them below.
Enjoy your crafting and see you soon!