DIY Rustic Wood Scrap Christmas Tree
Rustic Scrap Wood Christmas Tree
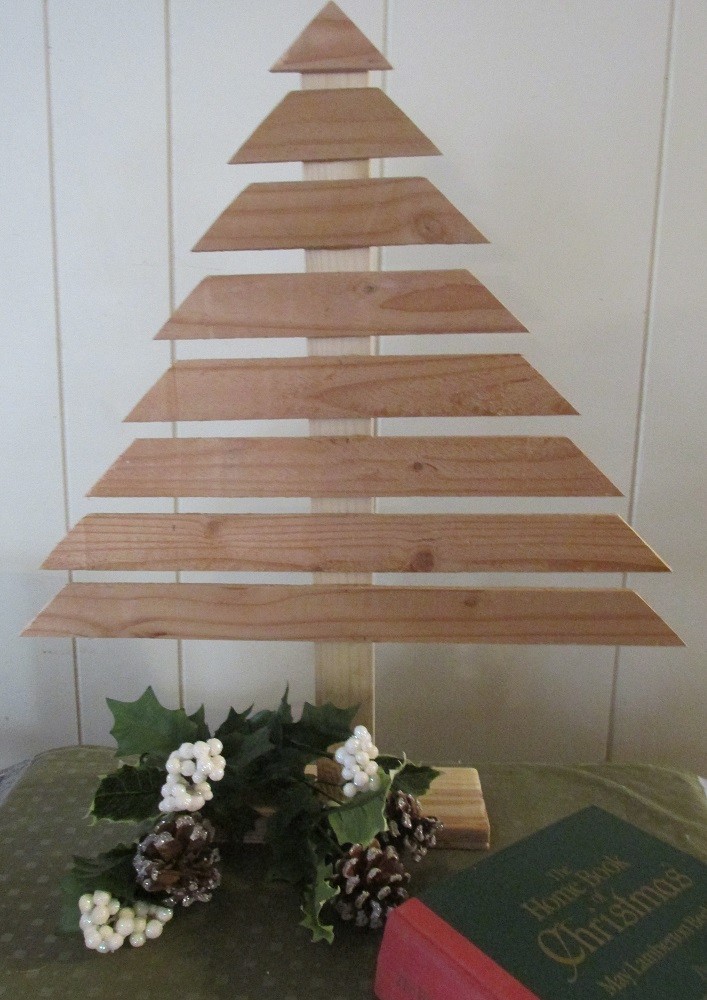
One of my favorite things to do is imagine what I can make out of scrap wood that we have left over from previous projects. Today I’m sharing a tutorial for a cute little rustic Christmas tree that was made from left overs that we had in our garage.
I also love to browse my local Habitat Re-store for wood and trim pieces. Often times I get these for a quarter or $0.50 and save them for future projects. As a result, I have a bit of a stash that I am trying to use up. The Lath I’m using today, came from my local Habitat for Humanity Re-Store but can also be found at your local lumber yard or home center.
Supplies and Tools:
- 1″x 2″ Pine lumber
- Wood lath
- Scrap piece of 1″x 3″ (Mine was a left over piece of pallet lumber about 7″ long)
- Miter Saw (The power miter saw would be faster, but I just used our hand miter saw)
- Wood Glue
- Nail Gun or Drill and Screw Driver Set
- Screws or Nails (I used 1″ screws)
- Measuring Tape
- Pencil
- Safety Glasses
- Sandpaper
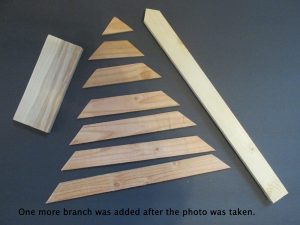
Cutting List:
8 pieces Wood Lath (one each of the following)
- 14 inches
- 12 inches
- 10 inches
- 8 inches
- 6 inches
- 4 inches
- 2 inches
- Point of tree
- (1) Piece of 1″x 2″ cut at 18 inches (or preferred length) for the trunk of your tree
- (1) 1″ x 3″ cut at 7 inches
Let’s Make Our Tree
Instructions:
I cut my first 45 degree angle on the miter saw, then flipped my piece of lath-front to back to measure for my next cut.
If you look at each “branch” piece, the cut length of each piece is the shorter side. You can certainly make the measurements as you have need for, but each piece from the base up is 2″ smaller than the piece before it.
Keep in mind this is a rustic tree, made from wood scraps.
It doesn’t have to be perfect!
Sand your pieces. You want to keep your project rustic, but not end up with a splinter in your hand.
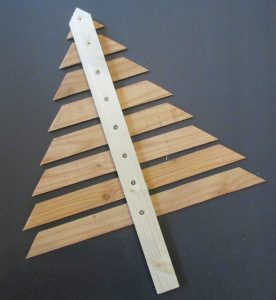
I found the center of each of my pieces and sort of lined them up with about a 1/2 inch space in between. Next I put a little wood glue on the center of each branch piece. Then I laid down the 1″ x 2″. You can certainly leave whatever gap you want in between the branches. I pretty much eyeballed everything.
Just a Little note: At first I was only going to use 7 branch pieces, but in the end I decided to use 8.
Now I used 1″ screws in my drill and driver set to put in one screw per branch. Lath is very thin, so be careful driving your screws in so the point doesn’t come through the front of your tree.
Adding the Base
Now I turned my attention to putting on the base. I envy the DIY folks in videos that I watch. They seem to keep everything together without having it all fly apart during assembly. I’m not that person!! I was fearing this step just a little.
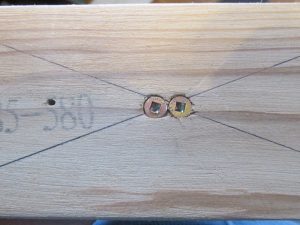
I lined up a ruler from corner to corner to draw lines and mark the center.
Yep, I realize that I over did it a little. (if you look in the photo below) It’s okay, it’s on the bottom. On the top I made a light “X” in pencil. It’s completely hidden under the 1″ x 2″ trunk.
I added some glue and positioned my tree trunk on the base.
From the bottom I drove in two screws. I could have spaced the screws apart a little bit more, but it’s holding together and seems very solid. Keep in mind that I was trying to balance everything and keep it straight. At least I didn’t scatter the project in all directions trying to put in two screws. I’m not going to worry about it.
Now I have an awesome little table top tree. I’m trying to figure out if I should paint and distress it, or just leave it as is. Let me know what you think. I’d love to hear your opinions.
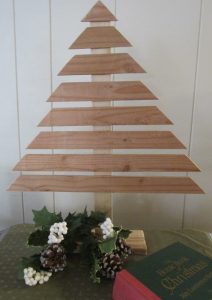
I haven’t let up on my resolve to go 6 weeks without buying any craft supplies. Making Christmas crafts was a little bit concerning, but as it turned out, I was still able to make this scrap wood Christmas tree and some other projects that I’ll share with you soon.
It is my sincere hope, that you will take some time for yourself and make some crafts for your home and family soon. Enjoy your holiday season!
Connie




Thank you for this idea! My husband made 12 of these trees to give as gifts and they were overwhelmingly popular. Saving the instructions for next year as well!
That’s so wonderful Amy! I’m so happy to hear that the tutorial was helpful and the gifts you made were well received. Thank you for letting me know and you have a wonderful Christmas!