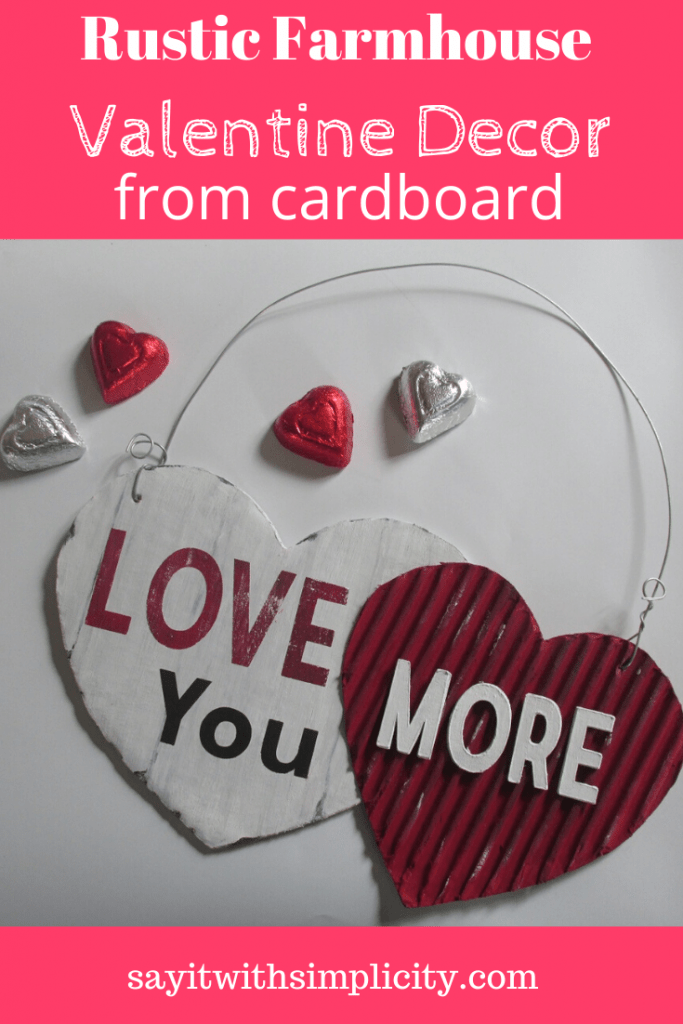
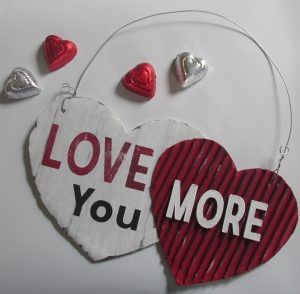
Rustic Valentine Cardboard Craft
**As an Amazon Associate I earn from qualifying purchases.**
If you have kids who want to craft, this Rustic Valentine Cardboard Craft might just be something you want to try. I started down the cardboard craft trail a little while back when I was asked to teach a workshop at our county 4-H Family Learning Day. Remember the cardboard snowmen ornaments that I shared on the blog. They’re another inspiration piece that I’ll likely share in the workshop.
Why Cardboard Craft?
All my life I’ve been taught the 4-H motto, “To make the best better.” Teaching meaningful life skills, stewardship of our environment, and just plain having fun…all play a key roll in making the best BETTER. There are so many ways that cardboard fits in!
We all have cardboard. (At least I think we do) It would be pretty difficult to get by without having some of it come into our homes.
We use it for storage, carrying our groceries, even mulching our gardens. I even saw something recently about a cardboard boat design competition.
Tell me why you can’t use it for crafting?!
Resourcefulness was something I was taught as a kid, so maybe that mindset serves me well.
Enough on that. Let’s get started!
Rustic Valentine Cardboard Craft
Supplies
- Corrugated Cardboard
- Cereal box Cardboard (optional)
- Heart templates (I made my own and will share the sizes below)
- Acrylic Paints in white, red and black.
- Foam brushes
- Liner brush
- Strong glue or glue gun
- Wire or twine for hanging your art
- Stencil (optional)
- Heavy Duty Sharp Scissors or X-Acto or other craft/hobby knife
- Ruler, pencil, scrap paper for heart templates
Instruction
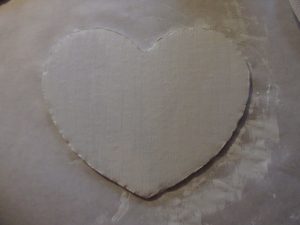
Create two heart templates by cutting them from scrap paper or copy paper. Remember doing this in primary school?
They need not be the same size or exact shape.
For the larger heart in this project was about 7 inches (18 cm) at the widest point. From the tallest part of the heart, to the tip the heart was about 6 1/4 inches tall (16.5 cm)
As for the smaller red heart, it is 5 1/2 inches or about (14 cm) by 5 1/4 inches (13.3 cm). By all means make these to fit your needs.
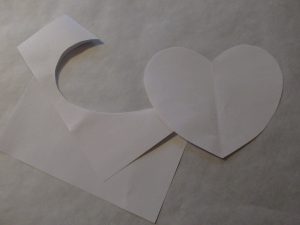
The template was then used to make the cardboard heart. Use a sharp scissors or craft/utility knife to cut this out. If you’re doing this with your kids, they might need a hand, but you get to craft and that’s part of the fun.
When using the scissors my advice is to use it at an angle. I feel like the cut was much smoother that way.
Painting the White Distressed Heart
Using white chalk paint and a foam brush, give your cardboard heart a white base coat.
While your white base is a little damp, you can use a very dry brush with just a tiny bit of black paint to give your heart a distressed look. If you don’t like the look, no worries. Just cover it with a little bit more white to blend it in.
Using a liner brush, paint some “boards” using a piece of scrap cardboard for your edge guide. Use your white foam brush to blend in your “board lines.”
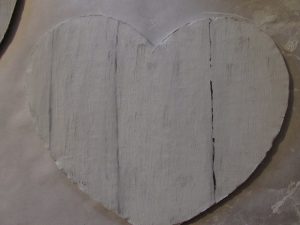
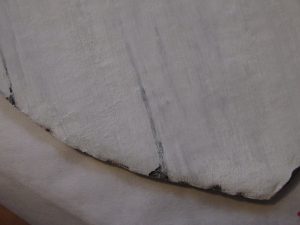
You can use the liner brush to do a little distressing at the edge, as you can see in the photo.
Remember not to stress about this. It doesn’t have to be perfect. Just have fun!
Preparing the Red Heart
Take a wet paper towel, damp sponge or wet cloth and use it to dampen the paper on the surface of your corrugated cardboard. Let it sit for a bit. It will soften the glue and you’ll be able to peel the top layer off your cardboard to expose the corrugated part inside.
Slide a utility knife in to start pulling that layer back. I found that pulling parallel to the corrugations was easier. If you have some remaining fuzz, just use your finger tips to clean it up. A tweezers also works very well. If you don’t get all of the fuzz off, it will smooth when you paint.
I didn’t get a good photo of this step, so my apology. It is very much like the cardboard snowman ornament craft.
Paint your heart with red craft paint. You can also do a little distressing with your dry foam brush in black along the top edge of the corrugated areas. I think it makes it look like painted corrugated metal.
Adding the words
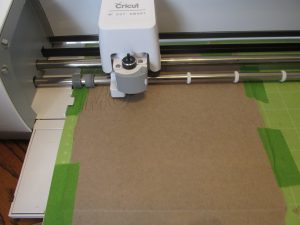
I have to confess that at this point I cheated a little and used my Cricut to cut a stencil from removable vinyl. It worked great to stencil my “Love you” on the white heart. I used the custom>stencil vinyl setting.
If you’re doing this with kids, you could totally use some hand painted lettering here. It would still turn out very cute. You could also create your own reusable stencil with fonts from your computer.
For the word “MORE” on the red heart, I cut the letters from cereal box cardboard. Cutting it three times and stacking it and gluing gave it some dimension. I used my deep cut blade for the Cricut and the light chipboard setting. I should have used my strong grip mat. Tape works too. Enough said.
I painted each of my stacked letters with white chalk paint. When they were dry I used my Art Glitter glue to adhere them to the red cardboard heart.
If you don’t have a cutting machine, Dollar Tree does carry some chipboard letters. $1.00 would still make this a VERY cheap craft.
Creating a Hanger
Use whatever wire you have around the house for hanging your heart. Piercing it through from front to back and then twisting it around itself works well. For the curls, simply wrap the wire around a pencil.
Alternately, you could punch some holes with a paper punch and use some jute twine, ribbon or string to hang and display your craft.
Did you like this craft? I hope it will inspire you to try some cardboard crafting of your own. If your library carries it, check out Green Craft Magazine by Stampington & Company. I have no affiliation with Green Craft, but my library carries it and I find it a wonderful source for unique recycled crafts. If you can get your hands on a copy, it’s well worth the look.
That’s it for today. I’d love to hear your comments or questions on this project. Until next time…