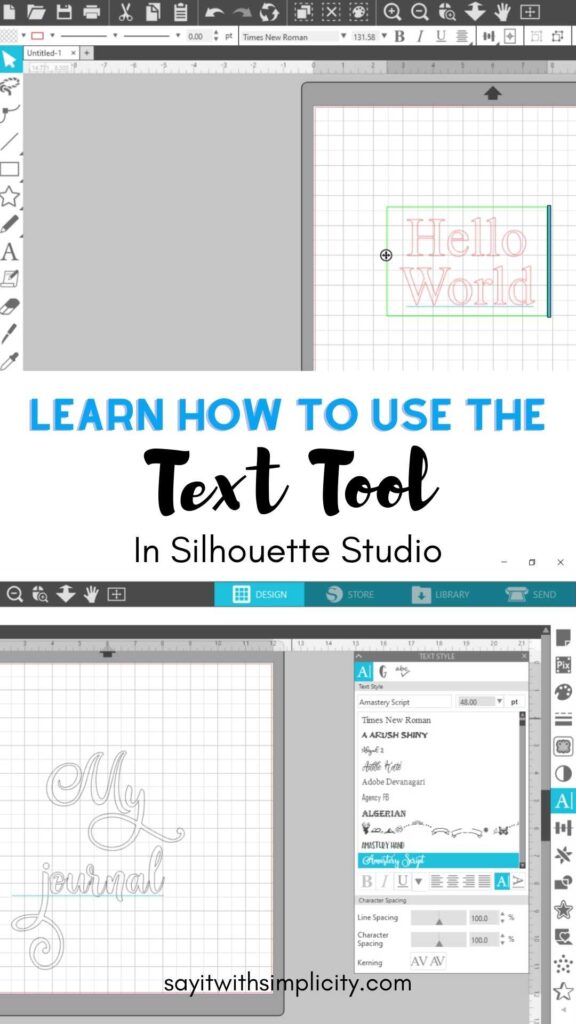
How to Use the Text Tool in Silhouette Studio
Let’s bring design ideas to life quickly and easily by learning how to use the text tool in Silhouette Studio
This post may contain affiliate links. If you make a purchase after clicking on a link I may earn a small commission at no additional cost to you.
Hello there! You all know that I love to create with my cutting machines and have several YouTube tutorials on how to use Silhouette Studio.
I’ve owned a Cameo 2, then 3 (and still do!) Plus, I have a Cameo 4 which I use almost daily now.
The Silhouette Studio is an excellent and powerful software for creating and I use it nearly every day. It will become like a second home once you learn your way around it. It won’t serve your morning coffee, but it will certainly do much when creating for your home and family.
One of the things that I love about Silhouette Studio is how user-friendly it is. Today we are going to learn about the text tool, so I hope if you’re new to this program you’ll follow along!
I’ll be using Silhouette Studio Business Edition, so if your text panel looks different than mine, don’t be alarmed. Most of the information will still apply.
Typing Text in Silhouette Studio
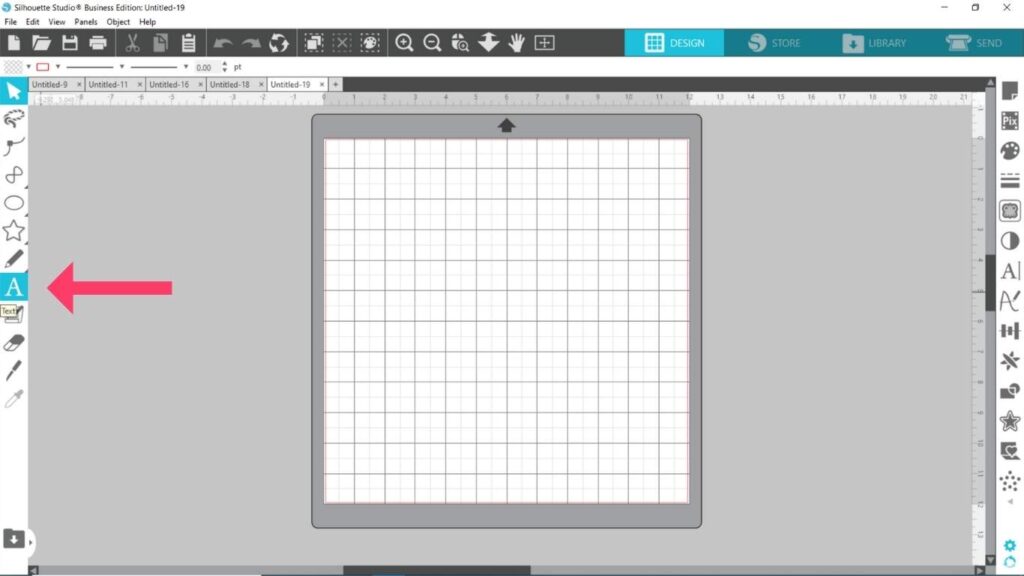
To begin typing text in Silhouette Studio, go to the left side of your screen and grab the text tool. It looks like the capital letter “A”. Just click on that tool, then click on your work area. You’ll get a cursor and can start typing your text.
Alternately, you can hit the “t” key on your keyboard and then click on your work area you’ll bring up a cursor and you can start typing your text.
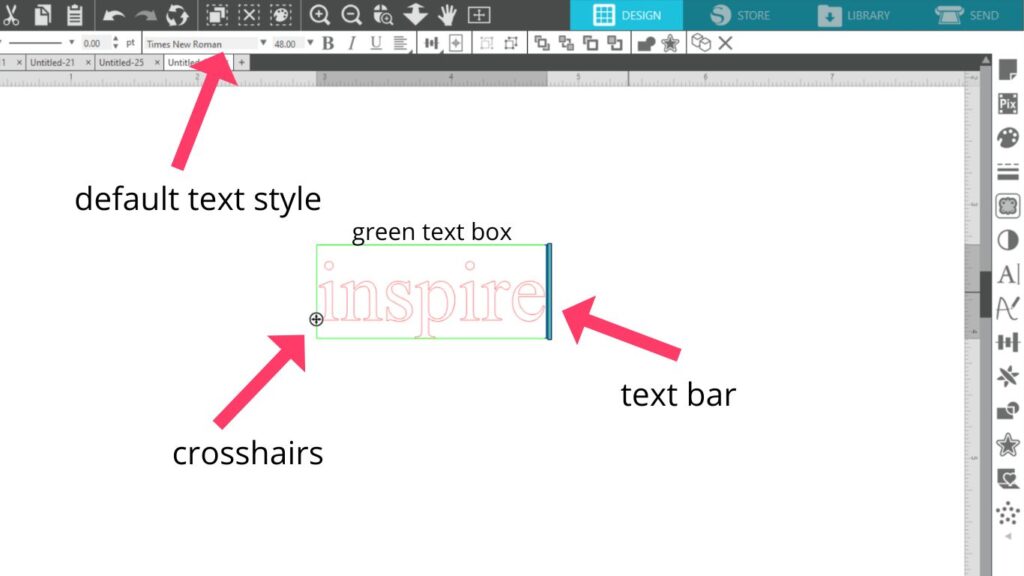
Your text will appear in the default font that you have set for Silhouette Studio.
Once you type your text, you’ll still have a blinking cursor or bar to the right of your text, as well as crosshairs to the left of your text.
The green box is your text box. You can move anywhere within that text box by using the arrow keys on your keyboard. Say for instance you missed a letter in your typing or made an error. While this text box is active, you can go in and make changes to that text.
If you click out of it, no worries, you can double click the text to bring up the text box again.
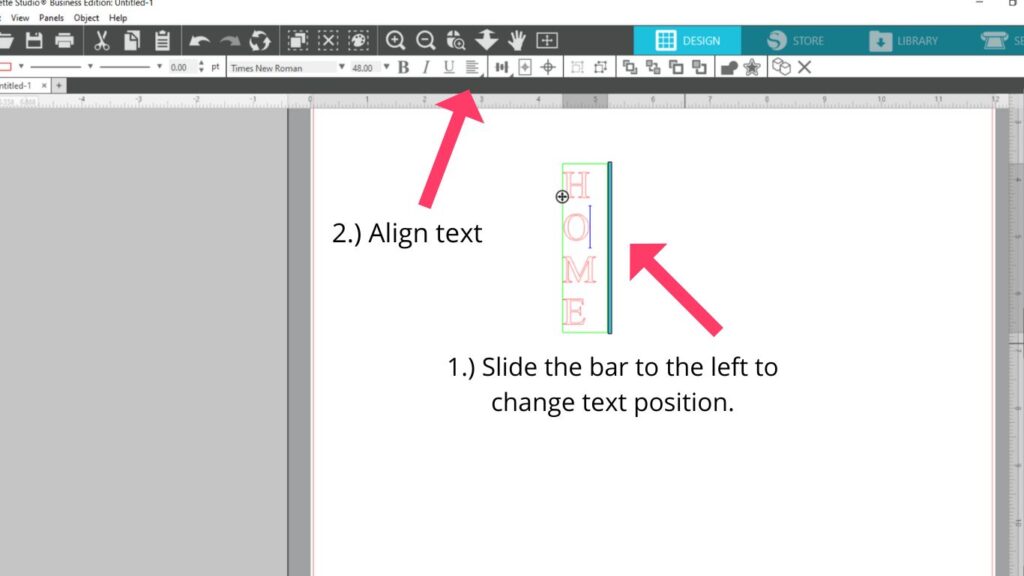
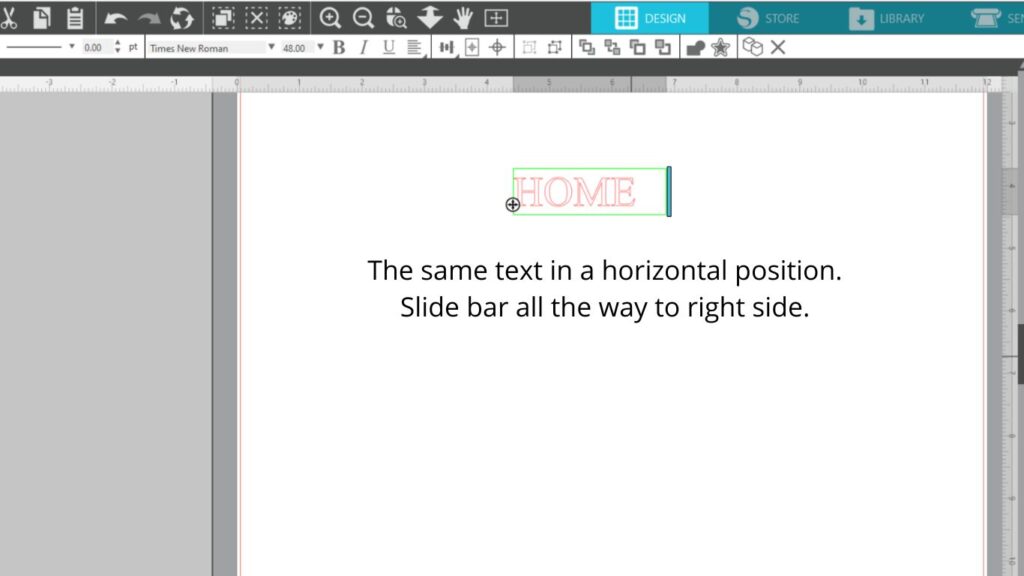
You can move the cursor to the right or left to adjust your text. Maybe you want a vertical line of text. Just bring the bar over to the left until all your letters are vertical.
If you have multiple words, you can also slide the bar to the left to split up the lines. Slide the bar to the right to bring the text back into one line.
Here is a piece of text, the first created by sliding the bar to the left and the second by sliding the bar to the right.
Exiting the Text Box
To exit the text box, click anywhere outside of it. To bring up the text box once again, double click on the text.
Changing Your Font in Silhouette Studio
You must first exit the text box in order to change your font. Just click outside of it.
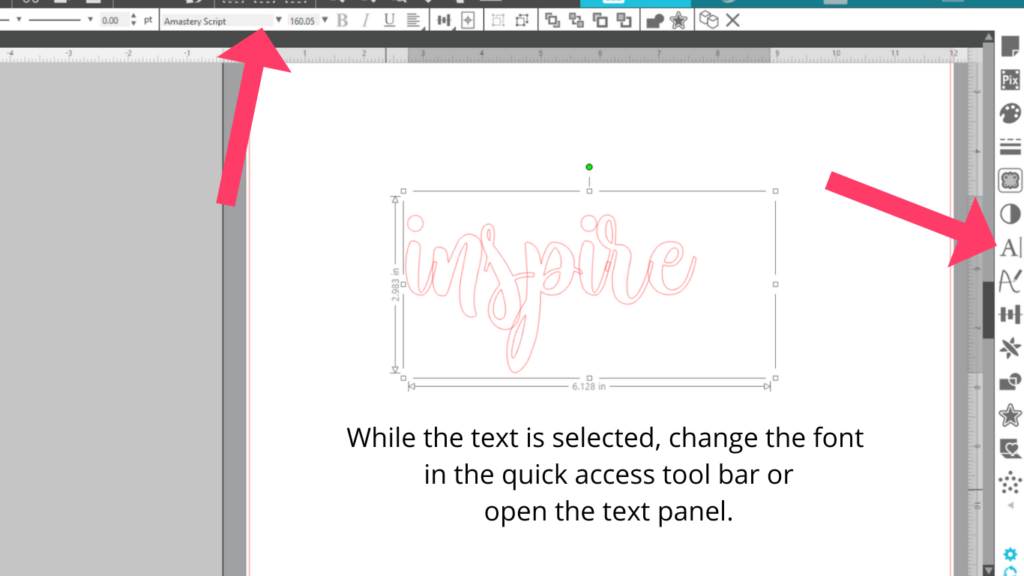
The font can be changed from the quick access toolbar above your mat or work area. Simply click on your text and scroll through your fonts to find one that best suits your project.
You can also change text, align text, add glyphs, and more from the text panel to the right side of your screen in Silhouette Studio. Don’t be afraid to type some text and experiment with some of the tools in the text style panel.
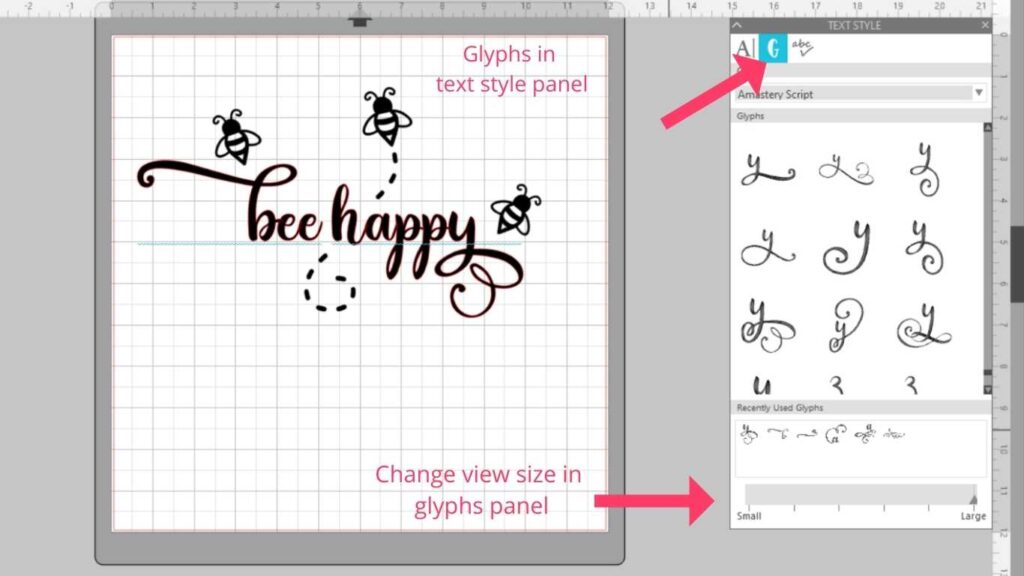
Adding Glyphs in Silhouette Studio
I have a YouTube Video on how to add glyphs in Silhouette Studio. You will need the designer edition and above for the method in the video. Otherwise you’ll need to use a character map or font manager.
You can access you glyphs or special characters inside the second tab of your text style panel. This is available in the Designer Edition and above. I use the Business Edition. If you want to upgrade for the reason of making your own SVG files, the Business Edition is a great choice.
There are a couple things to note about the glyphs panel. Variations are usually alphabetical, but occasionally they are not. You may need to scroll to find what you are searching for. They are usually grouped by those that are the beginning letter and those that are the ending letter.
At the bottom of your glyph panel, there is a slider for viewing your glyphs larger or smaller. This is very helpful for those who might need that extra visual assistance, like me.
If you need to access your glyphs with a font manager, you might consider Creative Fabrica’s Font Cloud.
Once you have your text all set, you may want to weld. This will join all those overlapping areas so that they don’t cut when sending them to your machine.
There are a number of ways to weld:
- Right click and choose weld
- Use the Weld option in the Quick Access Toolbar
- Use the Weld option in the Modify Panel
- Go to Object>Modify>Weld
Once your script font is welded, you no longer have the option of changing your font style.
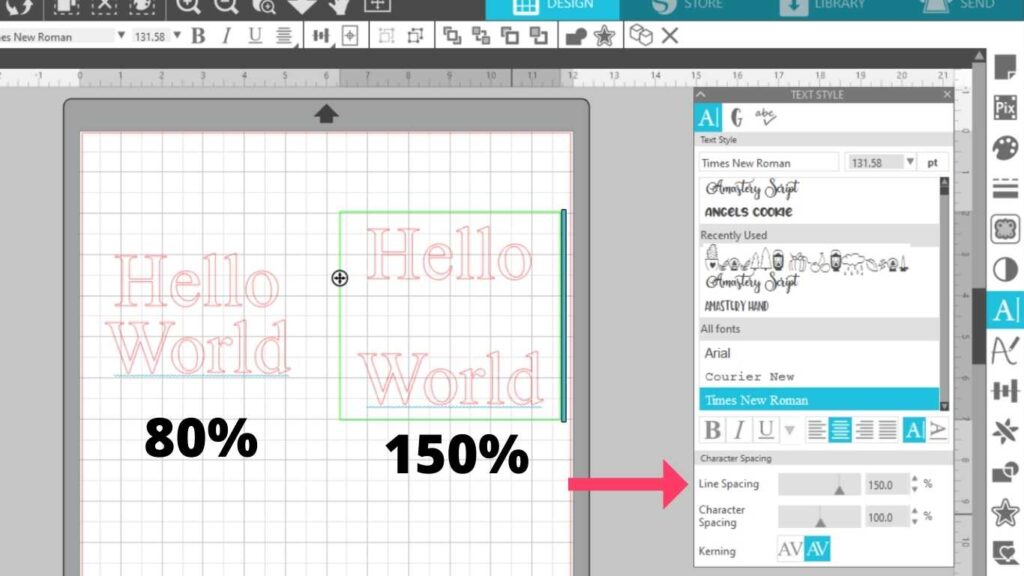
Line Spacing and Character Spacing in Silhouette Studio
In the text panel of Silhouette Studio, you can also control text spacing and line spacing. Use the slider or highlight to type in a number to change the spacing. Below is an example of line spacing in the text panel.
Welding Text in Silhouette Studio
One of the basic things to know when creating designs in Silhouette Studio is how to weld images and text. Weld is fusing the overlapping pieces into one smooth path.
You can see a couple photos above that the cut lines will overlap when using script fonts.
Let’s weld the text and see what it looks like:
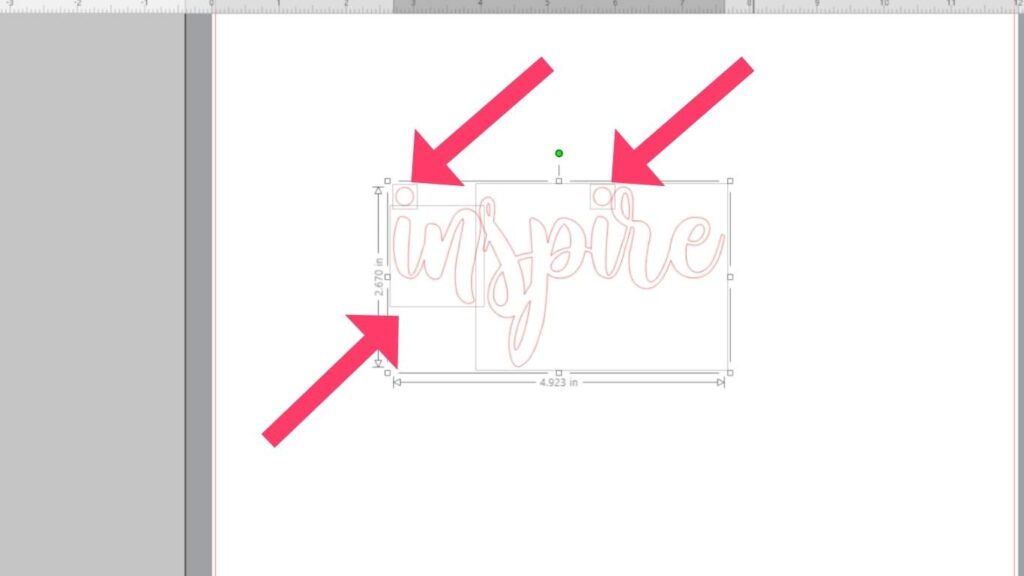
While this text is welded, you can see that there is still a separate box for the unconnected “in” and of course the dots of the small “i” in the word “inspire”. This will be different with other fonts. But in this instance I would simply right-click and select “Make Compound Path”. This will bring all those bits into one layer.
What if I’m Not Using a Script Font?
There are some important considerations even when using any font. But this is a mistake that may be more likely to happen when using your serif or sans serif fonts.
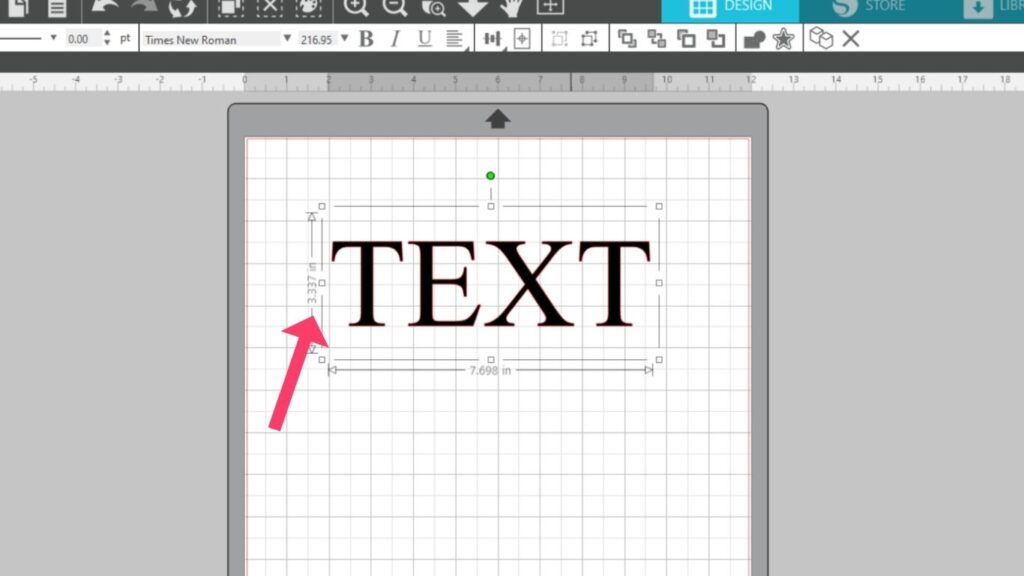
When a font is typed, the boundary box around the font is larger than the space the font actually occupies.
So even though the text in the photo below shows that it is 3.337 inches, this is not the actual height of the letters.
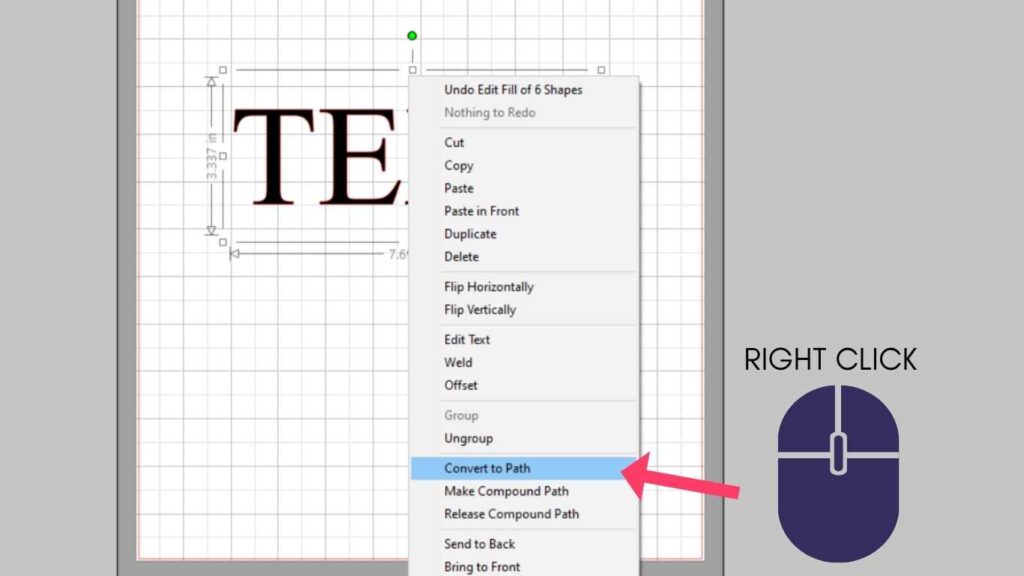
Right-click on your text and convert your text to path.
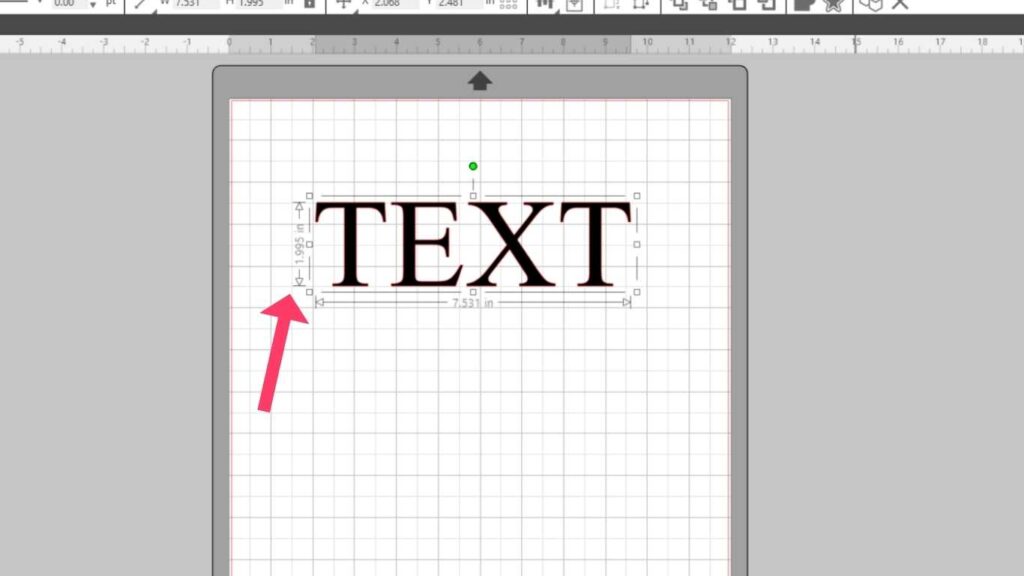
Now you can see the height of your text. In this example, it is just under 2 inches tall. This is important to know, especially if you need to create text for a certain size sign or decal.
Text and Compound Paths
When I’m making an SVG, you choose to right-click and make your text into a compound path.
There may be an exception. If you change the color of your design, every letter in the design will be that color.
It’s important to note then, if you want every letter in a design to be a different color, you will not want to make the compound path.
It’s not especially a problem if you are working on say a sign where you will be painting using a stencil. But if you wanted different patterns or colors for each letter in a design, then you would not use the compound path option.
Making a compound path makes the entire word one complete path. This is different than a group or welding. If you for instance uploaded a text SVG that you created to Cricut Design Space, a group would still separate into letters when sending to be cut. Not so with a compound path. It would appear as a single word or group of words.
Create Text Designs Quickly and Easily
Creating designs with text is super easy once you learn the text too basics. One of the best ways to learn the Silhouette Studio tools is to practice. Type text, change the font, add glyphs, change spacing and alignment, add special characters and even your own design elements. Don’t worry about saving every design you make. Get in and use the tools and learn.
If you have questions, feel free to join my Facebook Group! I’d be happy to answer them for you there.