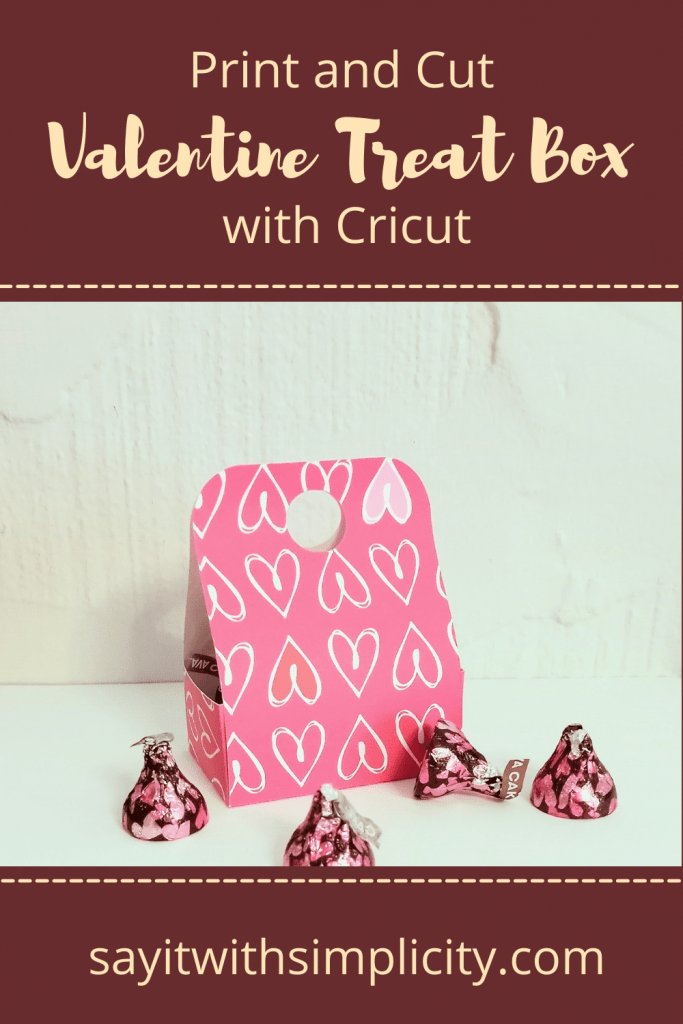
Freebie Valentine Treat Box SVG
Hey everyone! Today I’m here to share this Freebie Valentine Treat Box SVG that I created just in time for Valentine’s Day! I’ll be sharing how I used the “Print and Cut” feature in Cricut Design Space for this project. So if you’re not familiar with Print and Cut, be sure to read on…
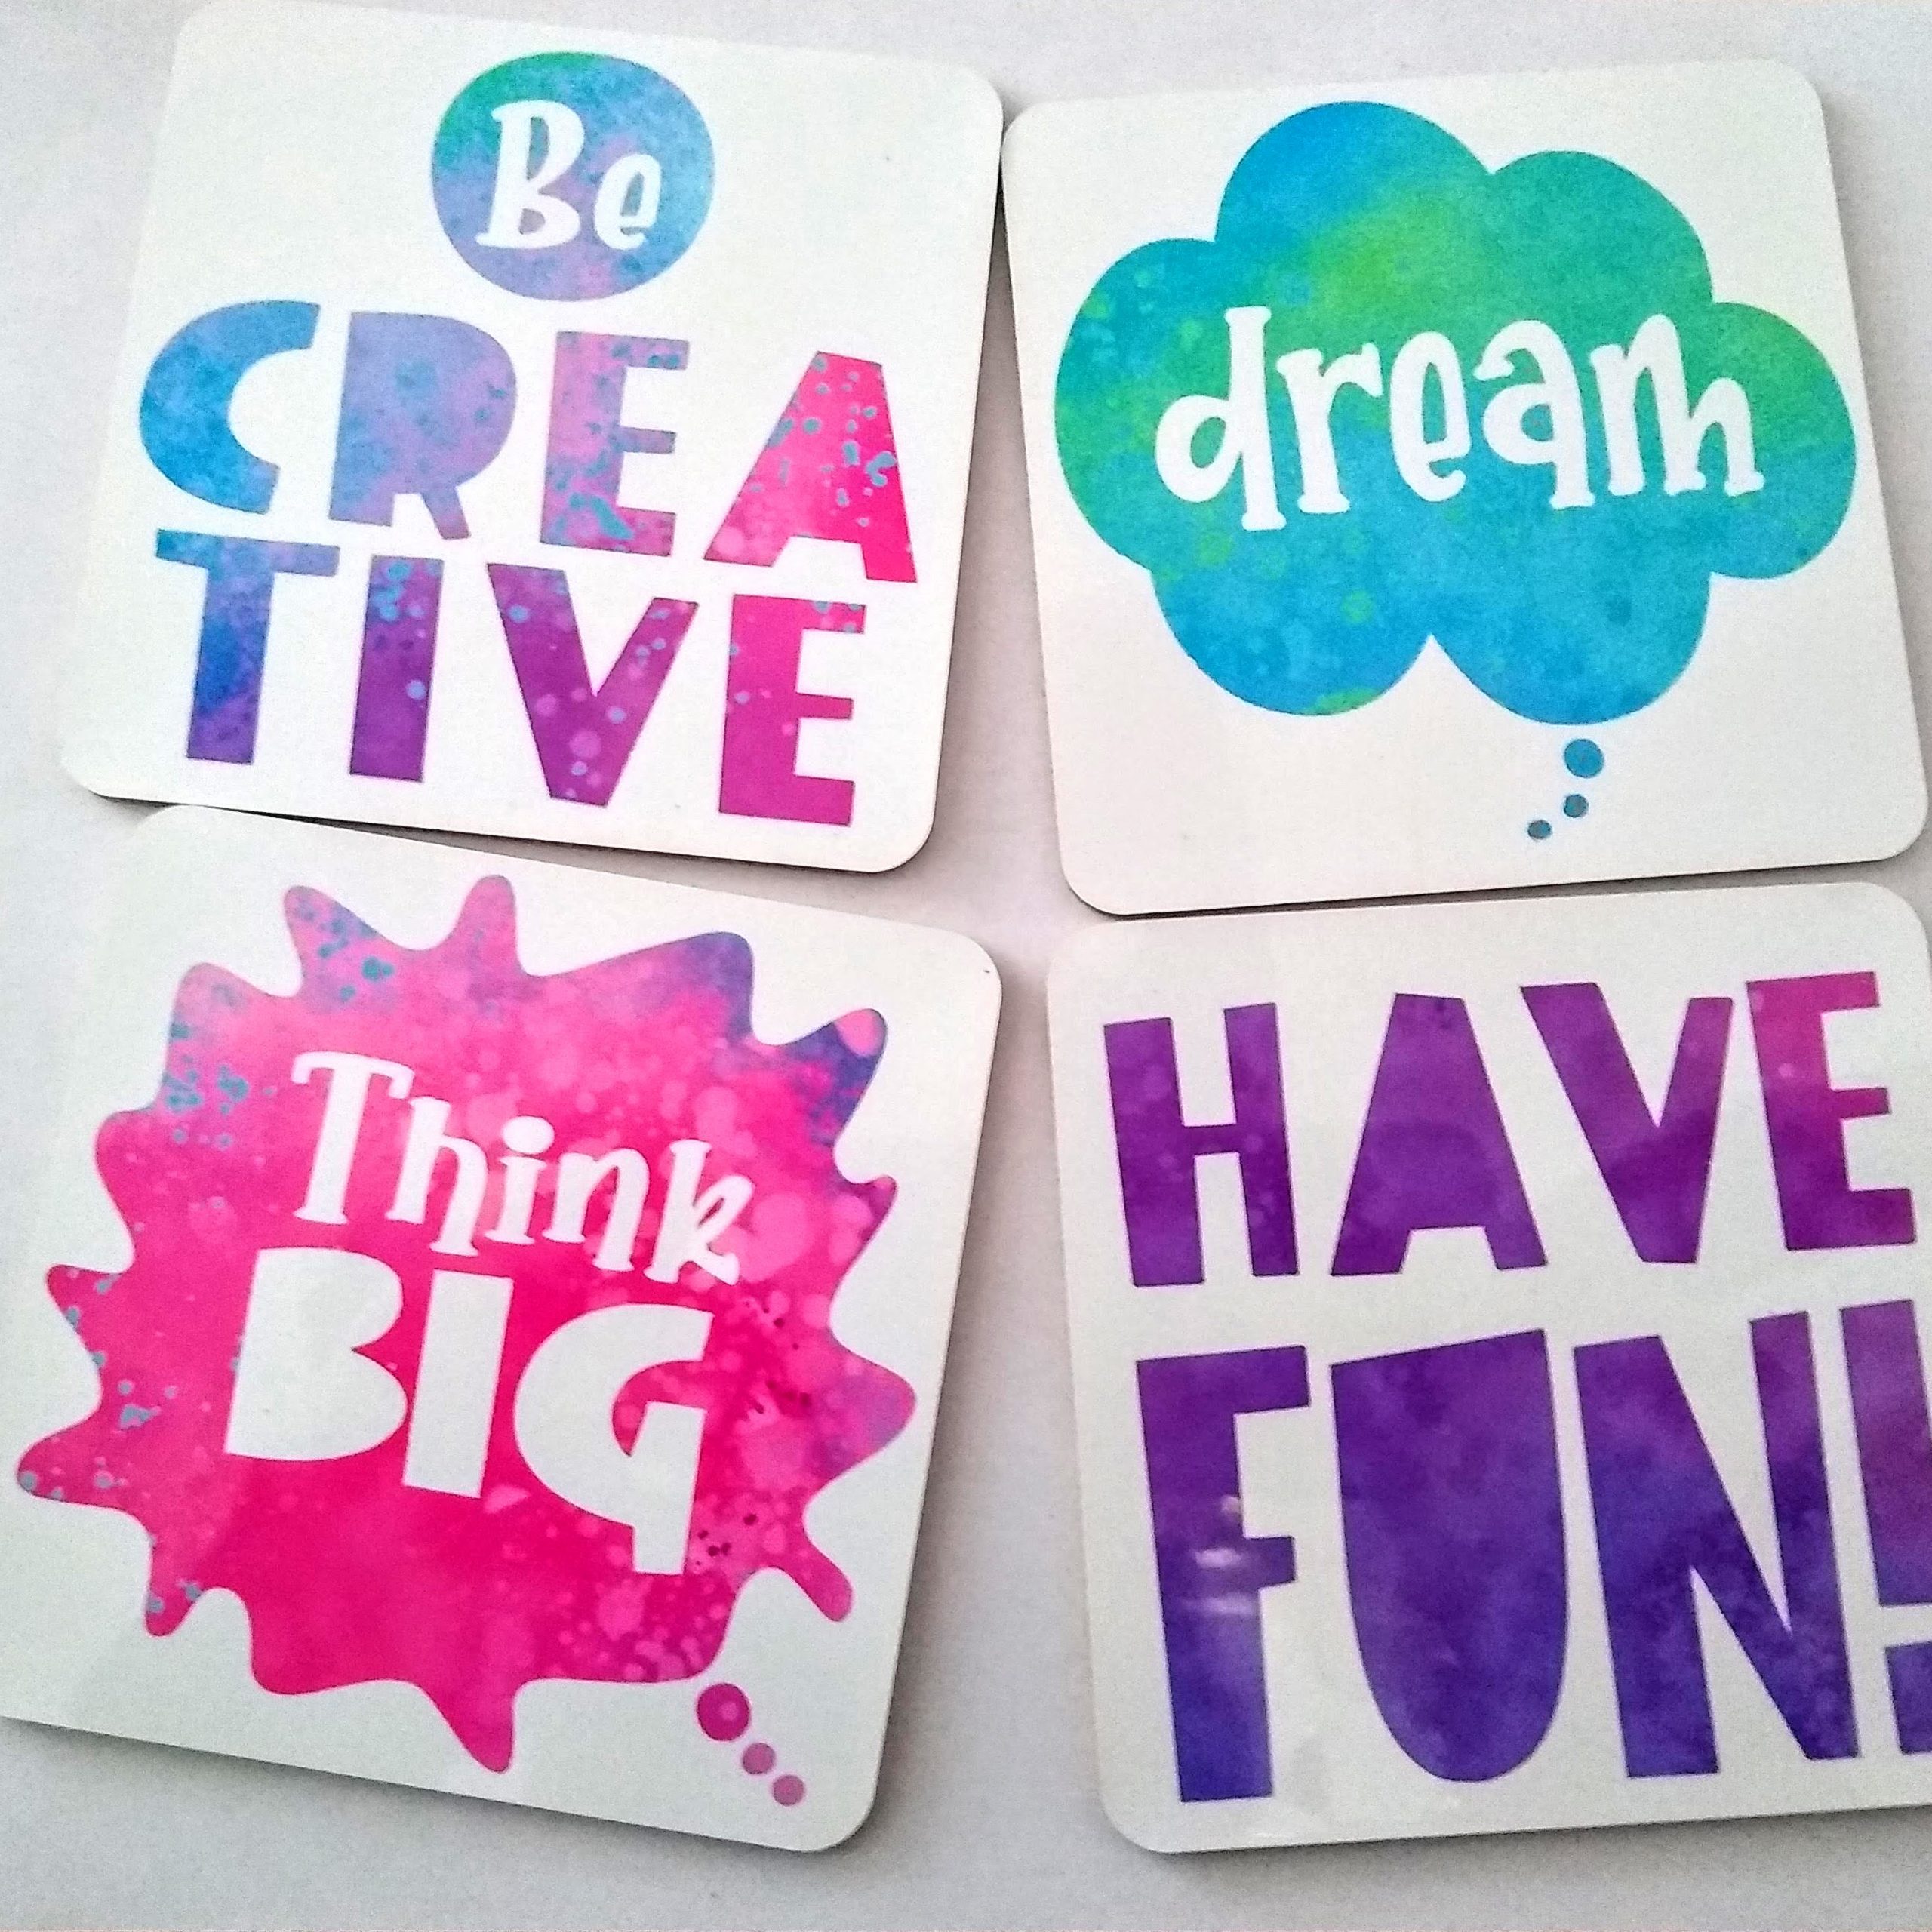
This box could actually be used any time of year with other patterned papers, colored cardstock, or print-and-cut patterns. The neat thing about this design is, that you can craft with things you already have at home.
You’ll be able to download this from my FREE SVG Library under the paper crafts section.
This post may contain affiliate links. This means that if you make a purchase after clicking on one of these links I may make a small commission at no additional cost to you.
About This Valentine Treat Box SVG
The unique thing about this papercraft cut file is that I’ve created little tabs that hook together so you can assemble it without glue. Now you may add glue for a little extra stability, but it’s totally up to you.
It’s super simple to put together. All you do is fold on the score lines, tuck the flaps to the center of the box, hook the little tabs, and voila! You’re done.
There is a little circle cutout at the top of the box. You could tie a ribbon through this to close your box. The double-sided adhesive tape would also work well for closure. I suggest something strong like Scor-Tape. Even a mini clothespin or staple would work well for closing the top of this little box.
Works Great With Plain Cardstock or Patterned Paper
Your treat box SVG is about 5.5″ wide by 10″ high in the design area of your software. This is a great size for cutting from an 8.5″x11″ piece of cardstock.
Be sure to change the inside lines to score lines and then select the entire design and “Attach” the score lines to your box before cutting.
I cut my project with my Cricut Maker and decided to use the “Print and Cut” feature for my example box. Let’s see how you would use print-and-cut for this project.
The Print and Cut dimensions when assembled are about 2.75 inches wide by 3.75 inches tall.
Using Print and Cut for the Valentine Treat Box
For my Valentine Treat Box, I used the print and cut function and a pattern from inside Cricut Design Space.
First, you’ll want to resize the image to 9.25″ high as this is the maximum size for print and cut. If you keep the dimensions locked, the rest of the box will resize accordingly.
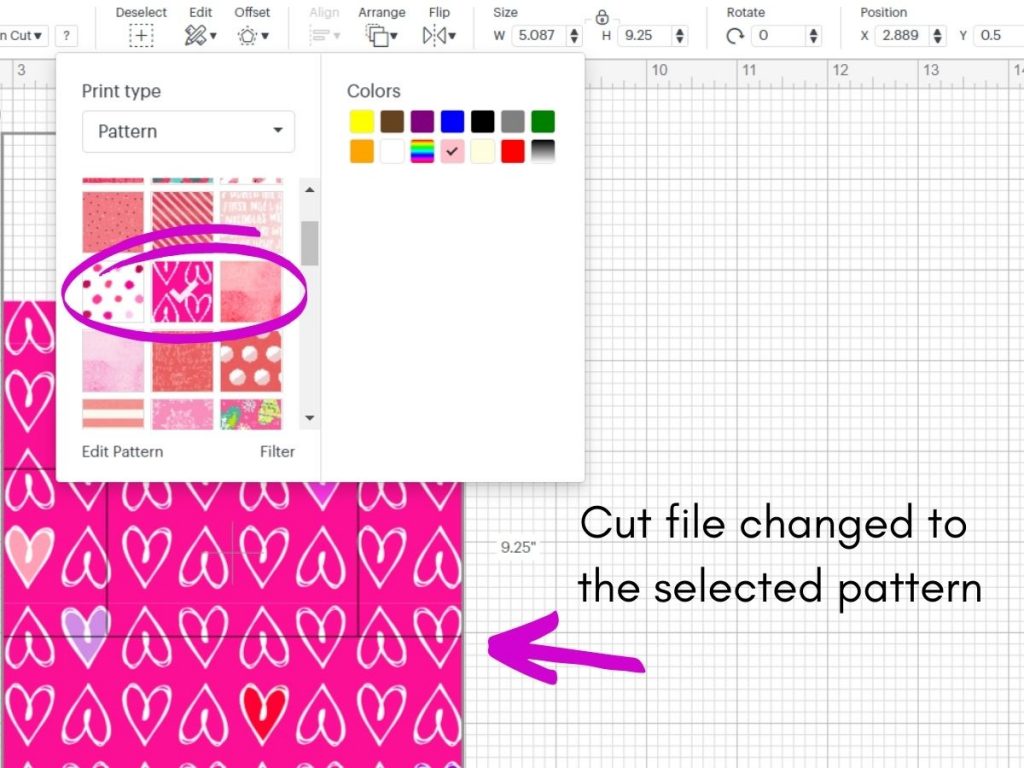
Now go to the operation menu and choose Print and Cut. Then where you would normally choose a color, you can select a pattern. I set the filter for pink patterns and chose the little hearts that you see.
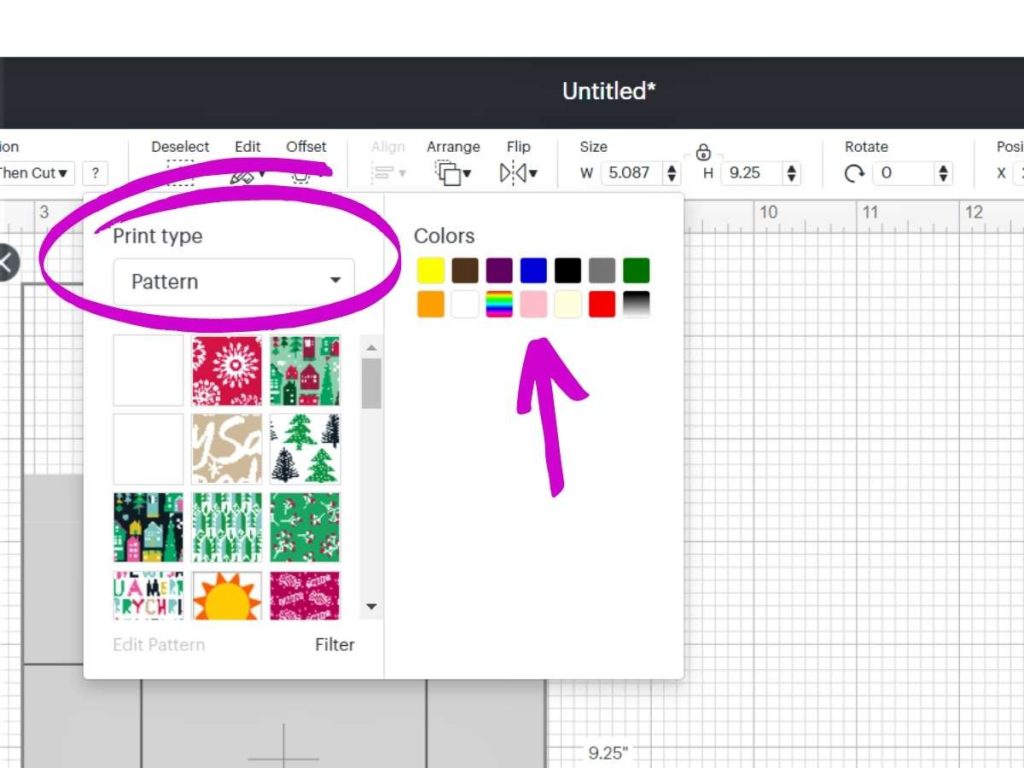
In the next photo, you can see that I’ve selected my pattern. The cut file has changed to the pattern fill.
Change Lines to Score Lines in Design Space
In the layers panel, you want to choose all the inside lines of the design and change them to “Score”. When your machine goes to cut, you can have your scoring wheel, or scoring stylus ready to score these lines.
To select them all, click on them one by one while holding down your shift key. I use design space on my computer, so if you are using mobile apps, your directions may be different.
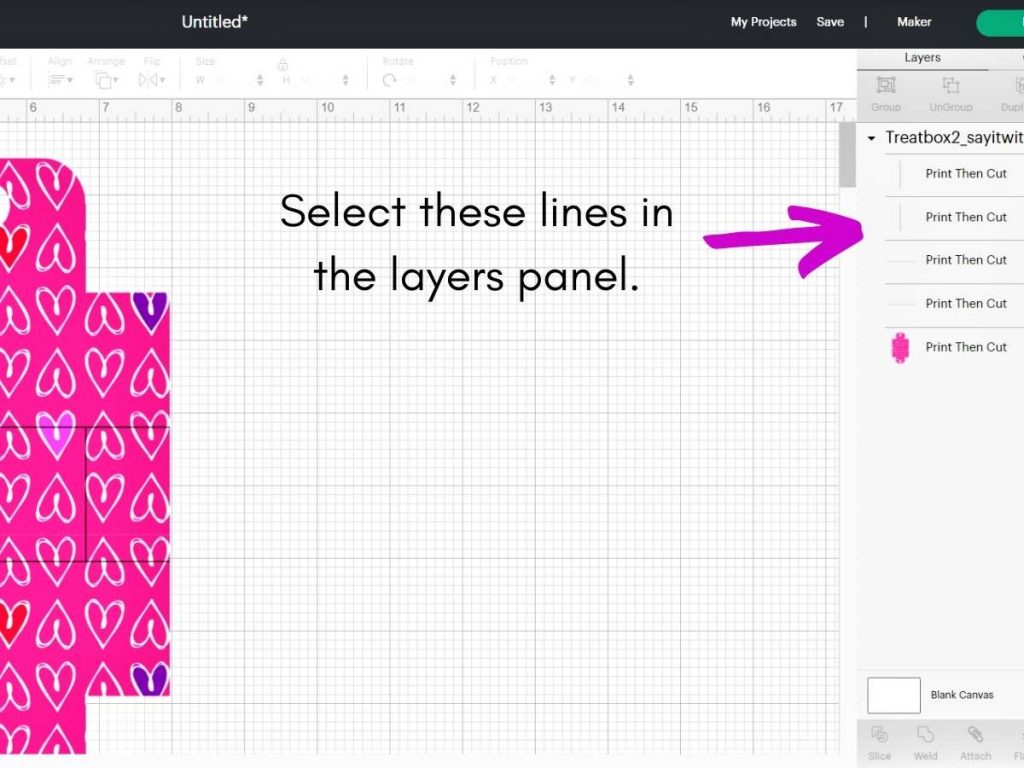
You can see that the lines are grayed out in the layers panel. Now you can hop over to the Operations dropdown and click on “Score”.
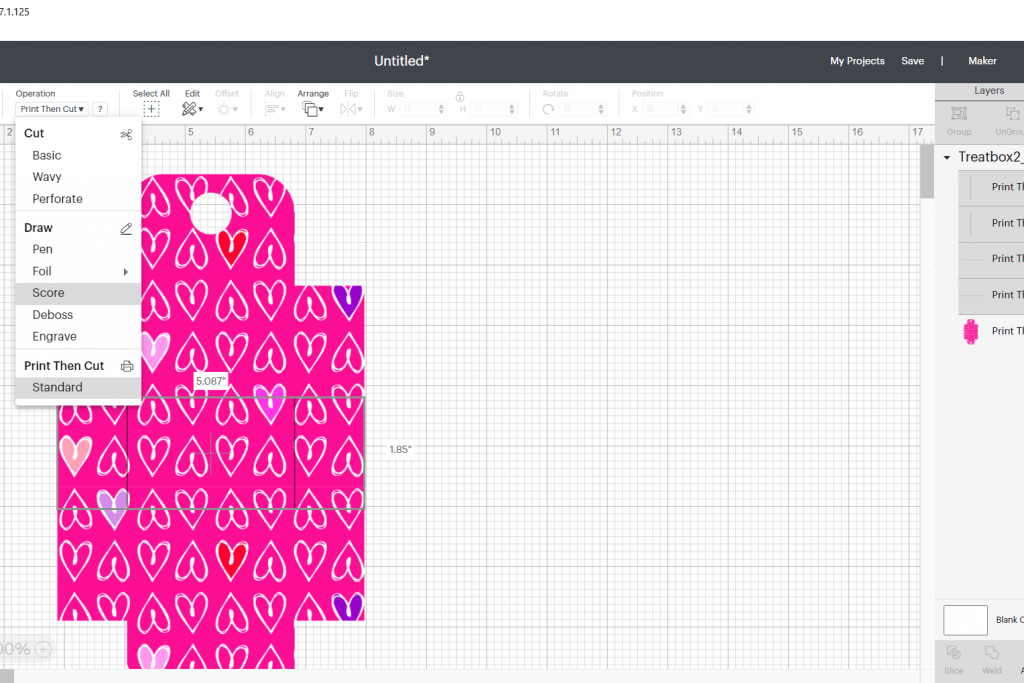
Now you can see that the lines inside the box template have been changed to dashed lines, and in the layers panel, “Score” lines are indicated.
Attach Your Score Lines to Your Treat Box
One of the unique things about Cricut Design Space compared to other programs is that even if a design is grouped, the score lines do not remain with the design when you go to “Make It”.
Using the “Attach” feature is sort of like paper clipping the score lines to the project.
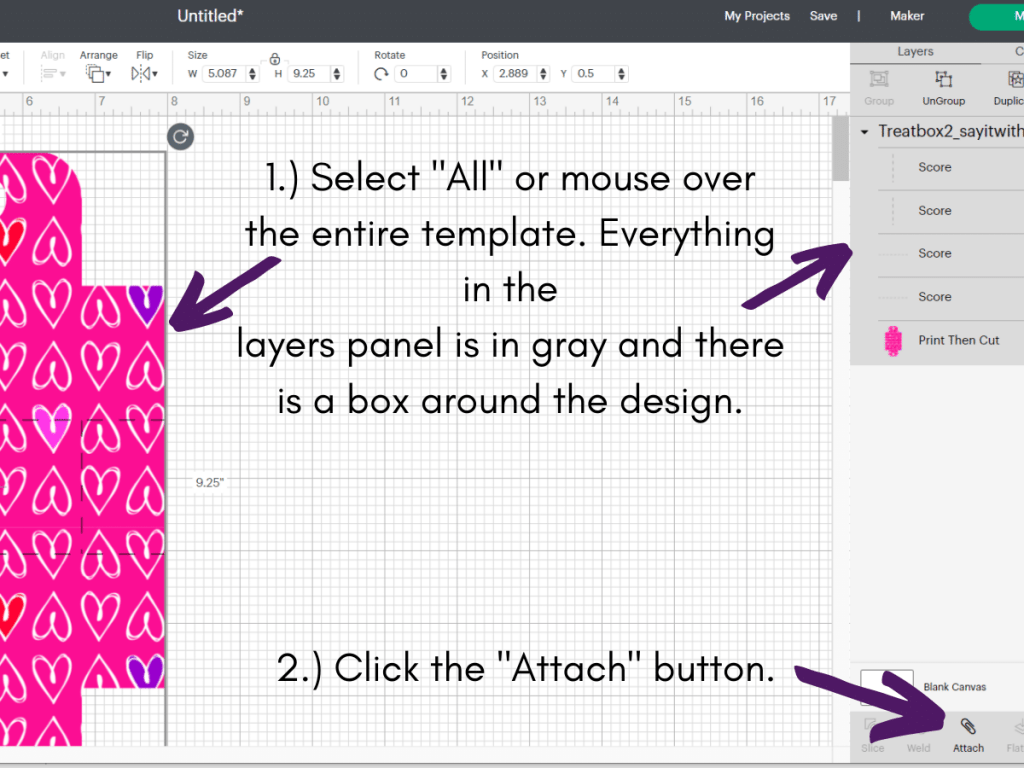
First mouse over or use the “Select All” button to select the entire design.
Next, go to the bottom right and click “Attach”. This will keep your score lines with your project.
Now you’re ready to “Make It”.
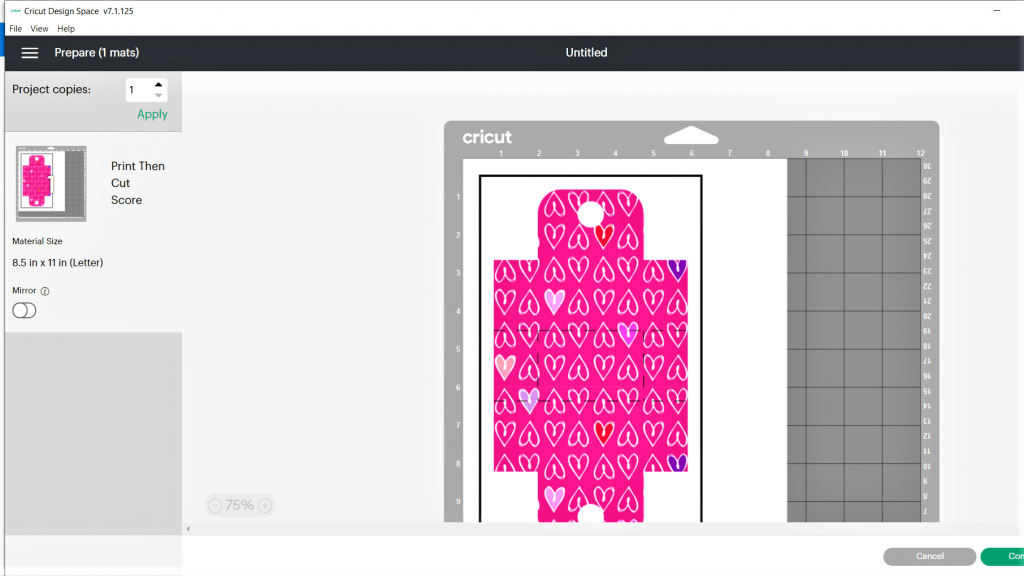
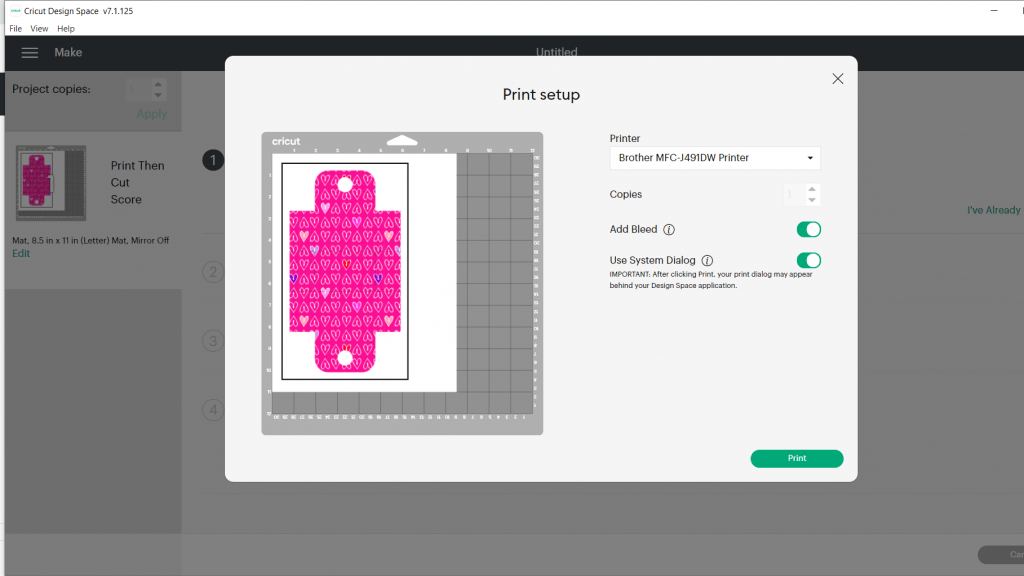
Print and Cut In Send Panel
When you do Print and Cut, there will be a black box around your design. This is the registration mark that your machine reads to determine the cut area.
Next, you’ll click on “Send to Printer”. The next part is pretty important if you want to achieve a nice print for your Valentine Treat Box.
Be sure to toggle the buttons to turn on the bleed, and to go to the printer dialogue. From there you can check “Best” print quality or adjust your settings to your liking.
I used Neenah 110# Cardstock for my print and cut. This is the same cardstock that I use for my hand-crafted cards.
Note: If you added text to your image, you would want to flatten first, then attach your score lines, then send to print and cut, but we’ll discuss this in a future post.
Once you’ve printed your image, then you’re ready to put your image on the mat and cut it with your Cricut.
Freebie Valentine Treat Box SVG
Be sure to head over to the Free SVG Library in the Paper Craft section to get your SVG file. There is a PDF in the file that more clearly shows the score lines and the assembly tabs.
I love how this little box turned out and it’s large enough for a number of wrapped candies or even a small non-food gift. These would make great make-ahead party favors because they could be stored flat to assemble later.
If you make a treat box, I’d love to hear your comments! You could also hop on over and join a small but growing number of crafters on the Say It With Simplicity Facebook Group and share your project!