3D Craft-Patriotic Wood Crate with Silhouette
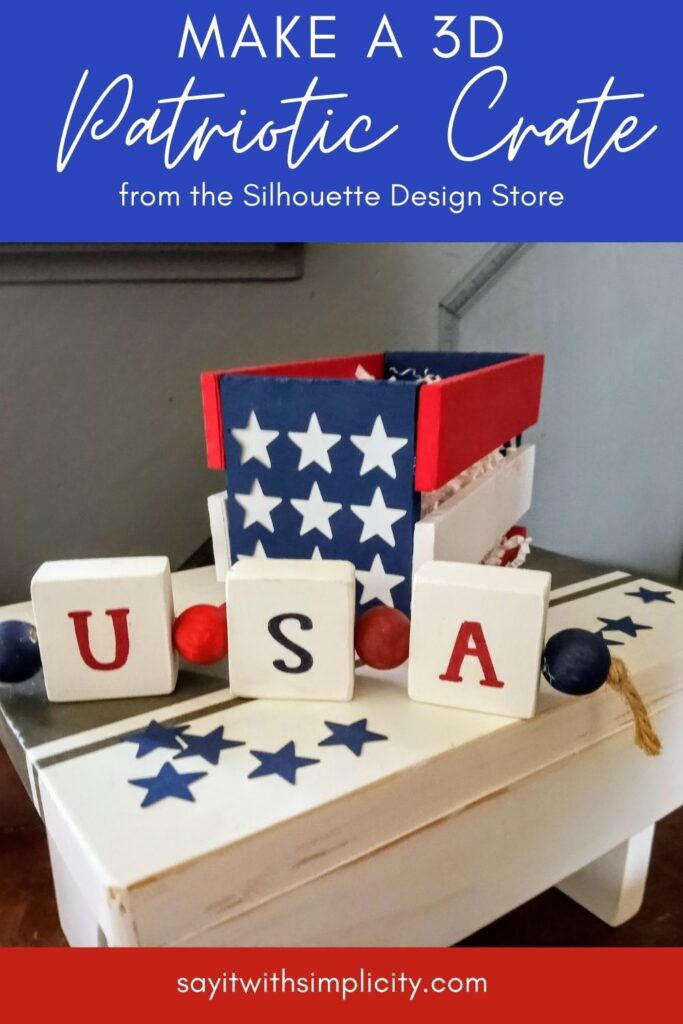
Hey Everyone! Get ready for the 4th of July with a little Red, White, and Blue. Today I’m sharing this patriotic wood crate that I made using a file from the Silhouette Store. This project would be great for adding to a tiered tray, using as part of your party table decor, or filling with goodies and giving as a gift.
This post may contain affiliate links. As an Amazon Associate, I earn from qualifying purchases.
The Silhouette Design Store has many Lori Whitlock designs. Her 3D Patriotic Crate design can be found HERE. I enjoy the well-made designs by Lori and the video instruction that goes along with them.
When you receive your e-mail from the Silhouette Design Store saying that you purchased this project, go to the project’s name in the e-mail and click on it. This should take you back to the Silhouette Store where you will get a pop-up window where you can click on the link to the instructions. The videos make it so much easier to assemble the 3D projects.
Making the 3D Patriotic Wood Crate
For my crate, I chose Bazzill Cardstock from Joann. The 12″x12″ open-stock sheets were on sale at 10 for $2.00, so I picked up enough for a few projects that I wanted to make. The colors were Cherry Splash and Moody Blue. For the white, I used White 110# Cardstock that I already had at home.
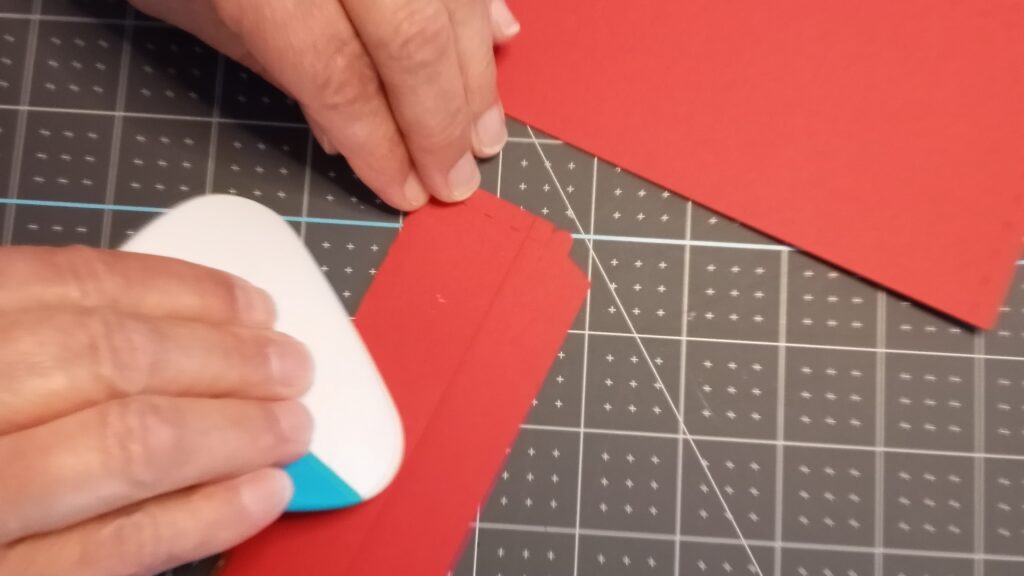
A couple of products that were really helpful in making this crate were the Art Glitter Glue and the scraper tool from my Nicappa Weeding Kit. A scraper really helps to sharpen the folds which make for a nicer product. You can use whatever brand you have.
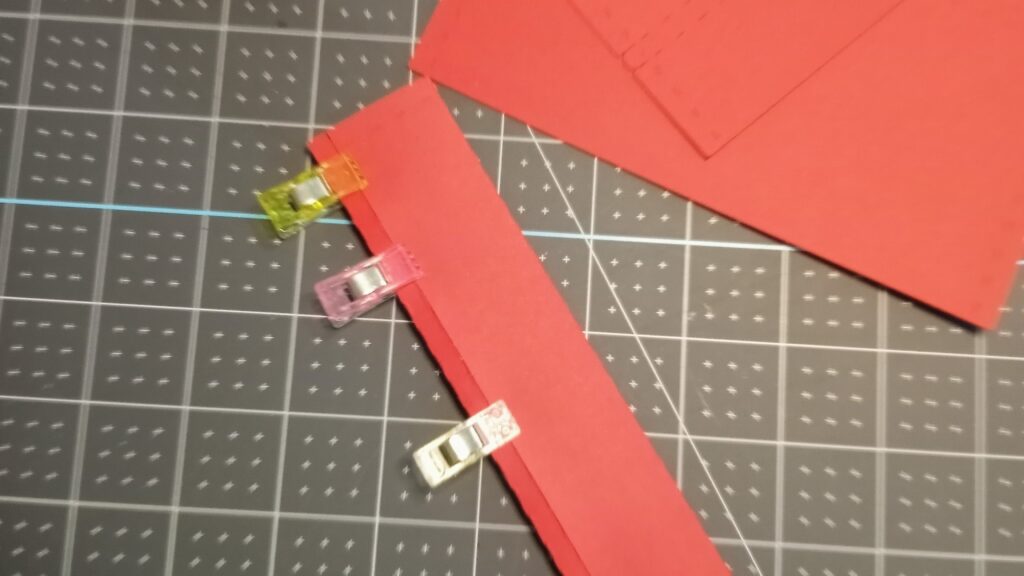
I like the way that Lori Whitlock gave some tips about using these clips to hold the project while the glue sets. This really worked nicely and was a huge time saver for me.
Once the pieces were made, the rest of the assembly was pretty easy.
First, I glued the blue star ends to the base. You’ll need to hold these in place for a minute while the glue sets.
Then I added the top side pieces. You can set a small book on this to weigh the side piece down for a few minutes while the glue sets. One thing I like about Art Glitter Glue is that it works quickly.
Next, I added the white bottom side pieces.
I did have a little glue problem on my blue end pieces. I think I’ve figured out how to be a little neater next time. For one thing, I’ll be sure to have some damp paper towels or wipes next to me for any glue mishaps. I got glue from my fingers on the face of the blue panel where it would show. A quick wipe of my fingers with a baby wipe would have maybe made a big difference.
An adhesive eraser is also really handy for removing any adhesive residue. I was able to remove some of it and it looked much better.
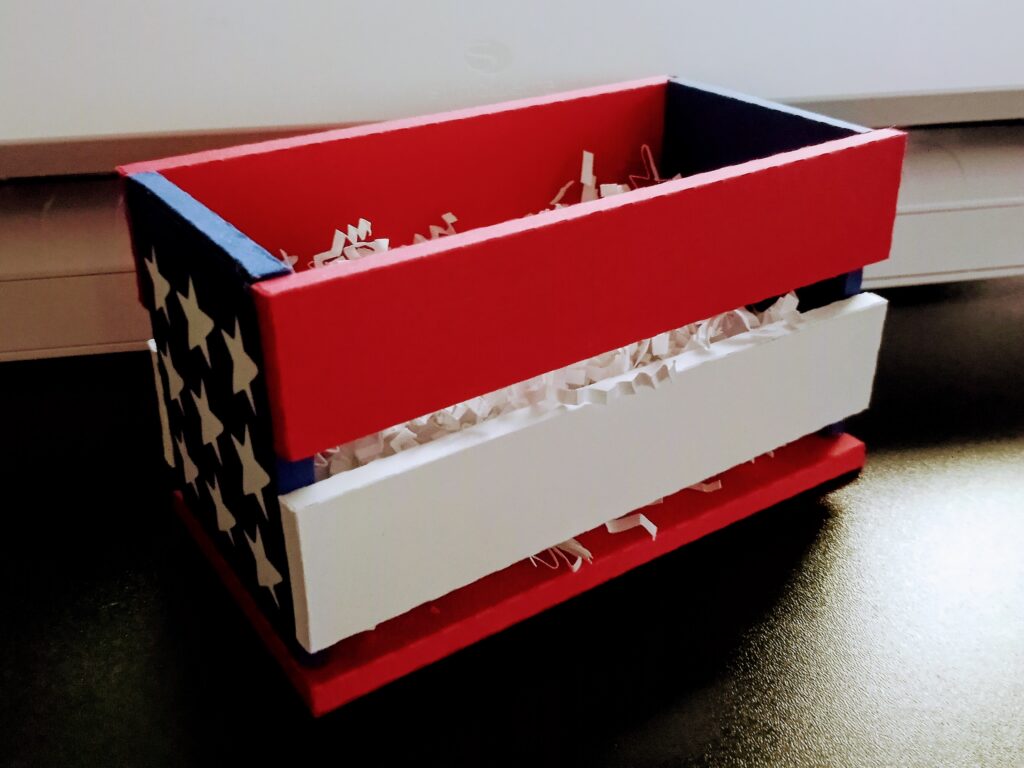
The Finished Patriotic Crate!
Here I’ve added some paper shreds and plan to add some goodies for a family 4th of July celebration.
Do you like to purchase designs from the Silhouette Store? Who are your favorite artists? Have you made 3D projects?
I’d love to see some of your projects! If you do make this or any project from the Silhouette store, be sure to share it on my Facebook Group. If you need help with your cutting machine, I would be glad to share my insights and resources with you.